A Guide to Screen Recording with Voice for Pro-Level Content
Learn how to master screen recording with voice. This guide covers the right tools, pro audio tips, and editing workflows to create polished video content.
Screen recording with your voice is what turns a silent movie into a guided tour. It adds a human touch, a layer of personality and context that plain text or a muted video just can's deliver. It's the secret sauce that transforms showing someone what you're doing into truly teaching them how to do it.
Why Clear Voice Makes All the Difference in Screen Recordings
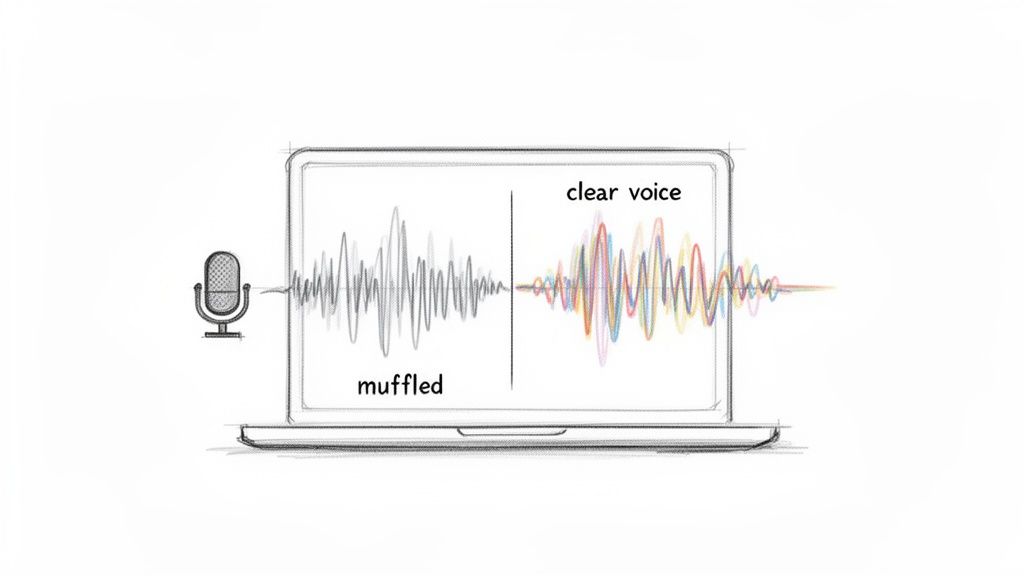
Think about the last time you watched a tutorial with tinny, muffled, or distracting audio. You probably didn't stick around for long, right? A screen recording without a clear voiceover is just a series of clicks and cursor movements. It lacks the context and the human connection that keeps people watching.
High-quality narration isn't just a "nice-to-have"—it builds trust and makes complicated topics feel simple.
This is non-negotiable in a professional setting. If you're an educator building an online course, a clear voice is essential for students to grasp complex ideas. For a marketer creating a product demo, crisp audio confidently guides potential customers through your best features. The quality of your sound directly reflects the quality of your message and your brand.
Elevating Content from Amateur to Authoritative
Getting your audio right isn't just a technical detail; it’s what separates amateur content from a polished, professional guide that people will respect and share. The demand for this kind of content is exploding. The global market for screen recording software was valued at a massive USD 1.2 billion in 2023 and is expected to climb to USD 2.1 billion by 2031. This just shows how much video communication has become central to remote work and online learning.
Your voice is the bridge between your on-screen actions and your audience’s understanding. A shaky, unclear bridge will cause viewers to turn back. A strong, clear one invites them to cross over and engage with your message.
Learning how to add a compelling voice over to video is a core skill for any modern creator. Whether you’re walking someone through software, troubleshooting an issue, or presenting data, your voice is what brings the visuals to life, making your recording truly effective.
Choosing the Right Screen Recording Tools for Your Project
Finding the right software for screen recording with voice isn’t about chasing the “best” tool on the market. It’s about picking the right tool for the job at hand. You’d be surprised how often a simple, built-in option is all you really need, saving you from a feature-heavy program you’ll barely scratch the surface of.
The key is to think about your project's goal first. A quick, informal tutorial for a coworker has entirely different requirements than a polished, multi-part online course you plan to sell.
Start with What You Already Have
Before you download anything, check out the tools that came with your computer. They’re surprisingly capable and definitely the fastest way to get started.
On Windows: The Xbox Game Bar is your secret weapon. Don't let the name fool you; it's a solid screen recorder for just about any application, not just games. Just hit Win + G to pop up the overlay, and you can start recording your screen and mic audio in a couple of clicks.
On macOS: You’ve got a couple of great options baked right in. The Screenshot toolbar (just press Cmd + Shift + 5) and QuickTime Player both handle screen recording beautifully. With QuickTime, you can easily drag a box around a specific part of your screen or record the whole thing, and selecting your microphone is just a simple dropdown menu. It's clean, efficient, and perfectly integrated.
These native tools are perfect for quick jobs like:
- Recording a bug report to show the IT team exactly what’s happening.
- Creating a simple how-to guide for a family member struggling with a new app.
- Grabbing a short clip from a website to share with your team on Slack.
Honestly, for a surprising number of projects, the tool that's already on your machine is more than enough. Getting comfortable with your OS's built-in recorder saves time, money, and unnecessary software clutter.
When to Bring in the Big Guns: Third-Party Tools
Built-in tools are fantastic for speed and simplicity, but sometimes you need more control, and that’s where dedicated software shines. These tools are built from the ground up for creators.
Screen Recording Tool Comparison
Deciding between built-in simplicity and the power of a dedicated app can be tricky. Here’s a quick breakdown to help you choose the right path for your next project.
| Tool | Platform | Best For | Key Feature |
|---|---|---|---|
| Xbox Game Bar | Windows | Quick captures, simple tutorials | Instantly accessible with Win + G |
| QuickTime/Screenshot | macOS | Clean, no-fuss recordings | Deep OS integration, partial screen capture |
| OBS Studio | Win/Mac/Linux | Professional tutorials, streaming | Total control over scenes and sources (free) |
| Loom | Win/Mac/Web | Team collaboration, quick feedback | Instant cloud sharing with a link |
| Apowersoft | Web-based | One-off recordings, locked-down PCs | No installation required, runs in a browser |
This table should give you a good starting point. If you find yourself hitting the limits of your built-in tools, that’s the perfect time to explore one of the more specialized options.
Our Top Third-Party Picks
OBS Studio is the undisputed king of free, powerful recording software. It lets you build complex scenes with multiple sources—your screen, your webcam, images, text overlays, you name it. Yes, it has a bit of a learning curve, but if you're serious about creating professional-grade tutorials or gaming content, the power you get for free is unmatched.
For anyone working in a corporate or team setting, Loom has become a go-to. Its killer feature is speed. The moment you finish recording, a shareable link is copied to your clipboard. It completely changes asynchronous communication, letting you send quick video messages, product demos, and feedback without ever having to schedule another meeting.
Finally, web-based recorders like Apowersoft offer incredible convenience. If you’re on a computer where you can't install software or just need to capture something in a pinch, these are a lifesaver. They give you a quick, accessible way to start a screen recording with voice from pretty much any machine with an internet connection.
Achieving Crystal-Clear Audio for Your Voiceovers
Ever watched a great video only to be completely put off by terrible audio? It happens all the time. A clear, professional-sounding voiceover isn't just a nice-to-have; it's essential if you want people to actually stick around and listen to what you have to say.
The good news is you don't need a high-end recording studio to get great sound. A few smart choices and simple techniques can make a world of difference.
Your journey to better audio begins with the microphone. While your laptop's built-in mic might seem convenient, it’s a magnet for every distracting sound imaginable—keyboard clicks, whirring fans, and that echoey room tone. Honestly, upgrading your mic is the single biggest improvement you can make.
Select the Right Microphone
For most people creating screen recordings, a USB condenser microphone is the perfect place to start. Models like the Blue Yeti or Rode NT-USB are plug-and-play, offering a massive leap in quality without breaking the bank. They’re designed to capture that rich, full vocal tone that’s perfect for narration.
Another fantastic and often overlooked option is a lavalier mic, also known as a lapel mic. These little guys clip right onto your shirt, keeping the mic a consistent distance from your mouth. This is a huge advantage because it prevents your volume from jumping all over the place as you move. They’re also surprisingly good at isolating your voice from other noises in the room.
Master Your Mic Placement
Once you've got your mic, where you put it is just as crucial as what you bought. Just plopping it down on your desk next to your keyboard is a recipe for disaster. You need to find that sweet spot that captures your voice perfectly without all the other junk.
A great rule of thumb I always use is the "hang loose" signal. Position the microphone about a fist's distance, or 4-6 inches, from your mouth. Try placing it slightly off to the side instead of directly in front. This little trick helps minimize those harsh "plosive" sounds—the puffs of air you make on 'p' and 'b' sounds that can ruin a take.
Key Takeaway: The closer the microphone is to your mouth, the less of the room's sound it will capture. This simple principle is your secret weapon for cutting down on echo and background noise before you even hit record.
Prepare Your Recording Space
You don't need to line your walls with acoustic foam to make your room sound better. The main goal is to reduce the number of hard, reflective surfaces like windows, bare walls, and hardwood floors. Soft things absorb sound and kill echo.
Here are a few easy, no-cost tricks to "deaden" your recording space:
- If you have a carpeted room, use it. Carpets are natural sound absorbers.
- Hang a thick blanket or a duvet on the wall behind you. It sounds silly, but it works wonders for reducing echo.
- Record in a smaller space. A walk-in closet full of clothes is an amazing makeshift vocal booth.
- Shut the windows and doors to block out street traffic, lawnmowers, or barking dogs.
Of course, some unwanted sound might still creep in. That’s where post-production comes in. Learning how to remove background noise from a video is a critical skill for creating that final polished product.
Finally, always, always check your audio levels before you start. On your recording software's meter, you want your voice to consistently peak between -12dB and -6dB. Think of this as the audio "Goldilocks zone"—it's loud and clear, but it leaves enough headroom to avoid clipping. Clipping is that nasty, harsh distortion you hear when the audio signal is too hot, and it’s impossible to fix later.
Just do a quick test. Record yourself saying a few sentences, then listen back with headphones. It takes 30 seconds and can save you from having to re-record an entire session.
A Modern Editing Workflow for Polished Recordings
Recording your screen and voice is really just the starting line. The magic truly happens in the edit, where you transform that raw footage into something polished and professional. A smart editing workflow isn't just about fixing mistakes; it’s about elevating your entire presentation.
The first pass is all about cleaning things up. You'll want to trim any awkward pauses at the beginning or end, chop out the inevitable "ums" and "ahs," and double-check that your audio and video are perfectly in sync. This initial cleanup is crucial for a smooth viewing experience that keeps your audience hooked. To see how the pros handle this, it’s worth understanding the role of a dedicated postproduction studio in refining every visual and audio detail.
Integrating a Professional Facecam
Adding a facecam is one of the best ways to build a personal connection with your viewers, but let's be honest—a clunky, boxed-in webcam feed can look pretty dated. A much more modern approach is the "floating head" effect, where your facecam appears to be seamlessly layered over the screen recording, free of any distracting background.
This is where AI tools have become a game-changer. Instead of fussing with a physical green screen, you can use a service like VideoBGRemover to create that clean, professional cutout. The process is simple: record your facecam video separately, upload it to the tool, and it automatically strips out the background. What you get back is a clean video file with a transparent background, ready to go.
This simple diagram breaks down how to get great audio from the very beginning.
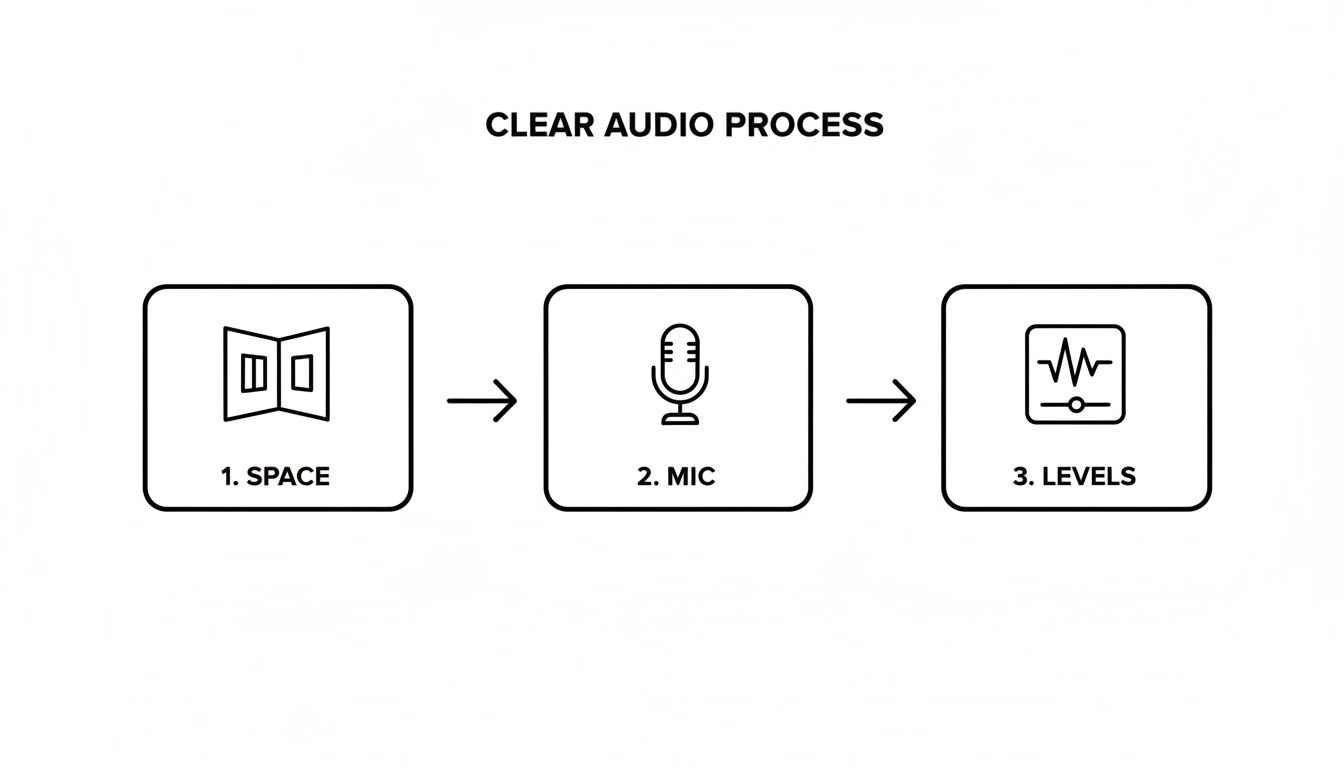
As the visual shows, nailing your audio comes down to three things: a controlled space, the right microphone, and proper levels. Get these right, and you'll spend far less time trying to fix bad sound in post-production.
The Power of AI in Modern Workflows
This kind of workflow is quickly becoming the new standard, mainly because AI is making once-complex editing techniques accessible to everyone. The market for these AI-powered tools is exploding and is projected to hit USD 3.5 billion by 2033.
It's not just for professional creators, either. A recent study found that 85% of remote teams now use screen recording to collaborate more effectively. The result? Companies that adopt these tools are seeing a 30% increase in communication efficiency.
A modern editing workflow is all about efficiency. When tools can automate tedious tasks like background removal, you're free to focus on what really matters: your content and your message.
Once you have your transparent facecam video, you can just drag it into any video editor—from CapCut and DaVinci Resolve to Adobe Premiere Pro—and place it right on top of your screen recording. This method gives you total creative freedom. You can easily resize and reposition your floating head on the fly to make sure it never blocks important information on the screen.
For creators constantly on the move, exploring the benefits of cloud-based video editing can make this process even smoother, letting you edit from anywhere. This approach ensures your final screen recording with voice isn't just informative but also visually engaging and professional.
Solving Common Screen Recording Problems
There’s nothing worse than finishing a recording, only to find a technical glitch has ruined the whole take. We’ve all been there—choppy playback, no audio, or a file so massive it would take a week to upload. It's a huge momentum killer when you're trying to perfect your screen recording with voice.
But don't panic. Most of these issues are surprisingly common and usually have a simple fix. The trick is to work through the potential culprits logically, starting with the easiest solutions first.
Why Is My Audio Missing or Distorted?
Nine times out of ten, audio problems come down to a settings mix-up. Before you start thinking your microphone is dead, take a deep breath and check your setup.
- Check Your Input Source: Is your recording software actually listening to the right mic? It’s incredibly easy to forget to switch from your laptop's built-in microphone to your nice USB one. Double-check this in the app's settings.
- System Permissions: Modern operating systems are big on privacy. Both Windows and macOS can block apps from accessing your microphone by default. You’ll need to dive into your system’s security or privacy settings and give your recording software the green light.
- Audio Levels: If your voice sounds like a distorted mess, your input gain is almost certainly cranked too high. Find the input volume in your sound settings or recording app and dial it back. A good target is to have your voice peaking between -12dB and -6dB.
Here's a pro tip: always make a quick test recording. A simple 10-second clip is all it takes. Listen back with headphones to confirm everything sounds right before you record that hour-long tutorial. This one habit will save you a world of frustration.
How to Fix Choppy Video Playback
Laggy or choppy video is a classic sign that your computer is overloaded. It’s basically screaming for help because the recording process is hogging all the available resources.
The first thing to do is lighten the load. Close every single application and browser tab you don't absolutely need for the recording. If that doesn't fix it, the next step is to lower the recording quality. Bumping the resolution down from 4K to 1080p, or dropping the frame rate from 60fps to 30fps, can make a massive difference in performance.
With people spending over six hours online daily, the demand for clear, helpful video content is huge. On platforms like YouTube, great audio isn't just a bonus—it can lead to 30% better viewer retention. As more creators and businesses turn to AI editing to keep up, getting these technical basics right from the start is more important than ever. You can learn more about AI's impact on screen recording tools to see where the industry is headed.
Answering Your Top Screen Recording Questions
Jumping into screen recording often opens up a Pandora's box of questions. Getting the video and audio to play nicely together can be a real headache. Let's walk through some of the common snags people hit, so you can get back to what you do best: creating.
What's the Best Free Software for Screen Recording with Voice?
Honestly, for most people, the best free tools are the ones that are already on your computer. Your operating system has some surprisingly powerful, no-cost options that get the job done for a ton of different projects.
- If you’re on Windows, the built-in Xbox Game Bar is fantastic for grabbing quick clips.
- For Mac users, both the Screenshot toolbar (Cmd + Shift + 5) and good old QuickTime Player are excellent and baked right into the OS.
When you're ready to level up, OBS Studio is the undisputed king of free, open-source software. It gives you an incredible amount of control over scenes, sources, and audio mixing. But if you value speed and easy sharing above all else, a web-based tool like Loom has a great free tier that makes sending off your recordings a breeze.
How Can I Record My Screen and Myself at the Same Time?
Putting a face to the voice makes a huge difference—it builds a real connection with your audience. Many tools, including OBS Studio and Loom, let you pop your webcam feed in as a picture-in-picture overlay. That’s definitely the simplest way to get an all-in-one recording.
But if you’re aiming for a cleaner, more modern look, I’d suggest recording your screen and your facecam as separate files. This little bit of extra work up front gives you complete freedom in the edit. You can then use a tool to strip out your webcam background, creating that slick "floating head" effect that you can place anywhere on the screen without a clunky box around it.
This two-track approach is a game-changer for post-production. You can resize, reposition, or even temporarily hide your facecam so it never covers up crucial information on screen. The result is just so much more professional.
How Do I Fix Audio That's Out of Sync with My Screen Recording?
Ugh, audio drift. It’s one of the most frustrating problems and almost always means your computer was struggling to keep up during the recording. The best way to fix it is to prevent it from happening in the first place. Before you hit record, do yourself a favor and close every single application and browser tab you don't absolutely need.
If you’re stuck with a file that’s already out of sync, your video editor is your best friend. Most editing software (think DaVinci Resolve, CapCut, or Premiere Pro) lets you "unlink" the audio and video tracks. Once they’re separated, you can just nudge the audio track a few frames forward or backward until it lines up perfectly.
Here's a pro tip for next time: clap your hands once right at the start of your recording. This creates a big, sharp spike in the audio waveform that makes syncing the two tracks incredibly easy.
What's the Best Format to Export My Recording for Social Media?
When it comes to social media, you want to stick with the tried-and-true standards. For pretty much every major platform—YouTube, Instagram, TikTok, LinkedIn, you name it—the MP4 format using the H.264 codec is the way to go. It strikes the perfect balance between high-quality video and a file size that won’t take forever to upload.
You should always be aiming for a resolution of at least 1080p (1920x1080 pixels) to keep things looking sharp. And if you're making content specifically for platforms like Instagram Reels or YouTube Shorts, make sure you edit and export in a vertical 9:16 aspect ratio. This ensures your video fills the whole screen on a phone, which is key to grabbing and holding someone's attention.
Ready to create that polished, background-free facecam for your next video? With VideoBGRemover, you can use AI to remove your video background in just a few clicks—no green screen required. Get your studio-quality transparent video today at videobgremover.com.
Tagged with
Ready to Remove Your Video Background?
See a free preview before you buy.
No credit card required • Free preview on every video