How to Compress a MP4 Video Without Losing Quality
Learn how to compress a MP4 video for social media and web uploads. Our creator's guide covers the best free tools and settings to reduce file size.
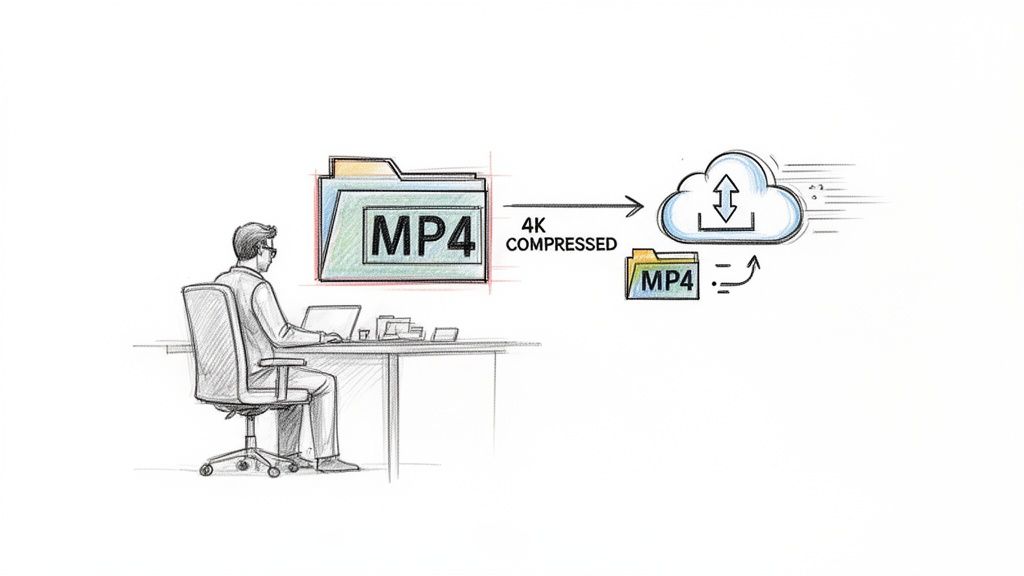
The quickest way to shrink an MP4 video is to jump onto a reliable online tool and knock down its bitrate and resolution. This simple trick can often slash the file size by half or more in just a few moments, solving one of the biggest headaches for modern content creators: monstrously large video files.
Why Smart Video Compression Is a Creator's Secret Weapon
Ever spent hours, maybe even days, perfecting a 4K product video, only to see the upload fail minutes before a big launch? It’s a gut-wrenching, all-too-common scenario.
Whether you're battling Instagram's strict file size limits or just trying to email a preview to a client without it taking all afternoon, oversized video files are a massive bottleneck. They devour expensive cloud storage, clog up your entire content pipeline, and can even ruin the viewing experience for your audience with endless buffering.
This is where knowing how to properly compress an MP4 file becomes a genuine game-changer. It's not about trashing your hard work; it's about being strategic.
The Everyday Headaches Solved by Smaller Files
Smart compression works by intelligently stripping out redundant data—the kind of information your audience will never miss—making your files leaner and far more manageable. The payoff is immediate and significant:
- Lightning-Fast Uploads: Spend less time staring at progress bars and more time actually creating.
- Lower Storage Costs: Keep your cloud storage bills from spiraling out of control by shrinking your video archive.
- Nail Platform Specs: Effortlessly stay within the size and length limits for TikTok, Reels, and YouTube Shorts.
- Better Viewer Experience: Smaller files mean faster load times, less buffering, and happier, more engaged viewers.
The demand for these solutions is exploding. In fact, the market for MP4 compressors is projected to climb past $1 billion by 2029, a surge driven almost entirely by creators and businesses wrestling with oversized files. For a little perspective, a single minute of uncompressed 4K video can easily top 500MB. But with the right compression, you can shrink that by 50-70% without any obvious loss in quality. This isn't just a "nice to have"; it's essential when a platform like TikTok caps its iOS uploads at 287.6MB. You can dig into more of this market growth data over at Data Insights Market.
This simple decision tree really drives home the direct impact file size has on your workflow.

Key Social Media Video Requirements
Every platform has its own rules, and trying to keep them all straight can feel impossible. Here’s a quick reference guide that shows why having a solid compression strategy is so critical for creators today.
| Platform | Max File Size | Max Length | Recommended Resolution |
|---|---|---|---|
| Instagram Reels | 4GB | 90 seconds | 1080 x 1920 |
| TikTok | 287.6MB (iOS) / 72MB (Android) | 10 minutes | 1080 x 1920 |
| YouTube Shorts | 128GB | 60 seconds | 1080 x 1920 |
| Facebook Reels | 4GB | 90 seconds | 1080 x 1920 |
As you can see, especially with mobile-first platforms like TikTok, uncompressed files from a professional camera simply won't make the cut.
The takeaway here is crystal clear: learning to manage your file size from the start saves you from frustrating upload failures and speeds up your entire content delivery process. Once you master a few key techniques, you can ensure your videos are perfectly optimized for any platform, every single time.
Quick Fixes: Using Online Video Compressors
When you're on a tight deadline and just need to shrink a video right now, an online compressor is your best friend. These tools run directly in your web browser, so you don't have to download or install a single thing. It’s the perfect solution for a quick one-off job or if you’re using a computer that isn't your own.
The workflow couldn't be simpler: upload your MP4, pick a compression setting, and download the new, smaller file. It's a lifesaver when you need to solve an urgent "file too large" problem in just a few minutes. If you're looking for a simple tool, an online AI HD video converter can give you a handful of options to reduce your file size quickly.
The Hidden Costs of Convenience
While they're incredibly fast and simple, you have to be smart about using web-based tools. The biggest thing to consider is privacy. When you upload your video, it’s going to a third-party server somewhere out on the internet. For a casual video of your cat, that's probably fine. But if it's sensitive client work or proprietary business footage, you're taking a real security risk.
Key Takeaway: My rule of thumb? Never upload anything to a free online service that you wouldn't be comfortable posting publicly. For sensitive video, always use a desktop app where your files stay on your machine.
You'll also run into some common limitations with the free versions. Be prepared for:
- File Size Caps: Most free tools won't let you upload massive files. Expect limits somewhere in the 500MB to 1GB range.
- Waiting in Line: Your video might get put in a processing queue behind other users, so "instant" can sometimes mean a 10-minute wait during busy times.
- Surprise Watermarks: Many services will stamp their logo onto your final video unless you pay to remove it. Always do a test run first if the video is for professional use.
How to Pick an Online Tool You Can Trust
So, how do you sort the good from the bad? A few tell-tale signs can help you pick a more reputable service. First, a non-negotiable: check for "https://" in the browser's address bar. That little "s" means your connection to their server is encrypted, which is the bare minimum for security.
Next, do a quick search for their privacy policy. A trustworthy site will tell you exactly how they handle your files, how long they're stored (good ones often delete them within hours), and if your data is shared. If you have to dig for this info, it's a red flag. Move on.
For a head start, you can check out our curated list of the best video compressors to find some reliable options we've already vetted.
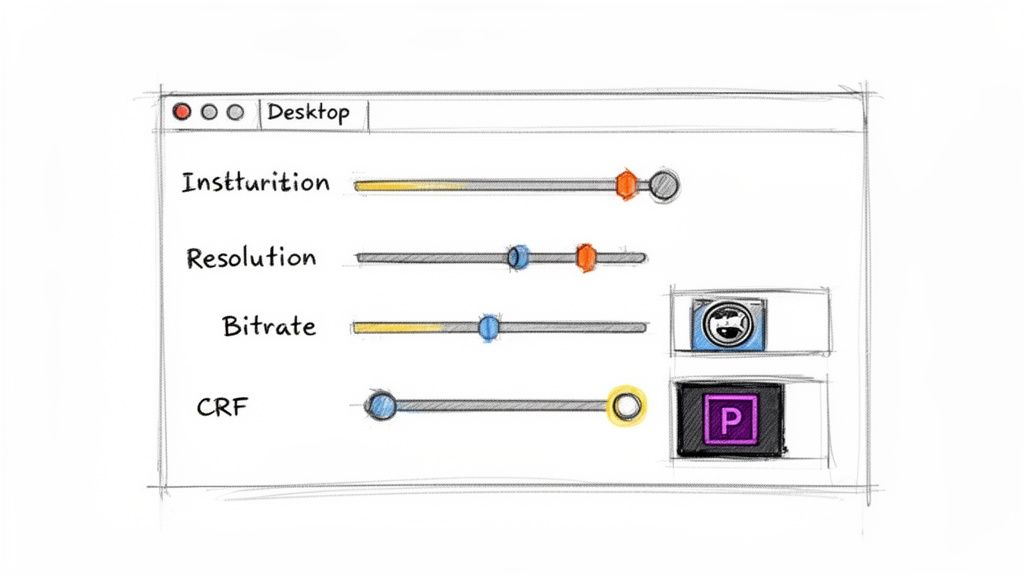
Gaining Full Control with Desktop Software
When a quick online tool just won't cut it, it's time to bring the work onto your own machine. For creators and marketers who need absolute precision, desktop software is the only way to go. You get a granular level of control that web-based services simply can't offer, plus your files stay private and secure on your own computer.
Let's dive into two of the best tools for the job: HandBrake, the legendary free and open-source powerhouse, and Adobe Premiere Pro, the industry standard for professional video editing. Both will get your MP4s compressed, but they fit into slightly different workflows.
Navigating HandBrake for the Perfect Balance
There’s a reason HandBrake has been the go-to transcoding tool for years: it’s incredibly powerful, totally free, and puts the most important settings right at your fingertips. The interface can look a little intimidating at first, but its preset system makes it surprisingly easy to get started.
The built-in presets are your best friend for a fast, reliable result.
- General Presets: Options like
Fast 1080p30orHQ 1080p30 Surroundare fantastic for everyday use and strike a great balance between compression speed and final quality. - Web Presets: If you know your video is heading to YouTube or Vimeo, presets like
Vimeo YouTube HQ 1080p60are already optimized to meet their common specs.
But where HandBrake really shines is with its Constant Quality (CRF) setting. Instead of telling the software to aim for a specific file size (bitrate), you tell it what level of visual quality you want to maintain. It then uses whatever bitrate is necessary to hit that target. Remember, lower CRF numbers mean higher quality and bigger files; higher numbers do the opposite.
In my experience, a CRF value between 20 and 23 is the absolute sweet spot for most web content, especially for social media. It dramatically shrinks the file size with virtually no quality loss that the average person would ever notice.
Mastering Export Settings in Premiere Pro
If you're already editing in the Adobe ecosystem, there's no need for another tool. Premiere Pro’s built-in Export Media panel is your command center for compression. The key is knowing which knobs to turn.
First things first, always choose H.264 as your format. It’s the universal language of web video, guaranteeing your file will play nicely on just about any device or platform. From there, your main focus should be the bitrate settings.
Bitrate is simply the amount of data used to encode each second of your video. More data means more detail, but also a bigger file. Premiere gives you a few ways to handle it:
- CBR (Constant Bitrate): This sets one bitrate for the entire video. It's predictable but inefficient, often wasting data on simple scenes while starving complex ones.
- VBR (Variable Bitrate), 1-Pass: The encoder adjusts the bitrate on the fly based on scene complexity. It’s a decent balance of speed and efficiency.
- VBR, 2-Pass: This is the gold standard for quality. The encoder analyzes the entire video on the first pass to figure out the best way to allocate data, then does the actual encoding on the second pass. It takes longer, but the results are worth it.
For a marketing team, cutting upload times is a massive win. The right settings can take a 500MB file down to 100MB with no visible drop in quality, slashing your upload time by up to 80%. This is a lifesaver for platforms like Reels, where I've seen smaller files avoid upload errors over 95% of the time. You can learn more about why video compression is a must-have skill on Young Urban Project.
By setting a Target Bitrate in Premiere's VBR 2-Pass mode, you can hit specific file size targets with incredible precision every time. For anyone looking for more specific guidance on different tools, our guide on choosing an MP4 file compressor can provide additional context.
Automating Compression with FFmpeg
If you’re dealing with more than a handful of videos, compressing them one by one in a GUI app is a recipe for a wasted afternoon. For developers, technical marketers, or anyone creating video content at scale, the command-line tool FFmpeg is your secret weapon. I know a terminal window can look intimidating, but its power to automate and batch-process video is simply unmatched.
The real beauty of FFmpeg is its simplicity once you get the hang of it. You're not clicking through menus; you're using simple, reusable commands that give you consistent results every single time. It puts you in complete control over every single parameter of your MP4 compression.
Your First FFmpeg Commands
Let’s dive into a real-world scenario. You have a massive 4K video file called input.mp4 and you need to get it ready for the web, fast.
This one command tells FFmpeg to re-encode the video using the efficient libx264 codec, set a quality level of 23 (which is a great starting point), and resize it to a more web-friendly 1080p.
ffmpeg -i input.mp4 -c:v libx264 -crf 23 -vf "scale=1920:1080" output_1080p.mp4
Here's another common task: making a video friendly for streaming. This command sets a maximum video bitrate of 2 Mbps (2M), which helps ensure smooth playback even for users on slower internet connections.
ffmpeg -i input.mp4 -c:v libx264 -b:v 2M -c:a aac -b:a 128k streaming_output.mp4
For anyone looking to really streamline their video work, understanding the broader workflow automation benefits shows just how much time you can save by using powerful tools like FFmpeg for repetitive tasks.
Leveraging Next-Generation Codecs
One of the smartest moves you can make is to use a more advanced video codec. Switching to a modern codec like H.265 (HEVC) can deliver up to 50% better compression than the old standard H.264, often without any noticeable drop in quality. For a social media manager, that means a 10-minute 1080p video could shrink from 1.2 GB to under 400 MB.
Pro Tip: I've found that when using H.265, a CRF value of around
28gives you a visual quality that's very similar to an H.264 file with a CRF of23. The key difference? The H.265 file will be significantly smaller. It's my go-to for archiving footage or when file size is my absolute top priority.
You can easily use the H.265 codec in FFmpeg with a small tweak to the command:
ffmpeg -i input.mp4 -c:v libx265 -crf 28 hevc_output.mp4
Once you get comfortable with these commands, you can start building simple scripts to process entire folders of videos automatically. It’s an incredible time-saver and the best way to maintain perfect video compression without losing quality.
FFmpeg Command Cheat Sheet for MP4 Compression
Here’s a quick reference table with some of my most-used FFmpeg commands. Just copy, paste, and change the input/output filenames to get started.
| Task | FFmpeg Command | Description |
|---|---|---|
| Basic Quality-Based Compression | ffmpeg -i input.mp4 -c:v libx264 -crf 23 output.mp4 |
Uses the CRF (Constant Rate Factor) method for a good balance of quality and size. 23 is a solid default. |
| Resize to a Specific Width | ffmpeg -i input.mp4 -vf "scale=1280:-1" output_720p.mp4 |
Resizes video to 1280px wide while maintaining the original aspect ratio. |
| Set a Target Bitrate | ffmpeg -i input.mp4 -b:v 1500k output.mp4 |
Aims for an average video bitrate of 1.5 Mbps (1500k), useful for streaming. |
| Compress with H.265 (HEVC) Codec | ffmpeg -i input.mp4 -c:v libx265 -crf 28 output_hevc.mp4 |
Uses the more efficient H.265 codec. A CRF of 28 is a good starting point for quality. |
| Remove Audio Track | ffmpeg -i input.mp4 -an output_no_audio.mp4 |
Creates a silent video by stripping the audio track, which can significantly reduce file size. |
| Create a GIF | ffmpeg -i input.mp4 -vf "fps=10,scale=480:-1" output.gif |
Converts the MP4 to a GIF at 10 frames per second and 480px width. |
This cheat sheet covers the fundamentals, but remember that FFmpeg is incredibly powerful. You can combine these flags to build the perfect command for nearly any compression job you can think of.
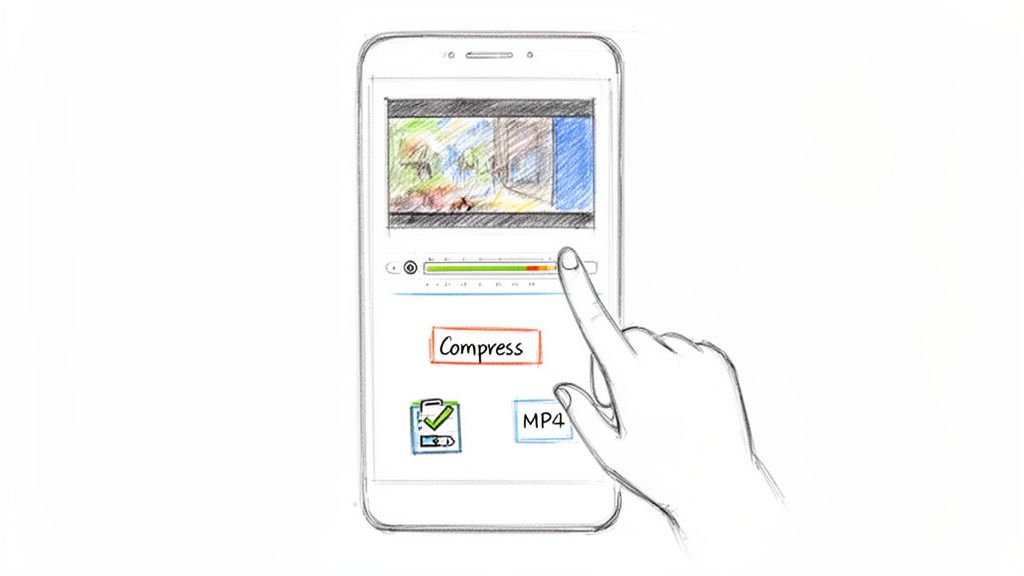
Compressing Videos Directly on Your Phone
Let's be real—most of the time, your phone is your entire production studio. You shoot, edit, and post on the go, and sending a massive video file to your computer just to shrink it down feels like a huge step backward.
Thankfully, you don't have to. You can compress an MP4 right from your phone, letting you go from final edit to posting on Instagram or TikTok in minutes. There are some fantastic apps for both iOS and Android that get the job done quickly.
Finding the Right Mobile Compression App
A quick search on the App Store or Google Play will throw a ton of options at you. Be warned, though: many free apps are loaded with ads, slap a watermark on your video, or have ridiculously low file size limits. If you're creating content regularly, spending a few bucks on a solid, reliable app is one of the best investments you can make.
You don't need an app with a million confusing settings. The best ones keep it simple and give you control over the two things that matter most:
- Resolution: A simple way to take that beautiful 4K footage and scale it down to a social-media-friendly 1080p.
- Bitrate or Quality: Usually a slider or a few presets that let you see the trade-off between file size and visual quality.
Apps like Video Compress on iOS and Video Compressor Panda on Android are popular for a reason—they focus on doing one thing and doing it well. You just pick your video, choose your settings, and they even show you an estimated file size before you hit "compress."
My Personal Workflow Tip: I always shoot in the highest quality possible on my phone. When I'm done editing, I create a compressed copy specifically for social media. This gives me a pristine master file for my archives and a small, optimized version that uploads in seconds, even when I'm on a shaky cellular connection.
How to Compress an MP4 on Your Phone
No matter which app you choose, the workflow is pretty much the same. You'll import a video from your camera roll, tweak a couple of settings, and then save the new, smaller version back to your phone.
Typically, you'll select your clip and see presets like "Small File (Low Quality)" or "Medium File (Good Quality)." These are great for a quick and dirty compression. For more control, dive into the custom settings. A good rule of thumb is to set the resolution to 1080p and then play with the quality slider until the estimated file size is comfortably under the platform's limit—for example, TikTok's iOS cap is 287 MB.
Once you run the compression, the app will save a completely new file, leaving your original high-quality video safe and sound.
Answering Your Top Questions About MP4 Compression
Even after walking through the steps, you probably still have a few lingering questions about getting your MP4s just right. That’s perfectly normal. Let's dig into some of the most common things people ask so you can export with confidence every single time.
What's the Best Video Format for Social Media?
Hands down, it's MP4 using the H.264 (AVC) codec. It’s the undisputed champion for a reason—it just works, everywhere.
Think of it as the universal language of web video. Every browser, phone, and social platform from Instagram to YouTube knows how to speak H.264. While newer codecs like H.265 (HEVC) are more efficient, they aren't universally supported yet. Sticking with MP4 and H.264 is your safest bet for maximum reach and zero playback issues.
Does Compressing a Video Automatically Ruin the Quality?
That’s a common fear, but the short answer is no—not if you do it correctly. The trick is to understand the two different ways compression works.
- Lossless Compression: This shrinks your file without throwing away a single bit of data. It’s like putting your video in a ZIP file. The quality is identical, but the file size reduction is pretty small.
- Lossy Compression: This is our go-to for video. It cleverly removes information that the human eye is unlikely to notice, resulting in a much smaller file.
When you compress a video properly, you're just trimming the digital fat. The "ruined," pixelated look only appears when you get too aggressive and the compression starts cutting into the essential data.
Think of it this way: A professional photographer shoots in a massive RAW format. When they save it as a high-quality JPEG (a lossy format), it looks stunning to our eyes but is a fraction of the original size. It only starts looking blocky and terrible when you slide that quality setting all the way down.
How Much Can I Realistically Shrink an MP4 File?
Every video is different, but a 50-70% reduction in file size is a very achievable goal without any noticeable drop in quality. It's a solid target to aim for.
For instance, I often take a one-minute 4K clip that's 500 MB and compress it to a crisp 1080p file that’s around 150 MB. It looks fantastic for the web and uploads in a flash. The amount of motion, detail, and colors in your video will affect the final result, but trying to cut your file size in half is an excellent starting point.
What Are the Ideal Settings for Reels and TikTok?
For vertical videos on platforms like TikTok and Instagram Reels, you need a smart balance between visual clarity and a small file size for fast uploads. I’ve found a sweet spot that delivers great-looking videos every time.
My Go-To Compression Targets:
- Resolution: Stick to 1080x1920. Anything higher, like 4K, is overkill. The platforms will just compress it down for you anyway, so you might as well control the process yourself.
- Frame Rate: Always match your original footage, whether it's 24, 30, or 60 fps.
- Video Bitrate: For 1080p at 30 fps, a bitrate of 4-6 Mbps (4,000-6,000 kbps) is perfect. If you're working with smoother 60 fps footage, bumping that up to 8-10 Mbps will keep it looking clean.
These settings provide more than enough visual information for a sharp playback experience on a phone screen, all while keeping your files small and easy to manage.
Ready to produce studio-quality videos without the hassle of a green screen? VideoBGRemover uses AI to remove or replace your video background in minutes. Upload your footage, customize your scene, and export a professional-looking MP4 or transparent file perfect for any project. Try it for free and see the magic at https://videobgremover.com.
Tagged with
Ready to Remove Your Video Background?
See a free preview before you buy.
No credit card required • Free preview on every video