Choosing the Right Converter MP4 in MPEG for Your Project
Discover the best converter MP4 in MPEG for your needs. This guide covers FFmpeg, GUI software, and online tools with practical, real-world examples.
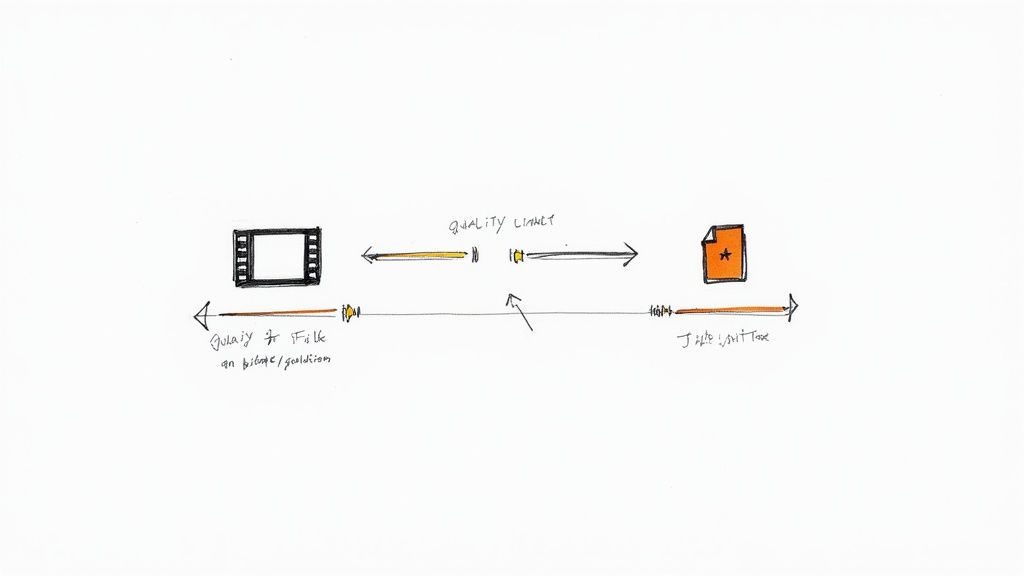
You might be wondering why anyone would convert a modern MP4 file back to an older format like MPEG in today's streaming-first world. It seems a bit like a step backward, right? But the reality is, there are still some very specific, important situations where this conversion is an absolute must-have.
The whole thing really comes down to compatibility. MP4 is the king of the web, perfect for your phone, tablet, and streaming services. MPEG, on the other hand, was built for a different era—the age of physical media and broadcast television.
MP4 vs MPEG At a Glance
To quickly see where each format shines, this table breaks down their primary roles. It's a handy reference for figuring out which one fits your specific project.
| Attribute | MP4 (MPEG-4 Part 14) | MPEG (MPEG-1/MPEG-2) |
|---|---|---|
| Primary Use | Web streaming, social media, mobile devices, online video | DVDs, Blu-rays (MPEG-2), broadcast television, VCDs (MPEG-1) |
| Compression | Highly efficient (uses codecs like H.264/AVC, H.265/HEVC) | Less efficient, resulting in larger file sizes for similar quality |
| Compatibility | Universal on modern devices and platforms | Universal on older hardware (DVD players) and broadcast systems |
| Quality | Excellent quality at lower bitrates | Good quality, but requires higher bitrates (especially MPEG-2) |
| Container | Flexible; can hold video, audio, text, and images | Less flexible; primarily for video and audio streams |
Ultimately, choosing between them isn't about which is "better" overall, but which is the right tool for the job you need to get done.
Making a Disc? You'll Need MPEG
This is easily the number one reason people still convert MP4 to MPEG. Let's say you've edited a fantastic wedding video or a corporate training session and you need to hand out physical copies. If you want to burn it onto a DVD that will play in any standard DVD player, you absolutely need an MPEG-2 file.
Your average DVD player from the last 20 years won't know what to do with an MP4 file, especially one using a modern codec like H.264. It just wasn't built for it. Converting to MPEG-2 ensures the video stream follows the exact rules those older devices are expecting, so it plays back perfectly every time.
Playing by Broadcast Rules
Another huge area is professional broadcasting. TV stations have incredibly strict technical guidelines for video submissions, and many of them are built on systems that have been running reliably for years. Because of this, they often still require all content to be delivered in MPEG-2 format.
Their entire workflow—from ingest servers to on-air playout systems—is designed around this standard. It's predictable, stable, and they know it works.
Submitting a file in the wrong format is one of the fastest ways to get your content rejected by a broadcaster. For them, technical consistency is everything, and MPEG-2 is a known, reliable quantity.
Sticking to Archival Standards
Finally, think about large-scale archives. Some corporate or institutional libraries were built back when MPEG was the go-to professional format. To keep their entire collection consistent, their internal policies might demand that all new videos are converted to MPEG-1 or MPEG-2.
This might sound rigid, but it simplifies their long-term storage and makes it easier to manage thousands of files with the same set of tools. You can see this evolution in action: MPEG-1 was originally designed for Video CDs (VCDs), while the superior MPEG-2 became the standard for DVDs and early digital television. If you're curious, you can find a deeper comparison of these formats to see how digital media has evolved.
Mastering Conversions with the FFmpeg Command Line
If you're looking for precision, automation, and total control over your video conversions, there's really no substitute for FFmpeg. It's a free, open-source powerhouse that runs from the command line. While the lack of a graphical interface can seem intimidating at first, its real strength is executing complex jobs with just a single line of text. This is exactly why it’s a staple for video professionals and developers.
The basic idea behind FFmpeg is simple: you give it an input file, tell it what you want to do, and specify an output file. Let's start with the most basic command to get a feel for how it works.
Your First MP4 to MPEG Conversion
To kick things off, let's do a simple MP4 to MPEG conversion. Just open your terminal (or Command Prompt on Windows), navigate to the folder with your video, and type this:
ffmpeg -i input_video.mp4 output_video.mpg
Here, -i just means "input," followed by the name of your source file. FFmpeg is smart enough to figure out what to do based on the file extension. By naming the output output_video.mpg, it automatically picks the right codecs to create a standard MPEG file. It's perfect for a quick and dirty conversion when the default settings will do.
But the real magic happens when you start telling FFmpeg exactly what you want.

This process really highlights why you'd move from a modern, flexible format like MP4 to something more specialized. Often, it all comes down to compatibility for specific tasks, like authoring a DVD or preparing a file for broadcast.
Creating Specific MPEG Variants
Most of the time, you won't just need a generic MPEG file; you'll need a specific flavor, like one that works on a DVD player. For that, we need to be more explicit with our commands.
To create a standard, DVD-compliant MPEG-2 file, the command gets a bit more specific:
ffmpeg -i input_video.mp4 -target ntsc-dvd output_for_dvd.mpg
The -target flag here is a lifesaver. It’s a shortcut that automatically applies a whole bundle of presets. In this case, ntsc-dvd sets the video codec, bitrate, audio format, and everything else needed to meet the strict standards for North American DVDs. If you're in Europe, you'd simply use pal-dvd instead.
My Personal Tip: I always lean on the
-targetflag for any DVD project. It completely removes the guesswork and ensures the final file will play nicely with my authoring software without any nasty surprises.
For even more granular control, you can set the codecs and bitrates yourself. Let's say you want an MPEG-2 video with a specific video bitrate of 5000 kb/s. The command would look like this:
ffmpeg -i input_video.mp4 -c:v mpeg2video -b:v 5000k output_custom.mpg
Let's break that down:
- -c:v mpeg2video explicitly tells FFmpeg to use the
mpeg2videocodec. - -b:v 5000k sets the target video bitrate, which is your main lever for controlling quality versus file size.
Batch Processing an Entire Folder
Who has time to convert files one by one? This is where a tiny bit of scripting can save you hours. If you've got a folder full of MP4s that need converting, you can use a simple loop.
On Windows, open the Command Prompt in your video folder and run this:
for %a in ("*.mp4") do ffmpeg -i "%a" -target ntsc-dvd "%~na.mpg"
This little command is a powerhouse. It finds every .mp4 file in the folder and runs your FFmpeg conversion, creating a new .mpg file with the same name. It's a game-changer for big projects or archiving jobs. This turns a repetitive chore into a "set it and forget it" task.
If you want to dive deeper into automating your workflow, our comprehensive FFmpeg guide is packed with more advanced commands and scripting tricks.
Navigating GUI Software for Easy Conversions
Let's be honest, the command line can feel a bit like staring under the hood of a car when all you want to do is drive. While powerful tools like FFmpeg are incredible, they're not for everyone, and that's perfectly okay. Thankfully, there’s a whole world of applications with graphical user interfaces (GUIs) that turn MP4 to MPEG conversion into a simple, visual task.
Think of GUI software as the friendly front desk for video conversion. Instead of typing out complex commands, you're clicking buttons, dragging sliders, and picking options from menus. It's a far more intuitive approach for most people and makes the whole process less intimidating. If you just need to convert a single clip for an older device or a DVD project, a GUI-based converter mp4 in mpeg is often the quickest way to get it done.

A Walkthrough with a Popular Tool
Let's walk through the process using a popular free tool like HandBrake to see how it works. Most other GUI converters follow a very similar, straightforward workflow.
- Load Your Source File: First things first, you need to get your MP4 into the program. You’ll typically see a big "Open Source" button or a dedicated panel where you can just drag and drop your video file.
- Select a Preset: This is where these tools are a lifesaver. Instead of digging into codec settings, you can browse a list of pre-configured profiles. Look for a category like "Legacy" or "Devices," which is where you'll usually find presets for DVDs or generic MPEG-2 formats.
- Check the Format: In the "Summary" tab, you can quickly verify the output settings. The preset you chose should automatically select MPEG-2, but it never hurts to give it a quick glance to make sure everything looks right.
- Choose Your Destination: Tell the software where to save the finished MPEG file and what you want to name it.
- Start the Conversion: All that's left is to hit the "Start Encode" button. The software takes it from there and will show you a progress bar while it works.
That’s it. This simple click-and-go process is a huge plus for anyone who values speed and simplicity over having a million different knobs to turn.
The core trade-off is clear: GUI tools offer incredible ease of use for individual tasks, while command-line options provide unmatched power for automation and batch processing. Your choice really just depends on the scale of your project.
When to Choose a GUI Converter
So, when does it make sense to reach for a GUI app instead of the command line? I find they're the best fit in a few common situations.
- Single or small-batch conversions: If you just have a handful of files to convert, firing up a GUI app is far faster than writing a script.
- Visual confirmation is important: Sometimes, you just want to see all your settings laid out in a clear, organized window. It gives you that extra peace of mind that you've got everything configured correctly before you commit.
- You're new to video conversion: This is probably the biggest one. GUI tools provide a gentle on-ramp, introducing you to core concepts like codecs and presets without overwhelming you.
Many of these applications are just one piece of a larger creative puzzle. When you're picking your tools, it's smart to think about how they fit into your overall workflow. For a deeper dive, our video editing software comparison breaks down different options and their strengths. Ultimately, the best converter is the one that gets the job done with the least amount of friction for you.
Look, sometimes you just don't need to fire up a heavy-duty desktop application for a simple conversion. For those moments when you have a single, non-sensitive file you need to switch over to MPEG right now, an online converter is a lifesaver.
These browser-based tools mean you don't have to download or install a single thing. This makes them perfect for quick, one-off jobs, whether you're on your main machine or borrowing a friend's laptop.
The appeal is all about speed and simplicity. The workflow is almost universal: you upload your MP4, pick MPEG from a dropdown list, hit a button, and wait a few moments. Before you know it, you’ve got a download link. It’s a fantastic solution for anyone who isn't a video pro and just needs to get a file working on an old DVD player without a headache.
The Price of "Free and Easy"
Of course, that convenience comes with some serious strings attached, and you need to know what they are. The absolute biggest concern is privacy. I can't stress this enough: never, ever upload a video with sensitive, personal, or confidential content to a free online tool. You're handing your file over to a server you know nothing about, with no real say in how it's stored or what happens to it later.
Beyond the security risks, you'll almost always run into practical walls with these online services.
- File Size Caps: Most free converters have pretty strict upload limits. If you're working with a long, high-resolution video, you'll probably be out of luck.
- Glacial Speeds: The whole process is at the mercy of your internet connection and their server traffic. It can often take way longer than just converting it locally on your own computer.
- Surprise Watermarks: Some "free" services will slap their logo on your final video, which is a deal-breaker for any kind of professional use.
- Minimal Control: Forget about tweaking bitrates, frame rates, or specific audio codecs. You get what you get, which is rarely good enough for serious projects.
An online converter is the right tool for a low-stakes job, like converting a public domain clip for a school project. But for anything involving client work or personal home movies, the privacy issues and quality constraints make desktop software the only smart and reliable choice.
The huge growth in the video converter market, now valued in the hundreds of millions, is driven by this very need—to bridge the gap between modern formats like MP4 and older standards like MPEG. It's a massive industry, and you can dig into the video converter market trends if you're curious about the business side of it all.
At the end of the day, an online tool is a great fix when your top priorities are speed and ease, and the video itself isn't something you'd mind seeing on a billboard.
Balancing Quality and File Size in Your Conversion
A great conversion isn't just about changing a file extension. It's really a balancing act—you're trying to get the best possible visual clarity without ending up with a gigantic file. When you use a converter mp4 in mpeg, you're in the driver's seat, but only if you understand the settings that control this trade-off.
The single most important setting to get right is the bitrate. You can think of it as the data budget for every second of your video. A higher bitrate throws more data at the video, which means a sharper, clearer picture, but it also creates a much larger file.
Getting a Handle on Bitrate Options
Once you poke around in the advanced settings of any decent converter, you’ll usually find two main ways to handle bitrate: Constant Bitrate (CBR) and Variable Bitrate (VBR). They work very differently, and the right choice really hinges on what you need the final video to do.
- Constant Bitrate (CBR): This is the straightforward approach. CBR assigns the exact same amount of data to every single second of video. It's predictable, which is great for estimating the final file size. The downside? It's inefficient. A simple, static shot of someone talking gets the same data budget as a chaotic, fast-moving action scene, which can waste space or starve the complex scenes of the detail they need.
- Variable Bitrate (VBR): This is the smarter option for most situations. VBR intelligently gives more data to complex scenes with lots of motion and less data to the simple, static parts. This method focuses on maintaining consistent quality, which usually results in a smaller overall file size compared to a CBR file of similar quality.
Key Takeaway: If you’re converting a high-action sports clip to burn onto a DVD, you'll want to use a higher VBR to keep all that fast motion looking sharp. But for a basic talking-head video, you can get away with a much lower bitrate, save a ton of space, and likely never notice the difference.
This whole process of tweaking settings has gotten a boost from AI and modern video transcoding—a market expected to be worth billions by 2025. Some newer tools can even analyze video content to suggest optimal settings, which is a neat way to preserve quality while shrinking files.
Recommended MPEG Conversion Settings
To give you a practical starting point, here are some typical settings I use when converting MP4 files to MPEG for different purposes. These aren't set in stone, but they're a reliable guide.
| Target Use Case | Recommended Video Codec | Recommended Bitrate (kbps) | Common Resolution |
|---|---|---|---|
| DVD Authoring (NTSC) | MPEG-2 | 4000-8000 | 720x480 |
| DVD Authoring (PAL) | MPEG-2 | 4000-8000 | 720x576 |
| Legacy Device Playback | MPEG-1 | 1000-1500 | 352x240 |
| Broadcast VTR (SD) | MPEG-2 | 15000-25000 | 720x486 |
Remember, a higher bitrate is your friend for action-packed content, but you can dial it back for simpler footage to keep file sizes manageable.
Don't Forget Resolution and Frame Rate
Bitrate is the star of the show, but resolution and frame rate are crucial supporting actors. These two settings control your video's physical dimensions and how smooth the motion appears.
My go-to rule is simple: match the source video’s settings. If your original MP4 is 1920x1080 and runs at 30 frames per second (fps), you should aim to keep those same specs for your MPEG output. Sticking to the original settings prevents the converter from doing extra work, which can introduce artifacts or degrade quality.
Of course, there are times you need to break this rule. Let’s say you’re taking a modern 1080p HD video and converting it for an old-school standard-definition DVD. In that case, you have to downscale the resolution to 720x480 (for NTSC) or 720x576 (for PAL). Trying to cram an HD resolution onto a standard-def disc is pointless—the format can't display it, and you'd just be bloating the file for no reason.
For a deeper dive into this, our guide on video compression without losing quality has some more advanced tips.
Common Questions About Converting MP4 to MPEG
When you start diving into video conversion, a lot of questions pop up. On the surface, turning an MP4 into an MPEG seems straightforward, but the devil is always in the details. Let's tackle some of the most common snags people hit so you can get a clean conversion every time.
The biggest worry is almost always about quality. Will converting from MP4 to MPEG ruin my video? The short answer is: it can, but it doesn't have to.
Anytime you convert a video from one compressed format to another, you’re performing what’s known as a lossy compression. The software has to re-analyze the video and toss out some data to make it fit the new standard. But here's the key: if you use the right settings, this quality loss can be completely unnoticeable. By setting a high enough bitrate, the final MPEG file will look virtually identical to the source MP4. The game isn't about avoiding compression; it's about managing it.
So, What’s the Real Difference Between These Formats?
You might be wondering why you'd even bother. Isn't MP4 good enough? Think of it this way: MP4 is the modern, do-it-all container. It uses advanced codecs like H.264 to pack incredible quality into a small file size, which is exactly why it dominates web streaming.
MPEG-2 is the old guard. It was designed for a different world—the world of broadcast television and DVDs. It's less efficient and demands a much higher bitrate to match the quality of an MP4. Its superpower, though, is its rock-solid, universal compatibility with older broadcasting equipment and disc players. You aren't converting for better compression; you're converting to make it work on specific, often legacy, hardware.
It helps to remember that MP4 (which stands for MPEG-4 Part 14) and MPEG-2 are related, but they were built for completely different jobs. One was designed for the internet age, the other for your living room TV in 2005.
Choosing the Right Tool for the Job
Picking a converter can feel overwhelming with all the options out there. The "best" tool really just depends on what you're trying to accomplish and how comfortable you are with the tech.
- For the Power User: If you're staring down a folder with a hundred files to convert or need granular control over every single setting, nothing beats a command-line tool like FFmpeg. It’s the gold standard for a reason.
- For Straightforward Simplicity: Got a handful of files and just want a simple, visual interface to get it done? A desktop app like HandBrake is your best bet. It’s reliable and easy to navigate.
- For a Quick, One-Off Conversion: If you have one small file that isn't confidential, an online converter can be the fastest solution. No installs, no fuss—just upload, convert, and download.
Each approach has its own balance of power, convenience, and security. Just think about the scale of your project and how sensitive the video content is before you commit.
Once your video is in the right format, you might need to clean it up. If you're looking to remove or swap out the background, VideoBGRemover can handle it in seconds. Our AI-powered tool is perfect for creating polished, professional-looking videos for any platform. You can check out all the features over at the VideoBGRemover website.
Ready to Remove Your Video Background?
See a free preview before you buy.
No credit card required • Free preview on every video