Removing Background Video A Guide to Flawless Results
Learn how to master removing background video with AI, green screens, and professional editing tools. This guide covers the best methods for any project.
Being able to remove the background from a video is a game-changer. It’s one of those skills that completely unlocks your creative freedom, turning a standard video clip into an asset you can use almost anywhere. Whether you opt for a speedy AI-powered tool or go the traditional route with a green screen for pixel-perfect precision, the goal is the same: isolate your subject so you can drop them into any scene you can dream up.
Why Bother Removing a Video Background?
Before we get into the nuts and bolts of how to do it, let's talk about why this is such a valuable skill for any creator. It’s way more than just a neat editing trick—it’s a strategic move that fundamentally changes how people see your content. A clean, professional look instantly makes your video feel more polished and authoritative.

Think about it. If you're shooting a product demo, a messy office or a distracting room behind you can completely sabotage your message. Viewers' eyes will wander, and their focus will drift away from the one thing you want them to see: your product. By removing that background, you put the spotlight exactly where it belongs.
Opening Up Creative and Professional Doors
The real-world uses for this are practically endless. I've seen everyone from social media influencers to corporate trainers use this to make their videos more engaging.
Here are just a few scenarios where this comes in handy:
- Consistent Branding: You can place your entire team against the same branded background for all official videos. This creates a super cohesive and professional look that reinforces your brand identity.
- Dynamic Ads: Want to make an ad that stops the scroll? Drop your product or a spokesperson into a wild, animated environment that would be impossible or way too expensive to shoot on location.
- Better Tutorials: For educational content, you can overlay the instructor directly onto presentation slides or a screen recording. It makes the whole lesson feel more personal and keeps viewers tuned in.
- Immersive Storytelling: Transport your subject anywhere. A historical setting? A futuristic city? The top of Mount Everest? No problem. You can do it all without ever leaving the studio.
Ultimately, removing the background gives you total control over the visual context and story of your video. Your footage is no longer stuck in one place; it becomes a flexible element you can blend into any project.
Learning this skill is fundamental if you're serious about video. It lets you produce cleaner, more professional, and infinitely more creative content that actually grabs and holds people's attention.
The Easiest Method: AI Video Background Removers
Let's be honest, sometimes you just need to get the background out of a video, and you need it done now. If you don't have the time or patience to fiddle with complex software, AI-powered tools are a game-changer. These web-based platforms have made removing background video footage ridiculously simple—we're talking upload, click, and you're done. No green screen, no painstaking frame-by-frame masking. Just fast, automated results.
This approach is your best friend for projects where speed is the name of the game. Think about that quick reaction video for YouTube Shorts, a snappy product showcase for a TikTok ad, or a straightforward internal training video. For those scenarios, spending hours in an editing suite just doesn't make sense.
Most of these tools are designed to be incredibly intuitive, letting you get a solid result in just a few minutes. This efficiency is what allows solo creators and small teams to produce content at a scale that was once unthinkable.
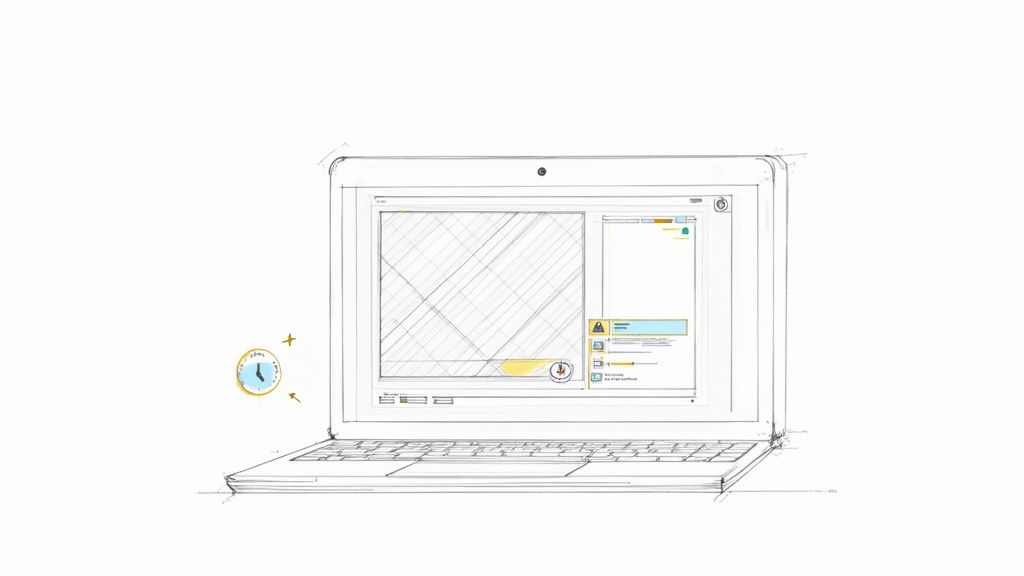
How AI Background Removers Work
The workflow is refreshingly simple. You start by uploading your video clip—usually an MP4 or MOV file—right to the website. The AI then fires up its digital brain, analyzing every single frame to figure out what's you (the subject) and what's the background.
Once it's finished processing, you'll get a preview of the video with a transparent background. From there, you can download the final clip in a format that supports transparency, like a WebM file or a PNG sequence. It's then ready to be dropped into your favorite video editor and layered over a new background. If you're new to this, it's worth learning more about how an AI video background remover can slot into your creative process.
The real magic here is the sheer amount of time you save. What used to be hours of tedious rotoscoping work by a skilled editor can now be handled in minutes, often with surprisingly good accuracy.
This isn't an overnight development. The shift from manual studio work to automated tools has been building for years. While non-linear editors in the 2000s got the ball rolling, recent advances in machine learning have put things into hyperdrive. Some services even boast up to a 95% reduction in manual labor for simple clips. This is what’s fueling the content explosion on social media and e-commerce, where churning out videos at scale is essential.
When to Choose an AI Tool
So, when should you reach for an AI remover? It all comes down to a trade-off between speed, cost, and quality. Here are the scenarios where it really shines:
- High-Volume Social Media Content: If you're pumping out daily or weekly videos for TikTok or Instagram, the time you save is gold.
- Quick Product Demos: Easily isolate your product and pop it onto a clean, branded background without needing a full studio shoot.
- Internal Communications and Training: Whip up professional-looking internal videos without hiring a dedicated production team.
- Creating Facecam Overlays: A classic for gamers and streamers. Remove your messy room background and overlay your camera feed cleanly onto gameplay.
But let's be realistic—AI isn't perfect. These tools can sometimes get tripped up by fine details like flyaway hair, heavy motion blur, or semi-transparent objects. For that big-budget commercial where every single pixel matters, a traditional green screen setup is probably still your safest bet.
This technology isn't just about a single task, either; it’s changing how we work. Freelancers using AI for these kinds of jobs should also explore how AI agents are transforming freelancing to understand the bigger picture.
Mastering the Classic Green Screen Technique
When you absolutely need flawless, pixel-perfect control over your video, nothing beats the good old green screen. While AI tools are amazing for a quick turnaround, the chroma key technique is still the king in professional settings where every little detail matters.
This is the method you’ll want for high-stakes projects—think polished corporate tutorials, cinematic visual effects, or big-brand ads that demand a perfectly clean separation between the subject and their environment. It’s a technique with deep roots, dating all the way back to the 1940s with early blue-screen methods that won Academy Awards. You can actually explore the fascinating history of this technology and see how it shaped modern filmmaking.
Setting Up Your Green Screen for Success
Here’s a secret that most beginners miss: a great chroma key has less to do with the software and everything to do with the initial shoot. Your main goal is lighting the green screen itself as evenly as possible. Any wrinkles, hotspots, or shadows will create different shades of green, giving your editing software a massive headache when it tries to isolate the color.
The trick is to use separate lights for your screen and for your subject. A classic setup involves placing two soft lights, one on each side of the green screen, to wash it in a flat, uniform color. This is crucial for preventing your subject's shadow from falling onto the screen—a rookie mistake that will cost you hours of cleanup in post-production.
Pro Tip: Make sure your subject is standing several feet in front of the green screen. This not only keeps their shadow off the background but also cuts down on "color spill," which is that nasty green glow that reflects off the screen and onto your subject's hair and shoulders.
Once the screen is perfectly lit, you can focus on lighting your subject. A standard three-point lighting setup (key, fill, and backlight) is perfect for making them stand out. Pay special attention to the backlight; a strong one creates a crisp, defined edge around your subject, making it much easier for the software to separate them from the green.
For a more detailed walkthrough of different setups, check out our complete guide on how to use a green screen.
The Editing Workflow in Premiere Pro or DaVinci Resolve
Alright, you've got your footage. Time to jump into the edit. The process is pretty similar across most professional video editors. In Adobe Premiere Pro, you'll be using the Ultra Key effect. If you're in DaVinci Resolve, the 3D Keyer in the Fusion page is your best friend.
Here’s how it generally breaks down:
Apply the Keyer: Drag your green screen footage onto the timeline and drop your editor’s main chroma key effect onto the clip.
Sample the Color: Grab the eyedropper tool from the effect controls and click on the main green color in your background. Poof! Most of the background should vanish instantly.
Refine the Matte: Now, switch your viewer to the "Alpha" or "Matte" channel. This gives you a black-and-white view. Your subject should be solid white (opaque), and the background should be solid black (transparent). The goal here is to crush any gray areas or noisy speckles.
Adjust the Controls: Start tweaking the settings. In Premiere, you'll use "Matte Generation" controls; in Resolve, look for "Threshold" sliders. You can use tools like "Choke" to subtly shrink the matte and hide any rough edges, while "Soften" will create a less jagged, more natural-looking outline.
Tackle Color Spill: The final touch is using the spill suppression tools. This removes that faint green halo from your subject’s hair or clothing, which is the key to making the final composite look believable and not like a cheap weather report.
Choosing the Right Method for Your Project
So, you know how to remove a video background, but the real million-dollar question is which technique you should actually use. The answer almost always comes down to a classic tug-of-war between speed, quality, cost, and control. There's no single "best" method, just the right tool for the job.
Think of it this way: a social media manager churning out daily TikToks is going to lean on a lightning-fast AI tool every single time. On the other hand, a corporate videographer producing a high-stakes training series will need the pixel-perfect precision you can only get from a proper green screen setup.
AI Automation vs. Manual Control
The main difference really boils down to who's in charge—you or the machine. AI background removers offer incredible convenience by handling the whole process for you. You trade fine-tuned control for raw speed, which is a fantastic bargain for content where "good enough" is exactly what you need.
A green screen, however, puts you squarely in the driver's seat. It's a more involved process that requires time, the right gear, and some know-how, but the payoff is unmatched accuracy. Getting a handle on the differences between SFX and VFX can also help you understand why this level of manual control is so crucial for professional work.
This flowchart breaks down the typical green screen workflow, showing you everything from the initial planning stages to the final edit.
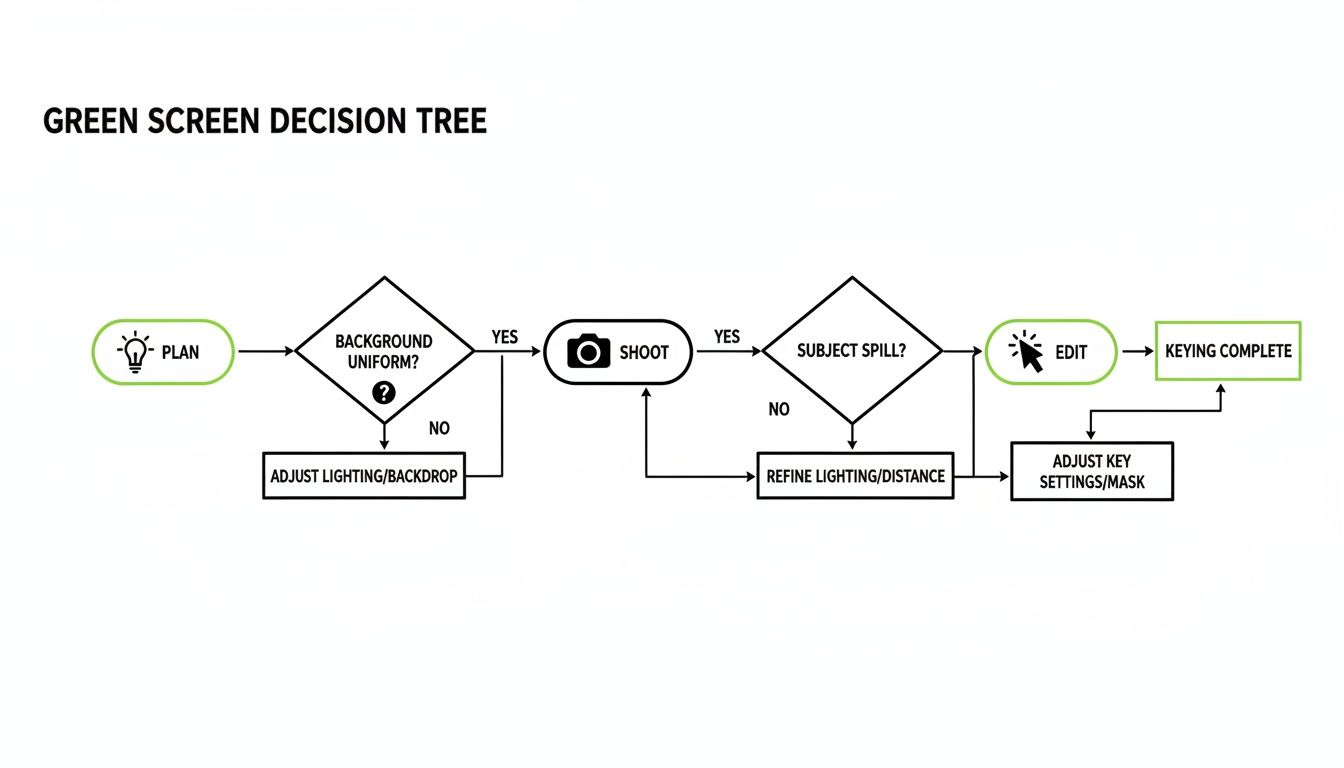
As you can see, getting great results with chroma key isn't just about what you do in the editing suite. The work you put in during pre-production and on the shoot itself is just as critical.
The Quality and Precision Divide
This is where the two methods really show their colors. For high-end productions like feature films and broadcast television, chroma key is still the king. When lit correctly, it delivers flawless results, which is a non-negotiable standard in that world.
AI tools are getting scarily good, but they can still stumble on the tricky details—wisps of hair, fast motion blur, or busy backgrounds. In professional VFX, even a 1-2% error rate per frame is a deal-breaker. For everyday content like social media clips or quick product demos, AI is a lifesaver, nailing an acceptable result in 60–90% of cases.
AI Remover vs. Green Screen: Which Is Right for You?
Still on the fence? This table breaks down the key considerations to help you decide which path makes the most sense for your project.
| Factor | AI Background Remover | Green Screen (Chroma Key) |
|---|---|---|
| Speed | Extremely fast. Often just a few clicks and a short processing time. | Slow. Requires setup, shooting, and manual editing time. |
| Cost | Low. Typically a subscription fee for an online tool. | Higher. Requires investment in a screen, lighting, and stands. |
| Control | Low. You're relying on the algorithm's interpretation. | High. You have granular control over every detail in post-production. |
| Quality | Good to very good. Can struggle with fine details like hair or motion. | Excellent to flawless. The industry standard for professional results. |
| Best For | Social media, quick ads, internal videos, proof-of-concepts. | Commercials, film/TV, high-end corporate videos, training modules. |
| Ease of Use | Very easy. Designed for beginners with no technical skill needed. | Moderate to difficult. Requires knowledge of lighting and editing software. |
Ultimately, your choice depends entirely on your priorities. There's no right or wrong answer, just a different tool for a different task.
Your Final Decision: Choose AI for speed and volume. Choose a green screen for absolute quality and control. Assess your project's specific needs and tolerance for minor imperfections before you commit.
How to Export Your Video With a Transparent Background
You’ve done the hard work of removing the background from your video, but don't celebrate just yet. If you export the file with the wrong settings, all that effort goes down the drain. The secret sauce here is choosing a format that supports an alpha channel—that’s the extra layer of data that tells a video player which parts of your footage are transparent.
Get this wrong, and those transparent areas will probably show up as solid black or white. Getting the export settings right is the final, make-or-break step to creating a truly versatile video you can drop over any other footage.
Picking the Right Format for Transparency
Not all video formats can handle transparency, so your choice really depends on what you plan to do with the final clip. A video for a website has different needs than one for a professional film project.
Here are the go-to options I rely on:
- Apple ProRes 4444: Think of this as the gold standard for professional editing. It gives you incredible quality and a rock-solid alpha channel, which is perfect when you're working in post-production and can't afford to lose any detail. The downside? The file sizes are huge.
- WebM (VP9): This is my top pick for anything web-related. WebM is fantastic at compressing files to keep them small while still supporting transparency. It's the ideal choice for website backgrounds, interactive elements, or online ads where fast load times are critical.
- PNG Sequence: This one's a bit different. Instead of one video file, you export every single frame as a separate PNG image, each with its own transparent background. This approach gives you granular control, making it a favorite for complex motion graphics work in software like Adobe After Effects.
My rule of thumb is simple: If you're editing, use ProRes. If it's for the web, go with WebM. If you're deep in motion graphics, a PNG sequence is your best friend. Sticking to this will save you a ton of re-exporting headaches later.
A Quick Look at the Export Process
Let's walk through a typical export scenario. Imagine you just finished your background removal in a program like Adobe Premiere Pro or After Effects and you're ready to make it official.
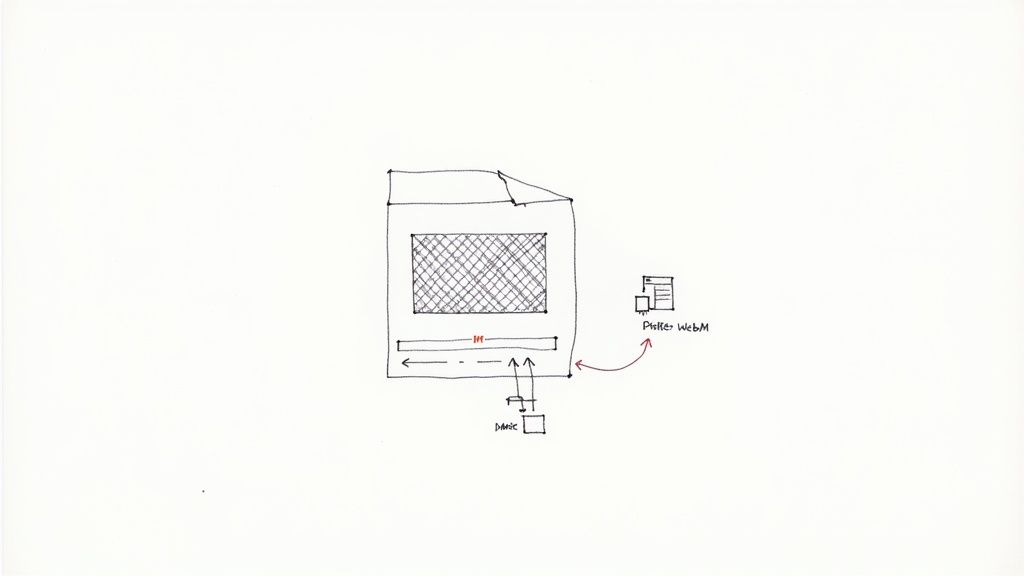
You'll head over to your export menu—often called "Export Media" or the "Render Queue." First, choose a format that can handle transparency, like QuickTime. But the real magic happens in the codec settings. Here, you'll want to select Apple ProRes 4444.
The most important setting to double-check is the channels. Make sure you select "RGB + Alpha". This is you telling the software, "Hey, don't forget that transparency data!" For a more detailed walkthrough, check out our guide on how to make a video with a transparent background.
Click export, and the final .mov file will have your subject floating on a transparent background, ready to be layered into any other video project. This is how you turn a simple clip into a flexible, powerful creative asset.
Common Questions About Removing Video Backgrounds
Even with the best tools, you’ll probably hit a few snags when you first start cutting backgrounds out of your videos. Let's walk through some of the most common headaches people run into and how to solve them for a truly professional look.
One of the biggest pain points is getting the fine details right—especially hair. AI tools have gotten remarkably good, but stray wisps against a cluttered background can still end up looking a little fuzzy or "blocky." On the green screen side of things, bad lighting is the usual suspect for that tell-tale green halo around your subject's head.
The fix, more often than not, is all about refining the edges. In AI-powered tools, hunt for a setting called "feathering" or "edge softening." For green screens, just about any keying effect in software like Adobe Premiere Pro will have spill suppression and choke controls. These are made specifically to clean up those stubborn, messy edges.
What If My Background Is Poorly Lit?
Uneven lighting is the number one enemy of clean background removal. It doesn't matter if you're using a fancy AI tool or a physical green screen; inconsistent light creates shadows and color shifts that completely confuse the software. The result? A patchy, amateur-looking mess. A green screen with a bright hotspot on one side and a dark corner on the other is a guaranteed recipe for a bad key.
For AI tools, the best solution is to get it right from the start. Shoot in a space that’s well-lit and evenly illuminated. If you're stuck trying to rescue existing footage, you might have to roll up your sleeves and do some manual masking on the frames where the AI is clearly struggling.
Key Takeaway: The final quality of your background removal is 90% dependent on the quality of your original footage. Good, even lighting isn't just a friendly suggestion—it's the single most important factor for a clean result. Fix it on set, not in the edit.
When working with a green screen, the trick is to light the screen and your subject separately. Use a couple of soft lights just for the green screen, aiming to get a perfectly flat, uniform color. Only after the screen is perfectly lit should you even think about lighting your subject.
Can I Remove the Background from a Moving Video?
You absolutely can, but motion brings its own unique set of problems to the table. The main issue you'll face is motion blur. When your subject moves quickly, the edges of their body naturally blur into the background, and that can be a real challenge for any software to interpret cleanly.
- AI Tools: The best AI models are trained on massive datasets and handle motion surprisingly well. That said, really fast movements can still cause some weird artifacts or a wobbly, distorted edge.
- Green Screen: Motion blur is less of a problem here, as long as your camera's shutter speed is high enough to capture sharp frames. The real challenge with a moving subject on a green screen is keeping them within the lit area and ensuring the lighting stays consistent as they move around.
No matter which method you use for removing a video background with a moving subject, always do a spot-check. Go through the trickiest parts of the footage frame-by-frame to catch any strange glitches before you hit export. A couple of minutes of quality control can save you a world of hurt later.
Ready to skip the hassle of green screens and complicated editing software? With VideoBGRemover, you can erase any video background in just a few clicks. Our AI-powered tool delivers clean, professional results in minutes, letting you get back to creating. Try it for free today and see for yourself.
Tagged with
Ready to Remove Your Video Background?
See a free preview before you buy.
No credit card required • Free preview on every video