Remove Background from Video Online Instantly
Learn how to remove background from video online with AI. This guide provides actionable tips to create professional videos without a green screen.
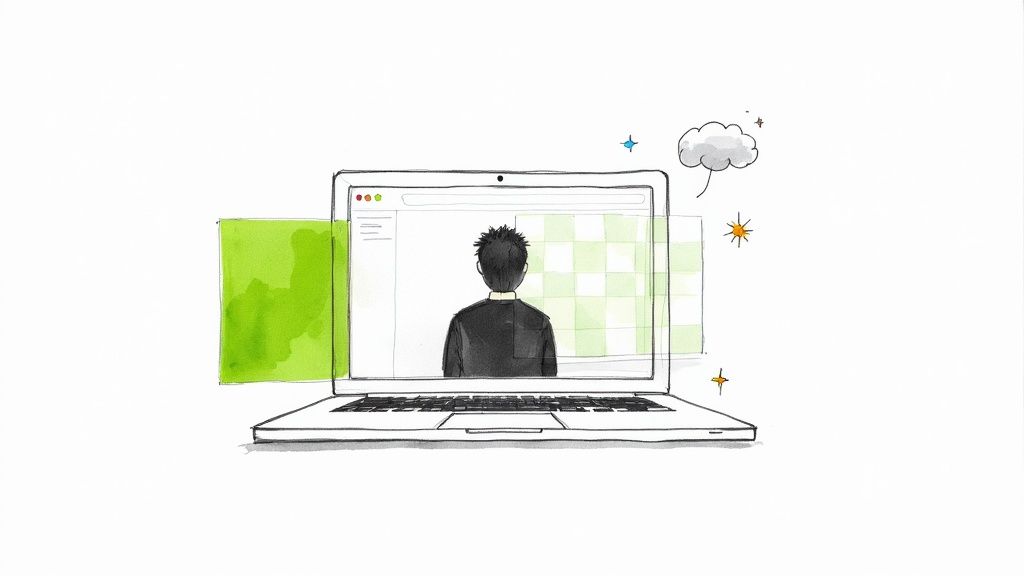
If you need to get rid of a video background quickly, an online AI tool is your best bet. Just upload your MP4 or MOV file, and the software automatically finds and removes the background. What you're left with is a clean, transparent video, all set for whatever new scene you want to drop in. This whole process completely sidesteps the old-school hassle of complex software or a physical green screen.
The Green Screen Is Officially Obsolete
It wasn't that long ago that changing a video background was a major production. You had to mess with bulky green screens, get the lighting just right, and then spend hours in expensive editing software. It was a tedious job, mostly left to professionals with actual studio space.
Today, that entire headache is gone. Simple, browser-based tools can now give you professional-looking results in just a few minutes.
This shift is a big deal. Modern online tools for background removal are powered by artificial intelligence, which is completely changing how we create content. You can see this trend everywhere, especially in discussions around AI applications in digital marketing. Instead of painstakingly keying out colors frame by frame, you can now let a smart algorithm handle all the tough stuff for you.
This tech has opened up professional-quality video to everyone:
- Content Creators: You can now film polished YouTube or TikTok videos without needing a dedicated studio.
- Marketers: Need to create a clean product video or an ad on a tight schedule? No problem.
- Professionals: Easily swap out that messy home office for a slick, branded background during your next video call.
The demand for these tools is exploding. The global market for video background removal was valued at roughly USD 1.2 billion in 2024, and that number is only growing as more people and businesses need to create engaging digital content. This growth shows just how crucial this technology has become.
Why Online Tools Are the New Standard
The move away from traditional methods isn't just about making things easier—it's about being more efficient and accessible. While a physical setup still has its uses, it’s definitely not the only game in town anymore. Honestly, for most people, the benefits of using an online tool far outweigh the hassles of a green screen.
You can learn more about the old way of doing things here: https://videobgremover.com/green-screen. But with AI, you get to skip all the setup, teardown, and technical headaches, letting you focus on what really matters: your content.
The biggest win here is speed. A task that used to take hours of careful editing can now be done in the time it takes to grab a coffee. This efficiency means creators and businesses can churn out more high-quality videos than ever before.
Let's look at a side-by-side comparison to really see why these online tools have taken over.
Why Online Video Background Removers Win
Here’s a quick breakdown of how modern AI tools stack up against the traditional green screen or desktop software approach.
| Feature | Online Tool Advantage | Traditional Method Limitation |
|---|---|---|
| Speed & Efficiency | Processes videos in minutes with AI automation. | Requires manual setup, lighting, and editing. |
| Cost | Often free or low-cost pay-as-you-go models. | High initial investment in screens, lights, and software. |
| Accessibility | Works on any device with an internet connection. | Tied to specific software and hardware. |
| Flexibility | Removes any background, not just a single color. | Only works with a properly lit green or blue screen. |
When you look at it this way, the choice becomes pretty clear. For the vast majority of projects, the agility and cost-effectiveness of an online remover just can't be beaten.
Prepping Your Video for a Flawless Cutout
Before you jump into removing the background from your video, let’s talk about a fundamental truth I've learned over years of editing: your final result is only as good as your original footage. Taking just a few minutes to prep your video isn't an extra step; it's the most important one. It's the difference between a crisp, professional cutout and a glitchy, amateur-looking mess.
You're essentially giving the AI a clear roadmap to follow. The goal is to create as much visual separation as possible between your subject and whatever is behind them. Don't worry, this doesn't mean you need a fancy studio setup. It's all about being smart with what you have.
Light Your Subject Like a Pro
Good lighting is non-negotiable. It's the single biggest factor in getting a clean edit. When your subject is lit well, the AI can clearly see their outline and accurately trace the edges.
A common mistake I see is shooting with a bright window or a strong light source directly behind the subject. This creates a silhouette, plunging the subject into shadow and making it nearly impossible for any software to figure out where they end and the background begins.
Instead, have your subject face the light source. A simple ring light is fantastic, but even just positioning them to face a large window will provide that soft, even light you need. This eliminates those pesky flickering edges and halo artifacts in the final video.
Keep the Background Simple
Look, you don't need a green screen anymore—the tech is that good. But that doesn't mean you should film in front of a chaotic scene. A plain, solid-colored wall is always your best bet.
Why? Because busy backgrounds with tons of patterns, different colors, or moving objects just confuse the AI. Imagine trying to cut someone out from in front of a bookshelf packed with trinkets or a leafy plant. The software might accidentally erase parts of your subject or leave bits of the background behind.
If you're aiming to swap in a specific color later, you can learn more about perfecting a video with a white background in our guide on that topic.
My Go-To Tip: Always wear clothes that contrast with whatever is behind you. If you're shooting against a light wall, don't wear a white shirt. That simple pop of color gives the AI a bold, clear line to follow.
Lock Down Your Camera
A shaky camera is the enemy of a clean cutout. Any sudden jolts or rapid pans can introduce motion blur, which is an absolute nightmare for an AI. It smudges the pixels together, making it impossible to define a sharp edge.
The fix is easy. Use a tripod.
Don't have one? No problem. Just prop your phone or camera on a stack of books, a shelf, or any stable surface. The steadier the shot, the sharper the footage, and the cleaner the final background removal will be. It's as simple as that.
Your Guide to Removing Video Backgrounds, Step by Step
Alright, let's get into the nitty-gritty. I'm going to walk you through how to remove a background from video online with a typical AI tool. Forget about complicated software manuals; this is all about getting your clip uploaded, letting the AI do its thing, and then tweaking the final result.
The whole process is surprisingly straightforward, built for speed and simplicity. Most of these online tools follow a similar workflow, so what you learn here will apply almost anywhere. The magic is in the algorithm, which handles the tough job of separating your subject from everything else, frame by painful frame.
Getting Your Video Uploaded
First things first, you have to get your video into the system. Pretty much every tool out there will have a big, obvious "Upload Clip" or "Select File" button waiting for you on the homepage. That’s your starting line.
From there, you can usually just drag and drop your file right into the browser. Or, you can click to browse your computer's folders the old-fashioned way. Most common formats like MP4, MOV, and WebM are almost always accepted. Once you’ve picked your file, the upload starts on its own. It might take a minute or two, depending on your internet connection and how big the video is.
This ease of use is a huge reason why the background removal software market exploded to USD 1.2 billion in 2023 and is on track to hit USD 4.7 billion by 2033. This growth is all about making powerful tools accessible to everyone, not just pro editors.
The infographic here really nails the simple prep work that gives the AI the best footage to work with.
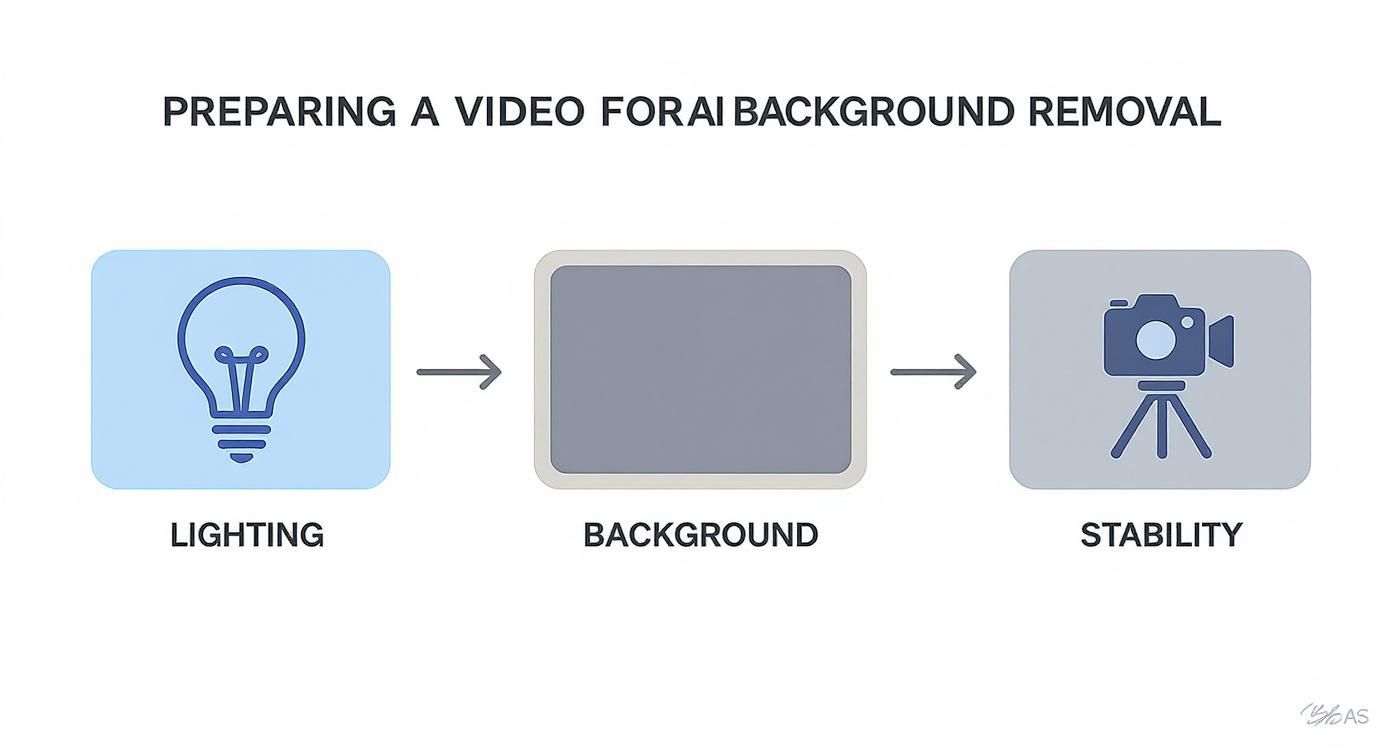
As you can see, a little bit of planning—like good lighting, a simple background, and a steady camera—can make a world of difference for your final video.
Preview, Tweak, and Customize
Once your video is uploaded and processed, you'll see a preview. This is your first look at the clip with the background completely gone. Your subject will probably be floating on a transparent or checkered grid, which lets you easily spot any little flaws in the cutout.
Now comes the fun part: adding a new background. You'll typically have a few options to play with.
- Solid Colors: Great for creating clean, on-brand content or simple talking-head videos.
- Custom Images: This is where you can get creative. Upload your own picture to put your subject anywhere—a professional office, a tropical beach, you name it.
- Video Backgrounds: Want to add some motion? You can drop another video behind your subject for a really dynamic look.
A Quick Tip from Experience: When you're picking a new background, always pay attention to the lighting. If your subject was filmed in bright, cool daylight, dropping them into a warm, dimly lit scene will look instantly fake. Try to match the lighting as closely as you can for a much more believable result.
Exporting Your Final Masterpiece
Happy with how it looks? Time to export. This is the final step where you download your finished video. You’ll usually get a few choices for resolution and format.
For something quick like a TikTok or an Instagram Reel, a standard MP4 file at 1080p is usually perfect. But if you’re a professional who needs to use this clip in other editing software, you’ll want to look for an option that preserves the transparency.
These pro-level formats often include:
- PNG Sequence: A series of individual transparent images.
- MOV (ProRes 4444): A high-quality video codec that supports an alpha channel (transparency).
- WebM (VP9): A modern format for the web that also handles transparency well.
While VideoBGRemover is a fantastic tool, it's always good to know what else is out there. If you want to compare different platforms, we put together a guide on the best AI tools with video background removal capabilities. Choosing the right export format from the start will make sure your video looks crisp and fits perfectly into your project, whether you’re just sharing it online or it's one piece of a much bigger production.
Creative Ways to Use Your New Videos
So, you’ve mastered the art of removing a video background. What now? The real fun begins. This isn't just a neat party trick; it's your new secret weapon for creating content that looks slick, professional, and endlessly creative. You're no longer limited by your physical surroundings.
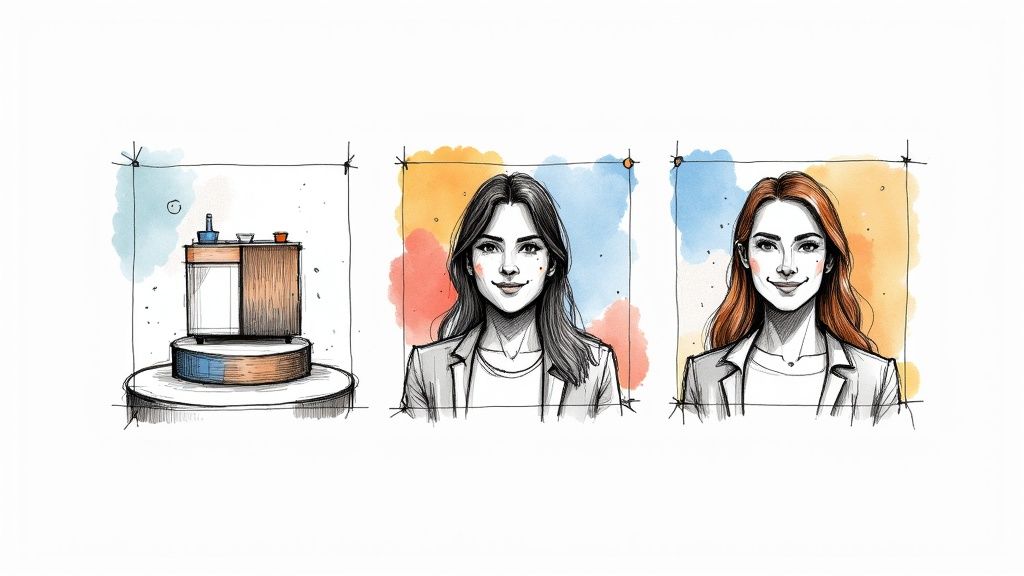
Think about it from an e-commerce perspective. Instead of a boring product photo, you can now feature a video of your product in motion. Drop it into a luxury virtual studio or make it float against a clean, minimalist backdrop. This one change can dramatically boost your product's perceived value and grab a potential customer's eye much faster than a static image ever could.
With that clean video cutout, you can easily create professional assets like product mockups with transparent backgrounds for just about anything. Imagine showcasing your product in a dozen different settings without ever having to reshoot.
Take Your Social Media and Brand to the Next Level
If you’re a content creator, the possibilities are practically endless. Want to make a viral reaction video? Superimpose yourself over the latest trending clip. You can create hilarious memes by dropping yourself into completely unexpected scenes, all without ever leaving your desk.
This isn't just for influencers, either. Professionals can find huge value here:
- Online Courses: Swap out that cluttered home office for a clean, branded background. Your educational content will instantly feel more polished and authoritative.
- Client Calls: Keep your professional image consistent during virtual meetings, no matter where you're actually calling from.
- Marketing Pitches: Imagine presenting a new concept where you appear right alongside your product demos or data charts. It’s far more compelling.
The power to instantly change your video's environment means you can adapt your content for any audience or platform on a whim. It’s a game-changer for maintaining brand consistency and a professional edge.
A Skill in High Demand
The technology behind this is improving at a breakneck pace because the demand is exploding. While the general background removal market is already massive, the video-specific segment is growing even faster.
According to market analysis, the video background removal industry is projected to hit USD 7.12 billion by 2033, growing at an impressive 18.9% compound annual growth rate. This boom is driven by the rise of short-form video and the incredible accessibility of AI tools like VideoBGRemover.
The takeaway is clear: learning how to remove video backgrounds isn't just a handy skill anymore. It’s quickly becoming essential for anyone serious about digital communication.
Troubleshooting Common Glitches and Imperfections
As incredible as AI tools are, they aren't perfect. You'll inevitably run into little glitches that keep your video from looking polished. But don't worry—most of these issues are surprisingly easy to fix, either by adjusting your next recording or making small tweaks in the editor.
The most common headache is what we in the biz call "edge chatter" or a "halo effect." You know the look: the outline around your subject shimmers, flickers, or has a weird, blurry glow. That's a dead giveaway that the AI had a tough time telling where your subject ended and the background began.
This almost always pops up when the background is too cluttered or the lighting just isn't right. A low-contrast scene, like someone wearing a dark shirt against a dark wall, is a classic recipe for this problem. The AI is forced to make a judgment call, and that's when you get those distracting imperfections.
Fixing Flickering Edges and Halos
Honestly, the best fix is to think about this before you even hit record. Your goal should be to create as much contrast as possible. If your subject is standing in front of a light-colored wall, have them wear darker clothes. If the background is dark, a lighter outfit will give the AI a crisp, clean edge to lock onto.
Good, even lighting is just as crucial. A single, harsh light from above can cast strange shadows that the AI might mistake for part of your subject. The easiest solution is to add a light source that illuminates your subject from the front. This smooths out the shadows and helps create that clean silhouette you're looking for.
The goal is to make the AI's job as easy as possible. Think of it like tracing a picture: a bold, clear outline is always easier to follow than a faint, sketchy one. Give the AI a bold line, and you'll get a perfect cutout every time.
When the AI Erases Too Much
What about when the software gets a little too aggressive and nips off part of your subject? I've seen this happen with fine details like stray hairs, the gap between an arm and the body, or even complex patterns on a shirt. The AI sometimes sees these small or low-contrast areas and assumes they're part of the background.
A higher-resolution video file can make a world of difference here. More pixels mean more data for the AI to analyze, which helps it make smarter decisions about what to keep and what to discard.
If you're still seeing parts of your subject disappear, here are a few other tricks I've learned:
- Avoid Busy Patterns: Clothing with super fine stripes or intricate designs can sometimes trip up the algorithm. When in doubt, solid colors are your friend.
- Check Your New Background: Occasionally, the problem isn't the cutout itself but the new background you've chosen. If the lighting in your new background is completely different, it will make even the tiniest edge flaws stand out.
- Adjust Your Position: If the AI keeps chopping off your hands when you gesture, try moving a little further away from the wall or whatever is behind you. That extra depth helps create more separation.
Once you understand what causes these little quirks, they become much easier to solve. This is the kind of know-how that lets you remove a background from video online and get a result that looks seamless and completely professional.
Got Questions? We’ve Got Answers.
Even when a tool is simple to use, a few questions always pop up. Let's dig into some of the most common things people ask when they start to remove a background from a video online.
Can I Do This on My Phone?
Yes, absolutely. Modern online tools like this are built from the ground up to work seamlessly on your phone. You can handle the entire process—uploading, editing, and downloading—right from your mobile browser. No app required.
This is a game-changer for creators who are always on the move. Picture this: you shoot a quick clip for your Instagram Reels, and within minutes, you've swapped out the background and posted it, all from the same device. That kind of convenience is exactly why these tools are catching on.
Is a Green Screen Still Necessary?
Nope! That’s the beauty of using an AI-powered tool. A green screen is no longer a must-have piece of equipment.
That said, it can still help. Filming against a solid-colored background—green, blue, or anything that contrasts sharply with you—gives the AI a much clearer separation line to work with. The result is an exceptionally crisp cutout with fewer little imperfections around the edges. So, think of it as an optional upgrade for perfectionists, not a requirement to get the job done.
Key Takeaway: A green screen is a nice-to-have, not a need-to-have. Good lighting and a simple, uncluttered background will get you 95% of the way to a great result without any special gear.
Are These Online Tools Really Free?
That’s a fair question, and the answer is usually "yes, but with some limitations." Most platforms, including VideoBGRemover, run on what’s known as a freemium model. You get access to the main features for free, but there are often a few catches.
Here’s how it typically breaks down:
- What's Free: You can almost always upload your video, see a preview of the background removal, and often download a shorter, lower-resolution version, sometimes with a watermark.
- What's Paid: To get your full-length video in high resolution without a watermark, you'll usually need to upgrade. Paid plans also tend to unlock pro-level formats, like MOV files with a true transparent background.
This approach lets you test everything out to make sure it works for your specific video before you ever pull out your wallet.
What’s the Best Video Format to Upload?
For the best possible outcome, always start with the highest quality video file you have. While most tools are flexible and accept common formats like MP4 and MOV, the source quality is far more important than the file extension.
A video shot in 1080p or 4K gives the AI significantly more pixel data to analyze, which translates into a more precise and cleaner cutout around your subject. If you upload a grainy, low-resolution clip, the final result will reflect that. Always feed the tool the best version of your footage for a professional-grade finish.
Ready to create eye-catching videos with clean, custom backgrounds? Give VideoBGRemover a try and see for yourself how simple it is to get studio-quality results in just a few clicks. Start for free at https://videobgremover.com.
Tagged with
Ready to Remove Your Video Background?
See a free preview before you buy.
No credit card required • Free preview on every video