How to Reduce MOV File Size Without Losing Quality
Discover how to reduce MOV file size with actionable strategies. Learn to master codecs, resolution, and tools to compress video for easy sharing and storage.
If you've ever exported a video and been shocked by its massive file size, you're not alone. The first step in shrinking a MOV file is understanding why it’s so big in the first place. It's usually not a mistake—it's by design.
Why Your MOV Files Are So Large
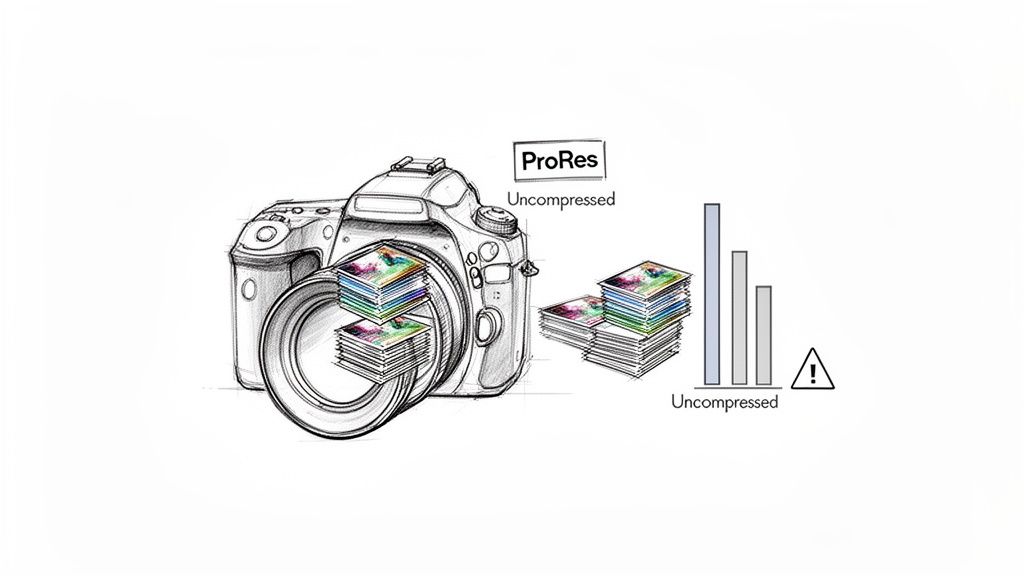
That huge MOV file sitting on your hard drive is likely packed with high-quality, minimally compressed video data. The MOV container format, originally developed by Apple for QuickTime, is a favorite in professional circles precisely because it can hold video and audio streams that retain incredible detail.
This is a huge advantage during editing. Codecs often wrapped in a MOV container, like Apple ProRes, are built to preserve as much visual information as possible. This makes tasks like color grading, applying visual effects, and re-exporting much cleaner because you aren't introducing compression artifacts with every save.
The downside? That "nearly lossless" quality comes at a steep cost: disk space.
The Trade-Off: Quality vs. Convenience
Think of your giant MOV file like a RAW photograph from a high-end camera. It's full of rich data, giving you the ultimate flexibility for editing. A compressed video, on the other hand, is like a JPEG. It’s much smaller and way easier to share, but a lot of that original data has been permanently thrown out to achieve that smaller size.
Your large MOV is probably using a codec that stores a massive amount of information for nearly every single frame. This is what makes scrubbing through a timeline feel so smooth in Premiere Pro or Final Cut, but it’s completely impractical for uploading to YouTube, sending to a client, or posting on social media. This is where learning to reduce mov file size becomes an essential skill.
The real challenge isn't just making the file smaller. It's about shrinking it smartly—finding that sweet spot between a file that won't take hours to upload and one that still looks sharp and professional.
Before we dive into the "how," let's quickly summarize the key factors that contribute to a MOV file's size.
Key Factors Affecting MOV File Size
| Factor | What It Is | Impact on File Size | Best Practice |
|---|---|---|---|
| Video Codec | The algorithm used to compress and decompress the video data (e.g., ProRes, H.264). | Very High | Switch from editing codecs (ProRes) to distribution codecs (H.264 or H.265). |
| Bitrate | The amount of data used to encode one second of video, measured in Mbps or kbps. | Very High | Lower the bitrate to a level appropriate for the intended viewing platform (e.g., 5-8 Mbps for 1080p web video). |
| Resolution | The number of pixels in each frame (e.g., 1920x1080 or 3840x2160). | High | Downscale if the viewing device doesn't require the native resolution (e.g., 4K to 1080p). |
| Frame Rate | The number of individual frames displayed per second (e.g., 24, 30, 60 fps). | Moderate | Reduce if high frame rates aren't necessary (e.g., 60 fps to 30 fps for standard content). |
Understanding these elements is the key to taking control of your export settings.
The Path to a Smaller, Sharper File
Luckily, you have a few powerful levers you can pull to get that file size down. The most effective methods, which we’ll walk through in this guide, involve re-encoding the high-quality source into a more efficient delivery format.
This typically means you'll be:
- Changing the Codec: Swapping a bulky professional codec like ProRes for a highly efficient one like H.264 or H.265 (HEVC).
- Adjusting the Bitrate: Dialing down the amount of data used for each second of video.
- Modifying Resolution and Frame Rate: Downscaling from 4K to 1080p or dropping from 60fps to 30fps where it makes sense.
Getting a better grasp of the different MOV file formats can give you a deeper appreciation for why these settings matter so much. By mastering these techniques, you'll be able to turn those massive master files into lightweight, shareable videos that still look fantastic.
Choosing the Right Codec for Maximum Compression
If there's one change that will make the biggest dent in your MOV file size, it's choosing the right codec. It's a common hang-up, so let's get it straight: MOV is just the container—think of it as a box. The codec is what’s inside that box, the specific method used to compress the video data.
Many of us work in professional environments where the default is a MOV container with a high-quality editing codec like Apple ProRes. ProRes is brilliant for post-production work because it values detail and buttery-smooth editing over a small file size. But for sharing, uploading, or archiving, it's a monster.
This is where delivery codecs save the day. The goal is to take that pristine ProRes video and re-encode it with a much smarter, more efficient algorithm for the final product.
Comparing Popular Video Codecs
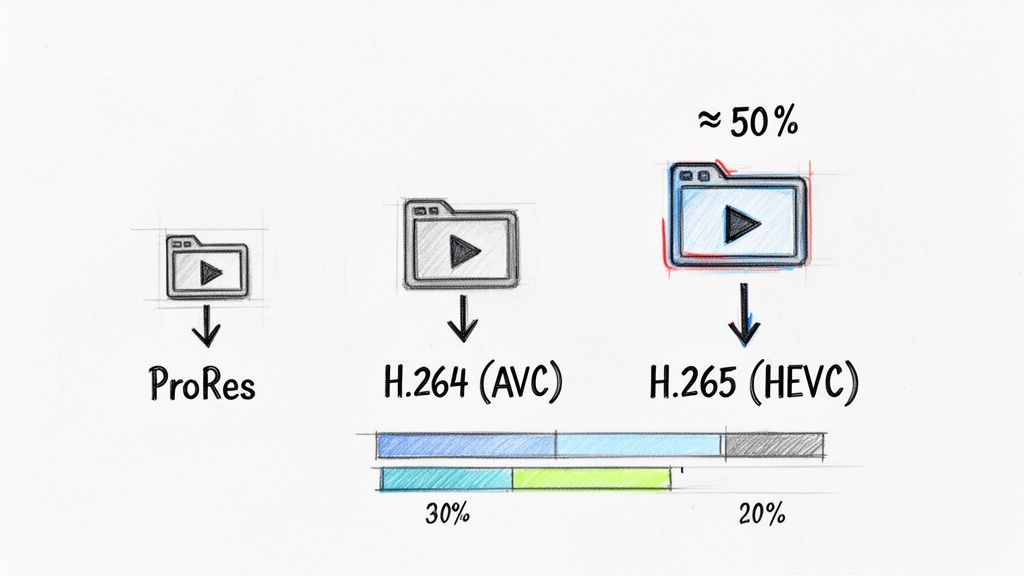
When it comes to efficient video delivery, two codecs stand head and shoulders above the rest: H.264 (also called AVC) and its newer sibling, H.265 (or HEVC). These were built from the ground up for one thing: creating small files that still look fantastic.
- ProRes: This is your master codec. It's perfect for the edit and color grade but creates enormous files. Always keep your ProRes export as the high-quality source.
- H.264 (AVC): For years, this has been the industry workhorse. It strikes an incredible balance between quality, file size, and near-universal compatibility on almost every device imaginable.
- H.265 (HEVC): This is the modern powerhouse. H.265 can deliver the same visual quality as H.264 in a file that's up to 50% smaller. That difference is especially dramatic when you're working with high-resolution video like 4K.
Think of it like this: ProRes is the original, unedited manuscript of a book. H.264 is the mass-market paperback, and H.265 is the highly compressed e-book. Each has its purpose, but the last two are optimized for distribution.
Making this switch is a game-changer. Those bloated MOV files, often born from Apple's QuickTime ecosystem, are packed with high-bitrate data that needs to be wrangled before you send it out into the world.
MOV vs MP4 What Is the Difference
This whole codec discussion naturally leads to another question: should you convert your MOV to an MP4? Most of the time, yes—and here's why.
Like MOV, MP4 is just a container. The key difference is that the MP4 container was specifically built to hold H.264 and H.265 video streams. This design choice gives it a huge advantage in compatibility for web and mobile playback.
So, when you re-encode your video using H.264 or H.265, saving it inside an MP4 container is nearly always the right move for your final delivery file. The same core ideas of choosing the right format and compression settings are universal in digital media, which you can see in practices like image optimization for web performance.
In practice, a solid workflow looks like this:
- Export a Master File: Finish your edit and export a high-quality master, like a MOV file using the ProRes 422 codec. This is your vault copy.
- Create a Delivery Version: Now, take that master file and run it through a compression tool.
- Choose Your Delivery Settings: Select H.264 or H.265 as the codec, then save this new, much smaller file inside an MP4 container.
This two-step process gives you the best of both worlds: a pristine, archive-quality version of your work and a lightweight, optimized file ready for any platform.
Mastering MOV Compression with the FFmpeg Command Line
When you need exact, repeatable results, graphical interfaces just don't cut it. For professionals who demand absolute control over their video compression, the command-line tool FFmpeg is the only real answer. It's a free, open-source workhorse that can handle practically any audio or video task you throw at it, especially when you need to reduce MOV file size precisely.
The command line can look a little scary at first, I get it. But once you learn a few key commands, you can build incredibly powerful and automated workflows that save a ton of time. The real power of FFmpeg is in its parameters—they let you fine-tune every single aspect of the encoding process.
Your Go-To Command: Basic MOV to MP4 Conversion
Let's start with the most common job: taking a huge ProRes MOV file and turning it into a lean, web-friendly H.264 MP4. A single command can often shrink your file size by over 90% without a noticeable drop in quality.
The secret sauce here is the -crf (Constant Rate Factor) parameter. Instead of telling FFmpeg to hit a specific bitrate, you're telling it to aim for a certain level of visual quality.
Here's the command:
ffmpeg -i input.mov -c:v libx264 -crf 23 output.mp4
Let's break that down:
-i input.mov: This is your source file, the big one you want to shrink.-c:v libx264: This tells FFmpeg to use thelibx264encoder, which creates highly compatible H.264 video.-crf 23: This is the quality setting. It’s a bit counterintuitive—lower numbers mean higher quality and bigger files. A value around 18 is often considered visually lossless, while anything up to 28 usually looks great for web use.
I almost always use the CRF method because it’s smart. It gives more data to complex, fast-moving scenes and less to static shots, which is a much more efficient way to maintain perceived quality. You can dive deeper into this concept in our full guide on video compression without losing quality.
Tackling More Advanced Compression Scenarios
Once you've got the hang of that basic command, a whole world of possibilities opens up. With just a few tweaks, you can tailor your output for specific platforms or tricky requirements.
For example, sometimes an ad network or client will demand a video file under a specific bitrate. For that, you'll want to switch from CRF to a target bitrate using the -b:v flag.
Targeting a 5 Mbps Bitrate:
ffmpeg -i input.mov -c:v libx264 -b:v 5M -maxrate 5M -bufsize 10M output.mp4
Pro Tip: For the absolute best quality at a fixed bitrate, use two-pass encoding. It takes longer because FFmpeg analyzes the entire video on the first pass before it starts encoding on the second, but the results are almost always cleaner and more efficient.
What if you're working with transparency? If you have a MOV with an alpha channel—maybe something you exported from After Effects or created with a tool like VideoBGRemover—you need a format that supports it. WebM with the VP9 codec is perfect for this.
Preserving Transparency in a WebM File:
ffmpeg -i transparent_input.mov -c:v libvpx-vp9 -b:v 0 -crf 30 output.webm
This command will give you a high-quality, transparent WebM file that's ideal for web animations and video overlays. This kind of flexibility is exactly why FFmpeg is an indispensable tool for anyone serious about their video workflow.
Friendly Tools for Easy MOV File Compression
While the command line gives you ultimate control, it’s definitely not the only game in town. For most people, a good old graphical user interface (GUI) is the fastest and most straightforward way to reduce MOV file size without sacrificing quality. These tools take all the complicated encoding settings and wrap them up in simple presets and sliders.
This is the perfect route when you need to quickly compress a few videos for a social media campaign or shrink a tutorial before uploading it to a course platform. No need to memorize commands—you just point, click, and go.
HandBrake: The Free Desktop Powerhouse
When it comes to free video converters, HandBrake is a legend. It’s an open-source workhorse for Mac, Windows, and Linux that hits the sweet spot between ease of use and deep customization.
For most jobs, HandBrake’s built-in presets are all you’ll ever need. Just drag your big MOV file into the app, pick a preset like "Fast 1080p30," and click "Start Encode." HandBrake does the heavy lifting, usually converting your file to a universally friendly MP4 using the H.264 codec.
Want a bit more control? Head over to the "Video" tab. There, you can tweak the Constant Quality slider (which works a lot like FFmpeg's CRF) or punch in a specific average bitrate. It’s a fantastic way to learn the ropes of compression in a visual, hands-on environment.
My personal workflow often involves using HandBrake for batch processing. If I have a dozen high-resolution MOV clips from a shoot, I can load them all into the queue, apply the same "Vimeo YouTube HQ 1080p" preset to every single one, and just let it run overnight. It's a massive time-saver.
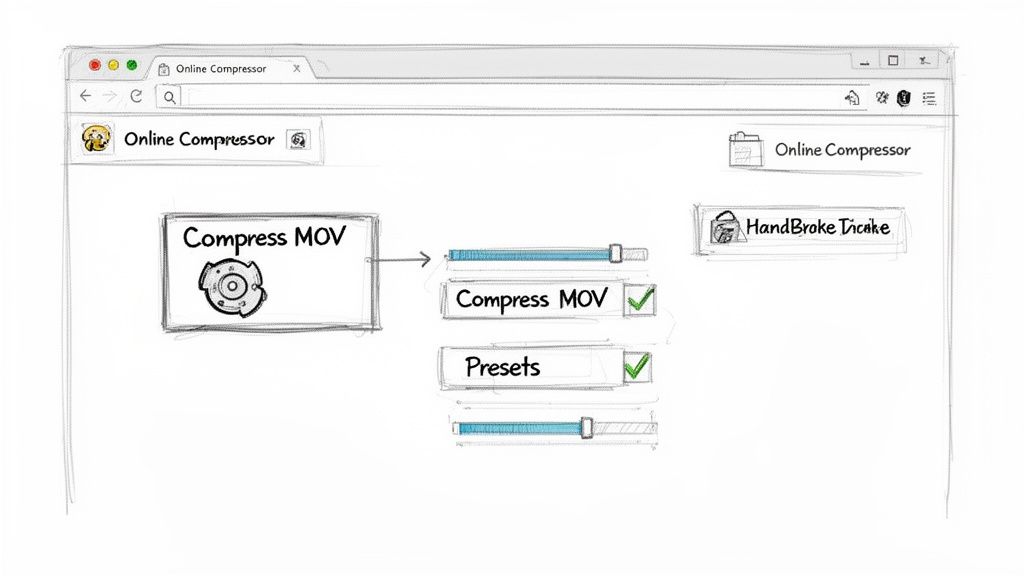
Online Video Compressors for Quick Fixes
But what if you don’t want to install any software? That's where online video compressors shine. They're incredibly handy for those one-off tasks where you just need to get something done fast. You upload your MOV, pick a compression level, and download the smaller version a few minutes later.
These browser-based tools are best for smaller files and situations where you don't need to fine-tune every setting. For example, if you have a 100 MB video clip that you absolutely have to get under a 25 MB email attachment limit, an online tool is your quickest bet. They typically keep it simple with options like "High Quality," "Medium Quality," and "Low Size."
This simplicity is their biggest advantage. Just be mindful of privacy if your video is sensitive, and keep an eye out for watermarks on some of the free services. For a detailed breakdown, our guide on the best video compressors runs through several popular options to help you pick the right one.
Comparing Popular Video Compression Tools
Choosing the right tool can feel overwhelming, so here’s a quick rundown to help you decide based on what you need to accomplish.
| Tool | Best For | Pros | Cons |
|---|---|---|---|
| FFmpeg | Power users, developers, and automated workflows requiring total control. | Unmatched flexibility; supports virtually any codec/format; scriptable. | Steep learning curve; no graphical interface; easy to make mistakes if you're not careful. |
| HandBrake | Everyday users, batch processing, and learning compression settings. | Free and open-source; great balance of presets and manual controls; cross-platform. | Can be intimidating for absolute beginners; fewer advanced codec options than FFmpeg. |
| Online Compressors | Quick, one-off compressions for non-sensitive, smaller files. | No installation required; extremely easy to use; fast for small files. | Privacy concerns; often have file size limits; may add watermarks; limited control over settings. |
In the end, it all comes down to the job at hand. HandBrake offers more power for big or sensitive files, while online tools are champs of speed and convenience for smaller, less critical tasks.
Making Smart Cuts to Resolution and Frame Rate
Let's talk about the low-hanging fruit. Beyond the technical weeds of codecs and bitrates, two of the easiest and most impactful changes you can make are to your video's resolution and frame rate. It really comes down to a simple question: where is this video going to live?
Frankly, not every video needs to be a 4K, 60 frames-per-second behemoth. That's fantastic for a cinema screen, but for a 6-inch phone display? It’s complete overkill.
Making smart adjustments here can slash your file size without anyone in your audience even noticing. A classic example is starting with gorgeous 4K footage. While it looks stunning on a big monitor, that level of detail is lost on platforms like Instagram or even most web embeds. Simply downscaling from 3840x2160 (4K) to 1920x1080 (1080p) can shrink the file by up to 75%. On a mobile device, the perceived loss in quality is practically zero.
This diagram breaks down the workflow—it’s a straightforward path from a heavy source file to a nimble, web-ready video.
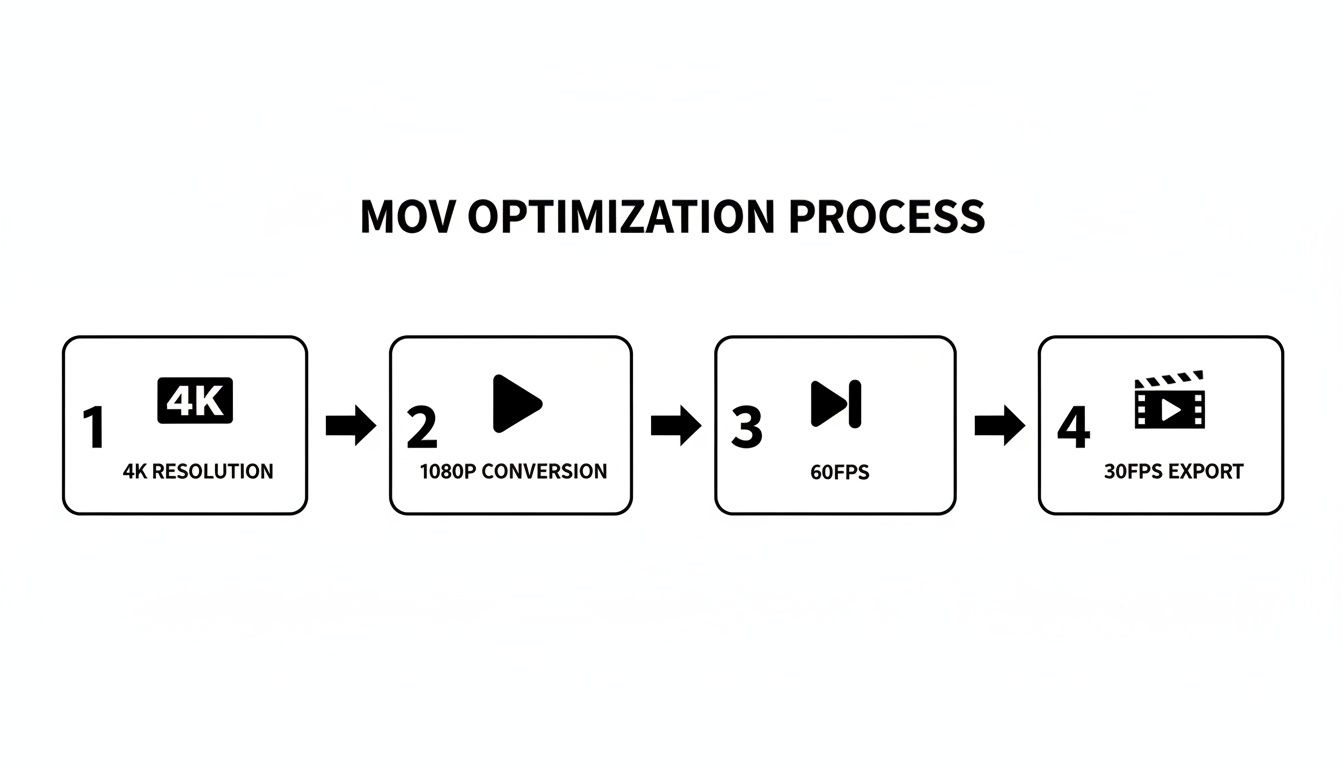
As you can see, by aiming for web-friendly standards like 1080p and 30fps, you can get massive file size reductions without a lot of fuss.
Nailing the Right Frame Rate
The same "just enough" logic applies to frame rate. A high frame rate like 60 frames per second (fps) is fantastic for specific uses—think silky-smooth slow-motion shots or capturing fast-paced gaming footage. But for the lion's share of content out there, like interviews, product demos, or talking-head videos, all those extra frames are just dead weight.
Dropping your frame rate from 60 fps to a more standard 30 fps (or the cinematic 24 fps) literally cuts the amount of data in half for that portion of the video stream. It's a simple, strategic trade-off. You're getting rid of data that doesn't add anything meaningful to the viewing experience, and your file size plummets as a result.
My Two Cents: Before you export, always ask yourself: "Where will people watch this?" If the answer is social media or a phone, dropping to 1080p and 30 fps is one of the quickest wins you can get for shrinking your MOV file.
This is a fundamental part of my own workflow, especially for social content. For creators on YouTube Shorts or TikTok, it's non-negotiable. Think about the numbers: a typical MOV file at 720p is around 100-200 MB per minute. That jumps to 200-400 MB/min for 1080p, and a massive 500-1000 MB/min for 4K. You can check out more video size statistics to see just how quickly those savings add up.
Building a Smarter Compression Workflow
Putting all these techniques together is what really separates the pros from the amateurs. It’s not just about knowing which buttons to press; it’s about creating a repeatable process that saves you serious time and disk space on every project you touch.
The first, and honestly most overlooked, step has nothing to do with compression at all: trim your footage. Seriously. Every extra second you can shave off the top or the end is pure file size savings. Cut that awkward intro or the few seconds of silence after the action finishes—it adds up faster than you'd think.
Set Up for Batch Processing
If you’re dealing with a lot of video, whether you're a social media manager or a course creator, compressing files one by one is just a soul-crushing waste of time. This is where batch processing becomes your new best friend. Tools like HandBrake and FFmpeg are built for this, letting you apply the same settings to an entire folder of videos automatically.
Take a few minutes to create a preset you can rely on—maybe a solid 1080p, 30fps export using the H.264 codec—and just let the software churn through your files in the background. It's a total game-changer for agencies and developers who need to get dozens of MOV files ready with consistent quality. When you're working on bigger projects, these optimized videos are crucial for everything from websites to more demanding mobile app development initiatives.
The Master File Method
A truly bulletproof workflow always starts with a high-quality master file. Once you’re done with all your editing and color grading, export the final project as a ProRes 4444 or ProRes 422 MOV. This file is your archive—your perfect, uncompressed source of truth. The cardinal rule is to never, ever compress your only copy.
Think of the master file as your negative. From this one pristine source, you can then create all the different, smaller versions you need. One for YouTube, a super-lightweight version for an email attachment, and a square-format clip for Instagram—all branching from that one perfect file.
Adopting batch processing and a trim-first mindset can completely change how a team handles its video assets, saving a huge amount of time and storage. An unoptimized 1080p MOV can easily clock in at 200-400 MB per minute. By simply trimming the fat and batch-compressing to H.264, you can slash those file sizes dramatically. You can learn more by checking out these best practices for MOV compression.
This strategy guarantees you always have a high-fidelity asset to go back to, while your delivery files are light, fast, and perfectly suited for wherever they need to go.
Ready to perfect your video workflow? If you need to remove a background before you compress, VideoBGRemover makes it effortless. Export a high-quality MOV with a transparent background using ProRes 4444, then use the compression techniques in this guide to create the perfect delivery file. Start creating professional, background-free videos today at https://videobgremover.com.
Ready to Remove Your Video Background?
See a free preview before you buy.
No credit card required • Free preview on every video