How to Film TikTok Videos That Go Viral
Learn how to film TikTok videos that capture attention. This guide covers planning, gear, and filming techniques to help your content stand out.
Great TikTok videos don't just happen when you hit record. The real magic starts with a solid plan. It's about figuring out how to grab someone's attention in the first three seconds, tell a quick, clear story, and wrap up with a call-to-action that feels natural and prompts people to engage. A little bit of prep work is what turns a random thought into a polished video that people actually want to watch.
Laying the Groundwork for a Viral TikTok
Before your phone even comes out of your pocket, the best TikToks are already taking shape. Viral content is almost never an accident; it’s born from smart planning and a real understanding of what makes people stop scrolling. You don’t need a fancy Hollywood script, but a simple outline can be the difference between a video that gets instantly swiped away and one that lands on the For You Page.
From Idea to Script
The first real step is getting the idea right. I always start by diving into my niche to see what's bubbling up. What are other creators talking about? Which sounds are trending? The goal isn't to copy them, but to find a popular concept and put my own unique spin on it.
Once you have that spark of an idea, sketch out a quick plan. A simple three-part structure is perfect for the fast pace of TikTok:
- The Hook: This is your make-or-break moment—those first 1-3 seconds. You need something visually interesting or a question that makes people need to know the answer. For example, instead of a boring "Here's how to make a smoothie," you could start with a close-up of a weird-looking ingredient with on-screen text that says, "This one thing will change your smoothies forever." See the difference?
- The Middle: Here's where you deliver the goods. Keep it tight. This is the substance of your video, where you fulfill the promise of your hook. Use quick cuts, text overlays, and dynamic shots to keep the energy up.
- The Call-to-Action (CTA): Don't just end your video; tell your audience what to do next. Make it feel like a natural part of the content. Something simple like, "Try this out and let me know how it goes!" or "Follow for more daily tips" works perfectly.
This whole workflow is about turning a basic concept into a structured piece of content that’s ready to be filmed.

Following a process like this gives every video a clear purpose and direction, which is exactly what keeps viewers hooked until the very end.
Why Planning Ahead is a Game-Changer
Spending a few minutes planning a 15-second video might feel like overkill, but trust me, it’s not. It has a direct and massive impact on engagement. Think about it: by 2025, it’s estimated that 92% of TikTok users worldwide will take some kind of action after watching a video—liking, sharing, following, you name it.
This proves that people on TikTok aren't just passive viewers; they're active participants. A well-structured video is far more likely to trigger those valuable interactions. If you’re curious, you can dive deeper into TikTok marketing statistics to get a better handle on how people behave on the platform.
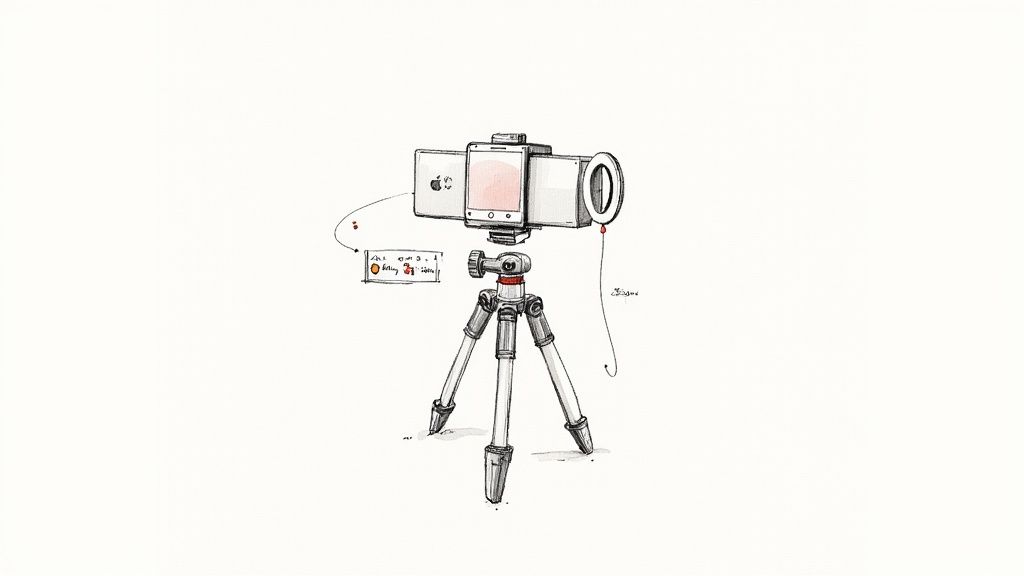
Choosing Your Filming Gear from Budget to Pro
https://www.youtube.com/embed/_GGVRM0nQy8
You don't need a Hollywood budget to make a TikTok that pops. Seriously. The real secret is knowing where to put your money for the biggest visual payoff. It’s all about being smart with your tools, not just owning the most expensive ones.
Let's be honest, the best camera is the one you have with you—and your smartphone is probably a powerhouse. Modern phones shoot incredible video, so just focus on the basics: always shoot in 1080p or 4K and, for the love of all that is holy, wipe your lens before you hit record. A greasy fingerprint is the number one killer of crisp footage.
To help you decide what to invest in and when, here's a look at the essential gear that will take your TikToks from amateur to awesome.
TikTok Filming Gear Comparison
This table breaks down the gear you'll need as you grow, from just starting out to going full-pro.
| Gear Type | Beginner Option (Budget) | Intermediate Option (Value) | Pro Option (Quality) |
|---|---|---|---|
| Camera | Your Smartphone (iPhone/Android) | Newer Smartphone Model | DSLR or Mirrorless Camera |
| Microphone | Wired Lavalier Mic (~$20) | Wireless Mic System (~$100-200) | Shotgun Mic or Pro Wireless System (e.g., Rode) |
| Stabilizer | Mini Tripod (~$15) | Full-Size Tripod or Handheld Gimbal | Professional Gimbal (e.g., DJI Ronin) |
| Lighting | Ring Light (~$25) | Two-Point LED Panel Kit (~$80-150) | Three-Point Lighting with Softboxes |
Ultimately, start with what you have (your phone) and upgrade your audio and lighting first. Those two elements provide the most significant quality jump for the smallest investment.
Upgrading Your Audio Quality
If your video looks great but sounds terrible, people will scroll right past it. Bad audio—whether it's echoey, muffled, or full of background noise—feels unprofessional and is incredibly distracting.
A simple lavalier (or "lav") mic that clips to your shirt is a game-changer. For less than $30, it isolates your voice and dramatically cuts down on room echo, making you sound clear and professional. It's easily the best bang-for-your-buck upgrade you can make.
Even with a good mic, unwanted sounds can sneak in. If you're dealing with noisy environments, learning how to remove background noise from video in post-production is a lifesaver.
Stabilizing Your Shots
Nothing screams "I just filmed this" like shaky, nauseating footage. A stable shot is the foundation of a good-looking video. The easiest fix? A tripod. You can grab a basic phone tripod for under $20, and it will immediately make your videos look more intentional and polished.
Here’s a quick rundown of your options:
- Mini Tripod: Perfect for filming at a desk, for makeup tutorials, or any static shot where you can set it on a table.
- Full-Size Tripod: This gives you the freedom to shoot standing up, get more creative with your angles, and film anywhere without needing a surface.
- Gimbal: When you're ready to level up your moving shots, a gimbal is your best friend. This motorized stabilizer keeps your phone perfectly smooth while you walk, making it essential for vlogs or cinematic B-roll.
Pro Tip: Even when using a tripod, don't just lock the camera in place. Add subtle, slow pans or tilts to create a bit of movement and keep the viewer engaged. A static shot can feel a little lifeless.
Getting the Lighting Right
Good lighting is like a real-life beauty filter. It makes you look better, helps your phone's camera capture a cleaner image, and adds an instant layer of professionalism.
You don't need a complicated film set lighting rig. A ring light is a fantastic and affordable starting point. It provides soft, flattering light that wraps around your face, smoothing out skin tones and eliminating harsh shadows. Just place it directly in front of you, and you're good to go.
Mastering Your Shots: Lighting and Movement
You can have the best idea and the fanciest gear, but your TikTok will still fall flat if the execution feels sloppy. The real magic is in the details—how you frame your shot, light the scene, and move the camera. These are the elements that separate a forgettable clip from a polished, professional-looking video that stops the scroll.
First thing's first: you have to think vertically. TikTok's 9:16 aspect ratio changes the game completely. A simple but powerful trick here is using the rule of thirds. Just imagine a 3x3 grid overlaid on your screen. Instead of planting yourself smack in the middle, try positioning your eyes along the top horizontal line.
It’s a small tweak, but it makes your composition feel more balanced, intentional, and way more visually interesting.
Simple and Effective Lighting Setups
Good lighting is non-negotiable. It’s what gives your video that crisp, clean, high-quality look. The good news? You don't need a complicated, expensive rig to get fantastic results.
Your best friend here is often the sun. If you can, position yourself facing a large window. This gives you soft, flattering, and completely free light that’s hard to beat. Just make sure the window isn't behind you, or you’ll turn into a dark, shadowy silhouette.
When natural light isn't an option, a basic three-point lighting setup is the industry standard for a reason. Here’s a stripped-down version that works wonders for TikTok:
- Key Light: This is your main, brightest light. A ring light is perfect for this. Place it slightly off to one side in front of you.
- Fill Light: A softer light placed on the opposite side. Its job is to fill in the harsh shadows your key light creates.
- Backlight (Optional): Stick a small light behind you, out of frame. This creates a subtle glow on your hair and shoulders, separating you from the background and adding a professional touch.
This technique adds incredible depth and dimension to your shots. It's also essential if you plan on using a green screen or digitally removing your background. For a deeper dive, check out our guide on how to use a green screen and see just how critical lighting is for a clean result.
Pro Tip: Think of lighting as sculpting. Your key light defines the shape, the fill light softens the edges, and the backlight makes you pop. Getting this trio right is a total game-changer.
Adding Energy with Camera Movement
Let's be real: static shots can feel boring on a fast-paced platform like TikTok. Injecting a little camera movement is one of the easiest ways to add energy and keep your audience hooked. It just makes the video feel more dynamic and immersive.
You don't need to go crazy. Try these simple, effective movements:
- Push-In: Slowly move the camera toward your subject to build intensity or emphasize a key point.
- Pull-Out: Start close and slowly move away to reveal the wider scene or provide a sense of finality.
- Pan: A smooth horizontal movement, left or right, to follow action or scan a space.
- Tilt: A vertical movement, up or down, to show off something tall or create a dramatic reveal.
You don't even need a fancy gimbal for this. A steady hand or a tripod with a fluid head can get the job done. The secret is making every move feel deliberate and controlled, not shaky. Even a tiny, subtle push-in can make a world of difference in holding someone's attention for that crucial extra second.
Want Your TikToks to Stand Out? Try These Advanced Tricks
Okay, so you've got the basics down. Your lighting is decent, your audio is clear, and you're comfortable in front of the camera. Now it's time to start creating content that doesn't just get watched, but gets remembered.
This is where you start thinking less like a person holding a phone and more like an editor. When you plan your shots with the final edit already in your head, you can pull off some seriously cool effects—slick transitions, epic slow-motion, and even clean background removals without ever touching a green screen.
Filming for a Digital Green Screen
The green screen effect is everywhere on TikTok, but here’s a little secret: you don't actually need a green screen. The real magic to getting a clean, crisp cutout of yourself is all in how you shoot the original video. It really just boils down to two things: separation and lighting.
To nail this, you just have to follow a few simple rules when you film:
- Find a plain background. A bare wall is your best friend here. Gray, beige, or any solid, neutral color works wonders. Just stay away from busy patterns or clutter that can confuse the software.
- Light yourself evenly. Make sure your main light source is hitting you from the front. Whether it’s a ring light or a big window, this helps kill any harsh shadows on the wall behind you, which are a nightmare for digital cutouts.
- Wear something that pops. Don't blend in! If your wall is white, don't wear a white shirt. The more contrast there is between you and your background, the easier it is for the AI to trace a clean edge.
Following these steps gives tools a much easier job of masking you out perfectly. When you're ready to remove the background, you can use a tool like VideoBGRemover. It's designed to make this process as simple as possible.
You can see from their interface that it's straightforward—you just upload the clip you filmed, and the AI does the heavy lifting, separating you from whatever was behind you.
How to Plan for Seamless Transitions
Nothing hooks a viewer faster than a video with slick, seamless transitions. The best ones feel like magic, and the trick is to create them in-camera instead of trying to fake it all in an editing app later.
Here are a few classic techniques you've definitely seen before:
- The Whip Pan: As you finish your first shot, quickly flick or "whip" the camera to one side. Then, start your next shot by whipping the camera in from that same direction. The motion blur completely hides the cut.
- The Object Wipe: Use something to fill the screen completely. You can swipe your hand over the lens or pass a book in front of it. Then, start the next clip by moving that same object away, revealing the new scene.
- The Lens Cover: This one's the easiest. Just cover the lens with your palm to end the shot. Start the next one by uncovering it. Simple, but so effective.
My biggest piece of advice: Filming with your transitions already planned saves a ton of headaches during the edit and looks way more professional. The whole point is to make the cut totally invisible.
Getting these details right is more important than ever. With an estimated 34 million videos uploaded to TikTok every single day around the world, you have to do more than just post. To really make an impact, you need to master not just what you film, but how you film it. You can see more wild stats about the sheer scale of TikTok content creation on Thunderbit.com.
Making Your Edit Pop on the For You Page
Getting great footage is a solid start, but the edit is where the magic really happens. This is your chance to craft a compelling story and package it perfectly for the TikTok algorithm. A sharp, well-paced edit that leans into trending audio can be the difference between a flop and a viral hit.
The name of the game is energy. Viewers on TikTok have an notoriously short attention span, so you can't afford a single dull moment. Get comfortable with jump cuts to slice out every "um," every awkward pause, and any dead air. Your goal is to create a relentless forward momentum that keeps people watching.
Pacing and On-Screen Text
A tried-and-true method for creating a satisfying edit is to sync your cuts to the beat of a trending song. This gives your video a natural, rhythmic feel that both viewers and the algorithm tend to love. If you're doing a voiceover instead, time your cuts to land on key phrases to add emphasis and keep the pace snappy.
Don't forget the power of text overlays. They're not just for subtitles; they're a vital tool for engagement. They make your content accessible to people scrolling with the sound off and help you hammer home key points, which often gets viewers to pause or rewatch.
- The Hook: Slap a bold, intriguing statement on screen within the first 1-3 seconds. Make them want to know what happens next.
- The Highlights: Use short, punchy text to summarize your main points as you go.
- The Ask: End with a clear call-to-action right on the screen, like "Follow for Part 2!"
I've found that the sweet spot for a lot of my best-performing videos is somewhere between 21 and 34 seconds. It's just long enough to deliver real value but short enough to keep completion rates high—a metric TikTok's algorithm pays close attention to.
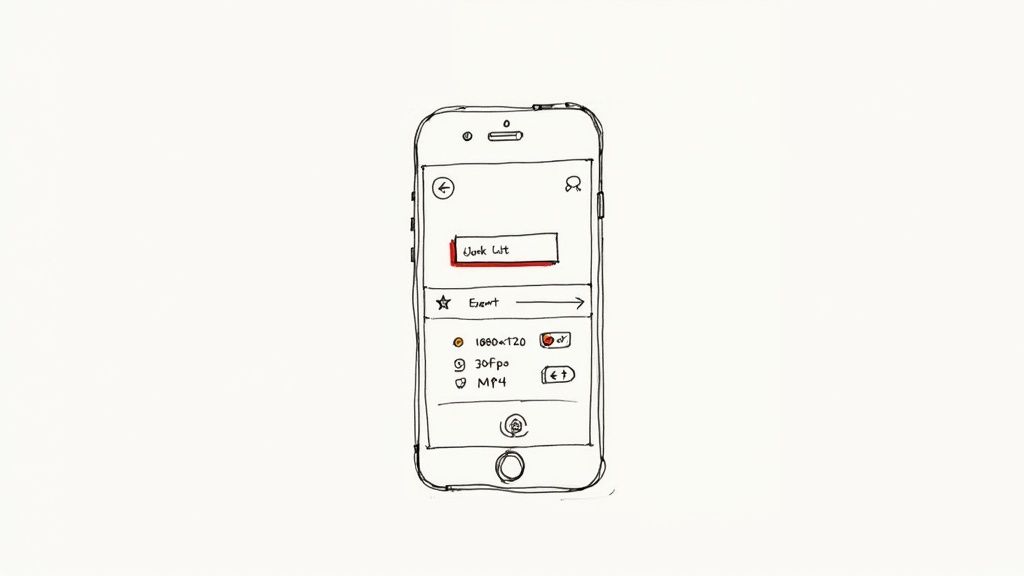
Nail Your Export Settings
You’ve put in all this work filming and editing; the last thing you want is for TikTok’s aggressive compression to turn your crisp video into a pixelated mess. Dialing in the right export settings is the final, crucial step to make sure your content looks professional when it lands on the For You Page.
Most modern editors, from CapCut to Adobe Premiere Rush, let you control these settings. And if you're looking to really level up your post-production, some of the new AI video editing software can automate a lot of the tedious parts of editing, letting you focus on the creative.
No matter what tool you're using, these are the export standards I stick to for the best results on the platform:
| Setting | Recommended Value | Why It Matters |
|---|---|---|
| Resolution | 1080x1920 (1080p) | This is the native HD format for a vertical screen. It looks sharp on a phone without creating a massive file that will get crushed by compression. |
| Frame Rate | 30 FPS | This gives you that classic, smooth playback on mobile devices. Going up to 60 FPS is usually overkill for TikTok and just gets compressed down anyway. |
| Format | MP4 (H.264) | It’s the universal standard for web video. You get a fantastic balance of high quality and manageable file size, which is perfect for uploading. |
Locking in these settings gives your video the best possible chance of looking great after TikTok is done with it. If you're still figuring out which editor is right for you, check out our guide on the best video editing apps for TikTok to find one that fits your style.
Giving Your Video Its Best Shot at Going Viral
You've filmed a fantastic video, but your work isn't done yet. Hitting "post" is just the start. How you package your video with a caption, hashtags, and a cover photo can be the difference between a few views and a spot on the For You Page.
Think of your caption as a conversation starter, not just a description. Instead of saying "Here's how I did this," try asking a question to pull people in. Something as simple as, "What's one thing you'd add to this?" or "Have you ever seen this happen before?" can ignite your comments section and tell the algorithm your content is worth showing to more people.
Nail Your Hashtag Mix
Hashtags are basically the search engine of TikTok, so you have to use them strategically. The biggest mistake I see is people only using massive, trending tags. Sure, they have a huge audience, but your video will be a tiny fish in an ocean-sized pond.
A much smarter approach is to use a balanced mix. Try this recipe:
- Go Broad: Pick 1-2 really popular tags that fit your video, like
#tutorialor#DIY. This gets you into the general conversation. - Get Niche: Add 2-3 super-specific tags that speak directly to your community. Think
#sourdoughtipsor#videographytricks. This is how your ideal audience finds you. - Catch the Wave: If it makes sense for your video, use one hashtag from a current trend or challenge. This can give you a nice, immediate boost.
This layered strategy gives you the best of both worlds—broad reach and a direct line to the viewers who will actually care about what you've made.
TikTok is a content giant. As of 2025, the platform has about 1.59 billion monthly active users who spend nearly an hour a day on the app. And what are they watching? Tutorials are the top content category for a whopping 62% of users. Your "how-to" video has a massive, hungry audience ready and waiting. You can dive deeper into TikTok's powerful user engagement statistics on Buffer.com.
Your Cover Photo is Your First Impression
Don't just let the app pick a random, blurry frame for your cover. That's your video's storefront, and it needs to grab attention instantly when someone lands on your profile or finds you in search.
Scrub through your video and find a clear, compelling moment that tells the story. Then, add a short, punchy text overlay that screams value, like "3 Easy Edits" or "Viral Hook Secret." A clean, well-designed cover makes your entire profile look more professional and helps people find exactly what they need. And remember, making your content easy to find is key—that’s where things like captioning videos for improved SEO and engagement also play a huge role.
Struggling to get clean cutouts for your video backgrounds? With VideoBGRemover, you can remove any background from your footage in minutes, no green screen needed. Upload your video, and let our AI do the work. Try it for free and create professional-looking videos today at videobgremover.com.
Ready to Remove Your Video Background?
See a free preview before you buy.
No credit card required • Free preview on every video