How to Compress MOV Files Without Losing Quality
Learn how to compress MOV files while preserving visual quality. This guide covers the best tools and settings for reducing video file size.
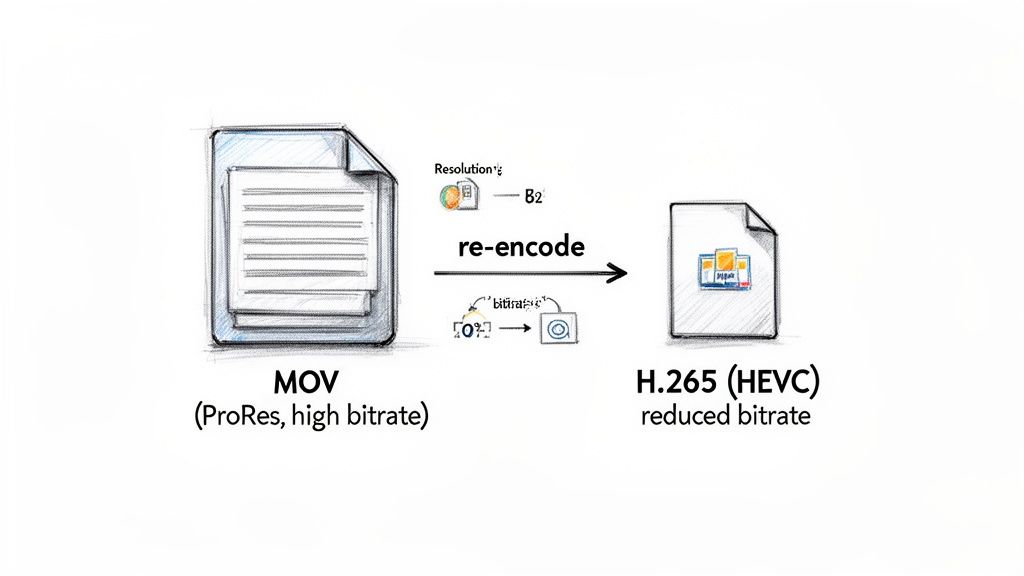
The secret to compressing a MOV file is to re-encode it. This means you're essentially translating the video into a more efficient "language" using a better codec, like H.264 (AVC) or its successor, H.265 (HEVC). Often, this is combined with a slight reduction in resolution or bitrate to strike that perfect balance between a smaller file and great visual quality.
Why Your MOV Files Are So Big (And How to Fix It)
If you’ve ever shot video on an iPhone or exported a project from a pro editor like Final Cut Pro, you know the feeling. A few minutes of beautiful 4K footage ends up being a multi-gigabyte monster file that’s a pain to upload, email, or even just store.
This isn't an error. It's by design. Those massive files are created to capture the maximum amount of visual data possible, giving you incredible flexibility during editing. The culprit behind this is usually the codec—the technology used to package the video data. Professional workflows and Apple devices often default to high-quality but hefty codecs like Apple ProRes, prioritizing pristine detail over a manageable file size.
Codecs and Bitrate Are Your Levers for Control
To shrink a MOV file without turning it into a pixelated mess, you need to change its codec to something more efficient. This is where modern compression standards really shine.
- H.264 (AVC): This has been the workhorse of the video world for years. It offers fantastic compatibility across almost every device and platform, providing a solid mix of quality and file size.
- H.265 (HEVC): This is the newer, smarter sibling. It delivers roughly the same visual quality as H.264 but in a file that can be up to 50% smaller. It’s an absolute game-changer.
This isn't just theory. Creators have been leveraging this for years. A revealing Apple Support Communities discussion from March 2023 showed countless users slashing their MOV file sizes simply by switching from H.264 to H.265, often cutting them in half with no perceptible quality loss. This is especially useful for anyone uploading MOV files to a tool like VideoBGRemover, as it makes handling 4K footage so much faster.
The goal of compression isn't to obliterate quality; it's to smartly discard data your eyes won't miss. A well-compressed video looks virtually identical to the original on most screens but is a fraction of the size.
By re-encoding your MOV with a smarter codec and fine-tuning the bitrate (the amount of data dedicated to each second of video), you can reclaim a huge amount of disk space. This transforms compression from a necessary evil into a powerful optimization tool. If you want to get into the nitty-gritty of the container itself, our complete guide to MOV file formats is a great place to start.
Now, let's get into the practical steps you can take to bring those files down to a manageable size.
MOV Compression Quick Guide
Need a quick answer? This table summarizes the most common compression goals and the settings that will get you there.
| Goal | Recommended Codec | Resolution Tip | Potential Size Reduction |
|---|---|---|---|
| Maximum Quality, Smaller File | H.265 (HEVC) | Keep original (e.g., 4K) | 40-50% |
| Best for Web/Social Media | H.264 (AVC) | Downscale to 1080p | 70-85% |
| Sending a Quick Preview | H.264 (AVC) | Downscale to 720p | 85-95% |
| Archiving Footage | H.265 (HEVC) | Keep original, use lower bitrate | 50-60% |
These are great starting points. Your final file size will always depend on the complexity of the video itself, but these recommendations will put you on the right track.
Understanding What Makes a MOV File Tick
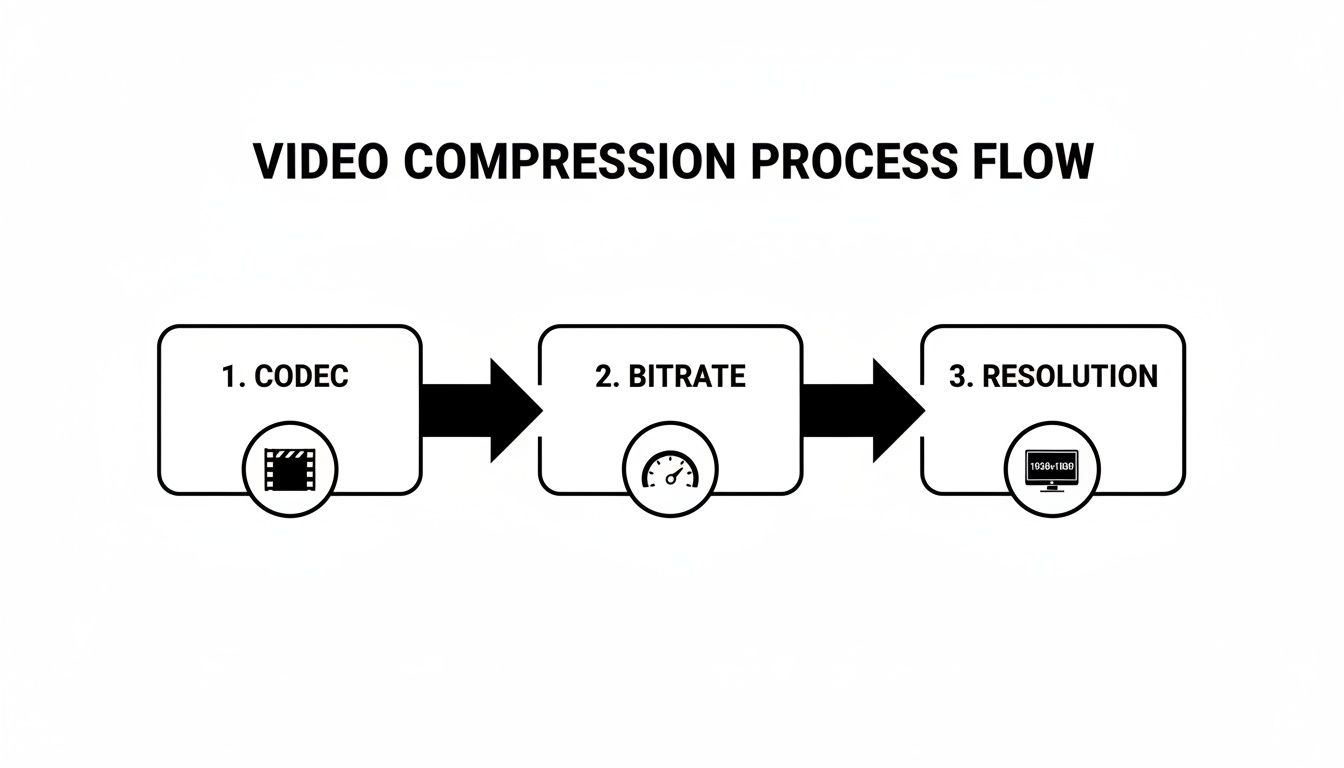
Before you jump into compressing your video, it helps to know what you’re actually changing under the hood. When we talk about video compression, we're really talking about four key ingredients that determine your MOV file's size and quality. Getting a feel for these will help you make smarter choices and avoid needlessly butchering your video's clarity.
Codecs: The Language of Your Video
Think of a codec (short for coder-decoder) as the specific language your video file uses to store visual information. Some languages are just more efficient than others. A modern codec like H.265 (HEVC), for instance, can describe a complex scene using far less data than an older one. It's like an eloquent speaker conveying a complex idea with fewer words. This is exactly why re-encoding a MOV file with a more efficient codec is one of the most powerful compression tricks in the book.
Bitrate: The Data Budget for Each Second
Next up is bitrate. This is basically your video's data budget, measured in megabits per second (Mbps). A high bitrate means you’re throwing more data at every second of video, which results in sharper detail but a much bigger file. Lower the bitrate, and you shrink the file size, but push it too low, and you'll start seeing ugly compression artifacts like blockiness or blurring.
It’s all about context. A chaotic action scene needs a generous bitrate to keep everything looking crisp and clear. On the other hand, a simple talking-head shot can get by with a surprisingly low bitrate, and no one will ever know the difference. Adjusting this setting gives you direct, hands-on control over that classic trade-off between file size and visual quality.
The real art of compression isn't just about making files smaller. It's about intelligently throwing away the data our eyes are least likely to miss. A perfectly compressed video looks almost identical to the original but is just a fraction of the size.
Resolution and Frame Rate: Pixel Count and Smoothness
Resolution is simply the number of pixels in your video frame, like 1920x1080 for Full HD. This one’s pretty straightforward: fewer pixels mean a smaller file. Dropping a 4K video down to 1080p is a common move that can instantly make the file 75% smaller while still looking fantastic on most screens.
Frame rate (measured in frames per second, or fps) dictates how smooth the motion looks. While you won't change this as often, dropping a video from 60fps to 30fps will dramatically reduce its size. Just be aware that this will also change the feel of the motion, making it less fluid.
Lossy vs. Lossless Compression
Finally, you'll encounter two main compression philosophies. Lossless compression is the safe route, often giving you a 2:1 reduction ratio by neatly packing the data without discarding a single pixel. It’s great, but its file size savings are limited.
Lossy compression is where the real magic happens for shrinking files. It works by permanently removing redundant visual information—data our eyes aren't very sensitive to anyway. Techniques like chroma subsampling can shrink files by a staggering 60-80%. To see how this works on a technical level, check out the SWGDE Technical Overview of Digital Video Files. For more practical tips, our guide on achieving video compression without losing quality is a great next step.
If you want to explore the fundamental principles of making files smaller, this guide on how to reduce video file size while preserving quality is an excellent resource.
How to Compress MOV Files with HandBrake: A Practical Walkthrough
If you're looking for a free, powerful, and ridiculously versatile tool to shrink your MOV files, look no further than HandBrake. For years, it's been the go-to choice for creators on Mac, Windows, and Linux. It strikes that perfect balance—simple enough for a quick job but packed with deep controls for when you need to get granular.
Let’s tackle a common scenario. You’ve just exported a beautiful 5-minute 4K product demo. The problem? It’s a monstrous 2GB MOV file. That’s way too clunky to upload to a website or quickly send over to your team for feedback. Our mission is to get that file down to a nimble 300MB or so, without making it look like it was filmed on a potato.
Your First Compression: From 2GB to Web-Ready
First things first, you'll need to grab HandBrake from its official site and install it. Once you fire it up, you’re met with a simple prompt to open a video file.
Go ahead and drag your 2GB MOV file right into the window, or use the "File" button to navigate to it. HandBrake will take a moment to scan the video and automatically pull in all its technical details.
Using Presets and Dialing in the Key Settings
For most jobs, HandBrake's built-in presets are your best friend. They save you a ton of guesswork.
In the "Presets" panel, look under the "General" category and select Fast 1080p30. This is a fantastic starting point for web video. With one click, it configures the resolution and frame rate to something much more manageable than our original 4K file.
Now, let's peek under the hood to fine-tune it. Click on the Video tab.
- Video Codec: Make sure this is set to H.264 (x264). It's the industry standard for a reason, offering the best mix of quality, file size, and compatibility across devices.
- Framerate (FPS): Just leave this on "Same as source." Changing it can lead to choppy or unnatural-looking motion unless you have a very specific reason.
- Constant Quality: This is where the magic happens. The RF (Rate Factor) slider is your primary tool for balancing quality and size. A lower number means higher quality and a bigger file. For 1080p video, the sweet spot is usually between RF 20 and RF 24. Let’s slide it to 22 for our demo video—this should give us excellent visual fidelity while cutting down the size dramatically.
Pro Tip: Using the "Constant Quality" setting is almost always better than picking an average bitrate. It lets HandBrake intelligently use more data for complex, high-action scenes and less for simple, static shots. The result is a much more efficient encode and better perceived quality for the same file size.
Finalizing the Audio and Hitting Go
A quick stop at the Audio tab is all that's left. For most web videos, you don't need lossless audio. A bitrate of 128 kbps is more than enough for clear stereo sound without bloating your file.
Finally, at the bottom of the window, choose where you want to save the compressed file under "Save As." Crucially, make sure the format is set to MP4 for maximum compatibility.
All set? Click the green "Start Encode" button.
After a few minutes of processing, your beefy 2GB MOV file will emerge as a sleek, web-ready MP4, likely landing right around our 300MB target. You've just successfully compressed your video without a noticeable drop in quality.
Advanced MOV Compression Using the FFmpeg Command Line
While graphical tools like HandBrake are fantastic for most tasks, sometimes you need surgical precision, automation, or the ability to process hundreds of files at once. This is where FFmpeg, the undisputed swiss-army knife of video processing, comes into play. It’s a command-line tool, which might sound intimidating, but trust me, you don’t need to be a developer to make it work wonders for you.
At its core, FFmpeg lets you perform incredibly complex video manipulations with a single line of text. This makes it perfect for creating reusable scripts and automating those mind-numbingly tedious compression workflows. For any creator handling large volumes of footage, learning just a few basic commands can save hours of manual clicking and waiting.
Your First FFmpeg Commands
Let's dive right in with a foundational command. Imagine you have a large MOV file named input.mov and you want to convert it to a universally compatible MP4 using the H.264 codec.
Just open your terminal (on Mac/Linux) or Command Prompt (on Windows) and type this in:
ffmpeg -i input.mov -c:v libx264 -crf 23 -c:a aac output.mp4
This command might look like gibberish at first, but each part has a very specific job:
-i input.mov: This is the easy one—it specifies your input file.-c:v libx264: This sets the video codec to H.264, a highly efficient and widely supported choice.-crf 23: This flag controls the Constant Rate Factor. Think of it as a quality dial where lower numbers mean higher quality (and larger files). A value between 18 and 28 is the sweet spot for most uses, with 23 being a fantastic balance of quality and size.-c:a aac: This sets the audio codec to AAC, the go-to standard for MP4 files.output.mp4: Finally, this names your new, compressed output file.
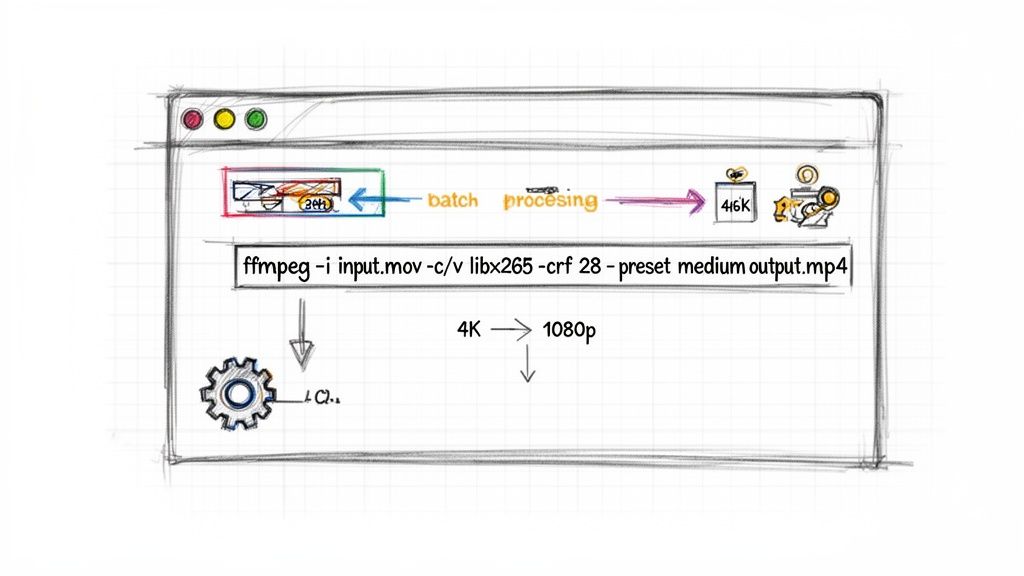
Upping the Compression with HEVC
If you need to shrink your file size even more, we can swap in the more modern HEVC (H.265) codec. The command is nearly identical, which shows just how adaptable FFmpeg is.
ffmpeg -i input.mov -c:v libx265 -crf 28 -c:a aac output_hevc.mp4
Notice the two key changes here. We've set the video codec to HEVC with -c:v libx265 and bumped the quality setting to -crf 28. Because HEVC is so much more efficient, a higher CRF value like 28 can produce a video with similar visual quality to H.264 at CRF 23, but at a significantly smaller file size—often cutting it by 30-50%.
FFmpeg gives you direct access to the engine of video compression. Mastering a few key flags like
-c:vfor the codec and-crffor quality empowers you to create custom compression recipes tailored perfectly to any project's needs.
Downscaling Resolution for Web Delivery
What if your source is a massive 4K MOV file, but you just need a 1080p version for a website or social media? FFmpeg handles this effortlessly using a video filter (-vf).
ffmpeg -i input_4k.mov -vf "scale=1920:-1" -c:v libx264 -crf 23 output_1080p.mp4
The new piece here is -vf "scale=1920:-1". This tells FFmpeg to apply a video filter, and the scale filter does exactly what it sounds like. We’re resizing the video to a width of 1920 pixels, and the -1 for height is a handy trick that tells FFmpeg to automatically calculate the correct height to maintain the original aspect ratio. No more stretched or squashed videos.
Quick Compression with Built-In and Online Tools
Let's be honest, you don't always need a powerhouse like FFmpeg for every compression job. Sometimes you just need to shrink a file now without all the technical fuss. In those moments, the tools already on your computer or a quick trip to a website are your best friends.
If you're a Mac user, you're in luck. Apple's own QuickTime Player is a surprisingly handy tool for basic compression tasks. It's the perfect solution for making a file small enough to email or for sending a quick preview to a client without having to install a single new application.
Using QuickTime Player on a Mac
Getting your MOV file smaller with QuickTime is about as simple as it gets. Just open your video, head up to the menu bar, and click File > Export As. You'll be greeted with a straightforward list of resolution options like 1080p, 720p, and 480p.
QuickTime’s main trick is resolution reduction. Bumping a 4K file down to 1080p, for instance, will slash the file size dramatically. No, you can't get under the hood to tweak bitrates or codecs, but for sheer speed and convenience, it's a winner.
The World of Online Video Compressors
When you need a quick fix on any operating system, online video compressors are incredibly convenient. A quick search brings up countless options that let you drag and drop your MOV, choose a general quality setting, and download the compressed version a few minutes later.
Platforms like Shortgenius are built for exactly these kinds of scenarios, where getting it done fast is the top priority. But with that convenience come a few trade-offs you should absolutely be aware of.
Keep in mind that uploading a video to an online service means sending your data to someone else's server. For any footage that's sensitive or confidential, sticking with an offline application is always the safer bet.
Online tools usually come with limits on file size, can be slow during peak times, and might not give you the pristine quality you're after. They're fantastic for shrinking a quick social media clip, but their compression can sometimes leave behind visible blockiness or artifacts, making them less ideal for professional projects. If you want to see what's out there, our guide to the best video compressors is a great place to start.
A great tip I picked up from a Shotcut forum discussion is that many creators find a Constant Rate Factor (CRF) of around 67% (which is a value of 23-28 in HandBrake) hits the perfect balance. This technique can shrink files by 60-70%—turning a massive 6GB file into a much friendlier 1.8GB—with almost no perceptible loss in quality. You can dive into the original user discussion for more details.
Compression Tool Comparison
Deciding which tool to use often comes down to balancing your need for speed against your desire for control. Here’s a quick breakdown to help you choose the right path for your project.
| Tool | Best For | Ease of Use | Quality Control |
|---|---|---|---|
| FFmpeg | Power users & automated workflows | Low | High |
| HandBrake | Balancing quality and ease of use | Medium | High |
| QuickTime Player | Mac users needing a quick, simple reduction | High | Low |
| Online Tools | Fast, non-sensitive, one-off compressions | High | Low |
Ultimately, the more advanced tools give you the keys to the kingdom, allowing for precise, high-quality results. But for quick and dirty jobs, never underestimate the simple, accessible options right at your fingertips.
Got Questions About Compressing MOV Files?
Diving into video compression for the first time? It’s completely normal to have a few questions. Getting a handle on these key concepts can save you a ton of headaches down the road. Let's clear up some of the most common things people ask when they're trying to shrink a MOV file.
Will Compressing a MOV File Ruin the Quality?
Here’s the honest answer: yes, compression will technically reduce the quality. Most compression is “lossy,” which is just a fancy way of saying some data gets permanently tossed out to make the file smaller.
But here's the crucial part: it doesn't have to look worse. Modern codecs, especially H.265, are incredibly smart about what data they remove. They’re designed to discard information that the human eye is unlikely to notice anyway. By using the right settings—like a Constant Rate Factor (CRF) in HandBrake or FFmpeg—you can slash your file size dramatically with almost no perceivable drop in visual quality. It's all about finding that sweet spot between file size and fidelity for your specific goal, whether that's for a smooth web stream or just archiving footage.
What’s the Best Format to Convert My MOV To?
For about 99% of situations, MP4 is the answer. It’s the gold standard for a reason.
When you combine an MP4 container with a modern video codec like H.264 or H.265, you get the perfect trifecta: great quality, small file size, and universal compatibility. An MP4 file will play nice with just about any device, social media platform, or editing software you can throw at it.
The big exception? Alpha channels. If your original MOV file has a transparent background, converting to a standard MP4 will wipe it out. To keep that transparency, you'll need to stick with a MOV container and use a codec like ProRes 4444, or switch to a WebM file with a VP9 codec. Just be aware that both of these options will create much larger files than a typical MP4.
Think of MP4 as the universal adapter for the video world. It's the safest, most reliable choice for sharing and playback, ensuring your content looks great everywhere without compatibility headaches.
Can I Compress a Bunch of MOV Files at Once?
Absolutely. Batch processing is a lifesaver, and the best tools are built for it.
HandBrake makes it incredibly easy with its queue system. You can just point it to a folder full of videos, pick a compression preset, and hit start. It’ll work through the entire batch one by one without you having to lift a finger.
If you want true power and automation, FFmpeg is king. With a simple script, you can tell it to process an entire directory of hundreds of files. You can literally set it up to run overnight and come back to a folder of perfectly compressed videos. For big projects or repetitive tasks, it’s the only way to go.
At VideoBGRemover, we're all about making video workflows faster and simpler. Once you've got your MOV files compressed, why not take the next step? Our AI tool can remove the background from your video in minutes. Just upload your new, smaller file and get a professional result with a transparent background, ready for anything.
Tagged with
Ready to Remove Your Video Background?
See a free preview before you buy.
No credit card required • Free preview on every video