Convert MP4 to Windows Media Like a Pro
Learn how to convert MP4 to Windows Media (WMV) for flawless playback. This guide covers free tools, online converters, and expert tips for quality.
Ever found yourself with an MP4 file that just won't play on a Windows computer? It's a surprisingly common headache. While MP4 is the go-to format for almost everything these days, it's really just a wrapper. The actual video inside might use a codec that an older version of Windows Media Player simply doesn't understand, leading to frustrating error messages.
This is where converting your file to a Windows Media Video (WMV) comes in. It’s a surefire way to guarantee your video will play perfectly on pretty much any Windows machine, regardless of its age.
Why You Still Need to Convert MP4 to Windows Media
In a world dominated by MP4, converting a file back to WMV might feel a bit strange, but it solves a very real problem: compatibility with legacy systems. Think of it as a practical fix for hardware and software that haven't quite caught up with the latest video tech.
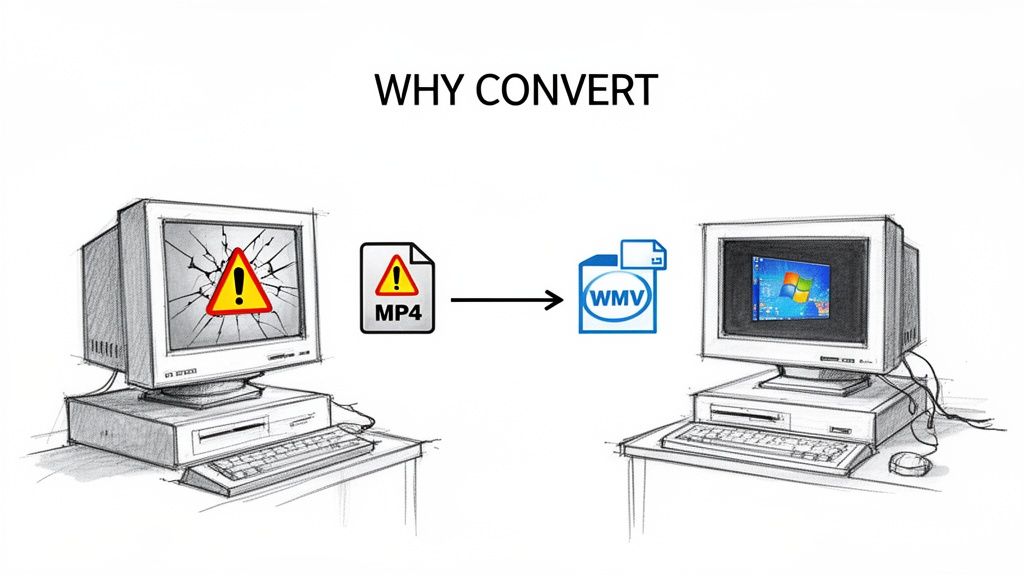
Let's say you're an HR manager rolling out a new training video to a company with hundreds of employees. Many will have modern computers, but a good chunk might be using older, locked-down PCs. An MP4 encoded with a new codec like H.265 will look great on your new laptop but will likely fail on a machine running an old copy of Windows Media Player.
The Stubborn Persistence of Legacy Systems
The heart of the issue is that WMV is a native Microsoft format. It was built from the ground up to work seamlessly inside the Windows ecosystem, especially with older versions of Windows Media Player and even other Microsoft tools like PowerPoint.
This tight integration is a lifesaver in certain situations:
- Guaranteed Playback: A WMV file is almost guaranteed to open and play on any Windows PC without needing to install extra codecs. No support calls, no confused end-users.
- Corporate Compliance: Many large organizations have standardized IT environments that stick with older, approved software. Sending a WMV ensures you're staying within their guidelines.
- Client-Friendly Delivery: If you're a freelance editor sending a draft to a client who isn't particularly tech-savvy, a WMV is often the path of least resistance. They can just double-click and watch.
The need for this conversion isn't about which format is technically better. It's about making sure your audience can actually see your work. The most amazing video is useless if the viewer can't press play.
To understand why WMV is still relevant, you have to look back. Microsoft introduced it in 1999 to compete with other popular formats. By 2006, its successor (VC-1) was an official industry standard. During the years when Windows dominated over 90% of the desktop market, WMV became deeply embedded in corporate and professional workflows. That legacy still lingers today.
For those curious about the history of format wars, you can find some great insights on video format evolution that shed light on why certain standards stick around. This context makes it clear why WMV remains a crucial tool for universal compatibility in many professional settings.
MP4 vs WMV Quick Comparison
If you're still on the fence, this table breaks down the key differences to help you decide which format is right for your specific needs.
| Feature | MP4 (H.264/AVC) | WMV (Windows Media Video) |
|---|---|---|
| Best For | Web streaming, mobile devices, modern systems | Older Windows PCs, PowerPoint, corporate environments |
| Compression | Excellent quality at low file sizes | Good, but often results in larger files than MP4 |
| Compatibility | Universal (Mac, Windows, Linux, Mobile) | Primarily Windows-focused, native support is limited |
| Proprietary Tech | Open standard, widely adopted | Microsoft proprietary format |
| Typical Use Case | YouTube, social media, general video sharing | Internal business communications, legacy presentations |
Ultimately, while MP4 is the modern champion, WMV still holds its ground as the reliable workhorse for ensuring your video plays everywhere within the Windows world.
Quick Fixes With Built-in Windows Tools
Sometimes, you just need a quick solution without the hassle of downloading and installing new software. Believe it or not, your Windows PC has a hidden trick up its sleeve for handling stubborn MP4 files that refuse to play nicely. The secret lies within the Video Editor, a surprisingly useful feature tucked away inside the Photos app.
While you won't find a big button that says convert mp4 to windows media, the process of making a tiny edit and re-saving the file forces Windows to re-encode it. This simple action often resolves playback errors by creating a fresh, highly compatible MP4.
The Trim and Re-Save Method
So, how does this work? Essentially, you're "laundering" the video through Windows' own system. This process strips out any problematic or unsupported codecs from the original MP4 and replaces them with standard ones that Windows Media Player can easily handle. It's a clever workaround for those one-off compatibility headaches.
Here’s the step-by-step:
- Find your MP4 file and right-click on it.
- Hover over Open with and choose the Photos app from the list.
- With the video playing, click the three-dot menu (...) at the top. Look for an option like Edit in Clipchamp or Video Editor (the name can vary slightly depending on your Windows version).
- Once in the editor, select the Trim tool. You don’t need to cut anything significant—just drag the end slider back by a fraction of a second. This tiny change is enough to trigger a re-save.
- Click Save a copy or Finish video. Windows will now process and export a brand new MP4 file. In my experience, this new version almost always plays flawlessly.
This built-in tool is my go-to recommendation for a quick, one-off fix. If you have a single family video or a presentation clip that won't play, try this first. It's fast, free, and you don't need to install a thing.
What Are the Limitations?
While this method is fantastic for simple fixes, it's important to understand its boundaries. It’s not a true format converter in the traditional sense, but rather a compatibility fixer.
Here's what you need to keep in mind:
- No WMV Output: You can’t save the file directly as a .wmv. The output will always be another MP4, just a more universally playable one.
- One File at a Time: There’s no way to batch process. This makes it completely impractical if you need to convert an entire library of videos.
- Minimal Quality Control: You get very few options to fine-tune the final output. Windows makes the decisions on bitrate, resolution, and compression for you, typically optimizing for compatibility over pure quality.
This approach is perfect for quick troubleshooting. However, if you genuinely need the WMV format, need to process multiple files, or require precise control over your video's quality settings, you’ll need to move on to more powerful, specialized software.
Getting Serious with Free Desktop Converters Like VLC and HandBrake
When the built-in Windows options just don't cut it, it's time to turn to the power users' favorites: free desktop software. Tools like VLC Media Player and HandBrake are the real workhorses for anyone who needs to convert mp4 to windows media with any degree of control.
Most people think of VLC as just a player that can handle any file you throw at it, but tucked away inside is a surprisingly powerful conversion engine. HandBrake, on the other hand, is the undisputed champion of batch processing. If you have a folder full of videos to convert, it's your best friend.
Fine-Tuning Your Conversions with VLC
The beauty of VLC is the granular control it gives you. Instead of being stuck with generic presets, you can build a custom WMV profile from the ground up. This means you get to dictate the exact video and audio codecs, ensuring your final file works perfectly on any Windows machine.
Let's say you’re a marketer who has a bunch of user-generated MP4 clips for a new campaign. To make sure every single one plays without a hitch in an important corporate presentation, you need a bulletproof conversion. This is where VLC shines.
Here’s the general game plan:
- First, open VLC and head to Media > Convert / Save.
- Add the MP4 file you want to convert, then click the Convert / Save button.
- In the next window, look for the Profile dropdown and click the little wrench icon right next to it. This is where the magic happens.
- Under the Encapsulation tab, choose ASF/WMV.
- Hop over to the Video codec tab. Check the "Video" box and select WMV2 from the codec list. For a 1080p video, a bitrate around 2500 kbps is a solid starting point.
- Do the same thing on the Audio codec tab, but this time select WMA2.
This level of hands-on control is precisely why so many professionals and hobbyists swear by tools like VLC. For a more detailed walkthrough, our guide on using VLC for video conversion has even more tips to help you master it.
Processing Your Videos in Bulk with HandBrake
When you're facing a mountain of files, converting them one by one is a nightmare. This is HandBrake's moment to shine. Its queue system lets you line up dozens of videos, configure the settings once, and then walk away while it does all the heavy lifting.
Think of an educator converting an entire semester's worth of lecture recordings or a social media manager prepping a month of video content. HandBrake turns a tedious, multi-hour task into a simple "set it and forget it" operation.
The real reason to use a desktop converter is control. You get to decide the exact balance between video quality and file size, something that online tools or simple built-in options just can't offer. You're the one who determines if a smaller file for an email attachment is more critical than pristine quality for a massive screen.
This need for control isn't just a hunch; the data backs it up. Compatibility is the driving force behind 65% of MP4 to WMV conversions around the world, particularly in corporate or educational environments still deeply rooted in the Windows ecosystem. Because WMV is native to Windows Media Player, the files open 100% of the time, whereas MP4s can still hit codec snags on roughly 15% of older devices. If you want to go deeper on these stats, you can discover more insights about video format compatibility on videocandy.com.
Common Mistakes to Watch Out For
When you convert mp4 to windows media, a couple of common slip-ups can cause headaches. The most frequent one I see is picking the wrong audio codec. For instance, people sometimes leave the audio as MP3 inside a WMV container, which can lead to playback errors. For guaranteed compatibility, always stick with a Windows Media Audio (WMA) codec.
Another classic mistake is jacking the bitrate up way too high. This bloats the file size but often gives you zero visible improvement in quality, especially for web or presentation use. Don't be afraid to run a few short tests to find that "just right" setting for your needs.
The Power User Method: Converting With FFmpeg Commands
If you're a developer, video professional, or just someone who loves the control of a command line, FFmpeg is your go-to tool. It skips the friendly graphical interfaces and gives you direct, scriptable power over every single detail of a video conversion.
While a terminal window can look a bit daunting, the basic command to turn an MP4 into a WMV is refreshingly simple.
Your First FFmpeg Conversion
At its heart, FFmpeg works by taking an input file, an output file, and a set of instructions (or "flags") that tell it what to do. This method is incredibly fast and efficient, especially when you need to automate tasks.
To start, open your Command Prompt or Terminal. Navigate to the folder where your video is saved and type this command:
ffmpeg -i input.mp4 output.wmv
That's it. This tells FFmpeg to take input.mp4 and convert it into output.wmv using its default settings. This usually works just fine, but the real magic of FFmpeg is in the details—customizing codecs and quality settings to get the perfect result for Windows Media Player.
The entire process is a straight line from one format to another.

You start with your source MP4, run it through the FFmpeg engine, and end up with a native WMV file ready for any Windows environment.
Fine-Tuning With Codec and Bitrate Controls
Let's get more specific. What if you need to create a file for an older system that might be picky about codecs? You can tell FFmpeg exactly which ones to use.
For instance, here’s a command I’d use to create a high-quality WMV for archival purposes, where preserving detail is key:
ffmpeg -i input.mp4 -c:v wmv2 -b:v 5000k -c:a wma2 -b:a 192k output_high_quality.wmv
Here's what those extra flags are doing:
-c:v wmv2: This sets the video codec to WMV version 2, a great middle-ground for quality and compatibility.-b:v 5000k: We're assigning a high video bitrate of 5000 kbps to keep the picture sharp.-c:a wma2: This specifies the Windows Media Audio v2 codec.-b:a 192k: We're setting the audio bitrate to a crisp 192 kbps.
For anyone who works with video regularly, getting comfortable with the command line is a game-changer. It unlocks a level of precision and automation that clicking through menus just can't offer. You can find a deeper dive into more advanced FFmpeg commands on our blog to really expand your skillset.
How to Automate Conversions With a Batch Script
This is where FFmpeg truly shines. Imagine you have a folder with dozens of MP4s. Converting them one by one would be a nightmare. With a simple script, you can do them all at once.
For Windows users, create a batch file (a plain text file ending in .bat) and paste this single line inside:
for %%a in ("*.mp4") do ffmpeg -i "%%a" -c:v wmv2 "%%~na.wmv"
Just drop that .bat file into the folder with your MP4s and double-click it. The script will automatically find every MP4, convert it to a WMV using the wmv2 codec, and give it the same filename. A task that could take an hour manually is done in minutes. This is exactly why FFmpeg remains an indispensable tool for serious video work.
Choosing the Right Online MP4 to WMV Converter
Sometimes you just need to convert a single file, and you need it done now. Installing a whole new software program for a one-off task feels like overkill. This is exactly where browser-based converters shine. They're incredibly handy, especially if you’re on a work computer that won't let you install apps or just need to get a WMV file over to a client quickly.
The process is usually dead simple: drag, drop, convert, and download. But don't let the simplicity fool you—not all online tools are built the same. A little bit of know-how can help you pick a good one and avoid the duds.
What to Look For in an Online Converter
When you’re trying to find a reliable site to convert mp4 to windows media, a few things should immediately jump out at you. Paying attention to these details upfront will save you from headaches like painfully slow uploads, poor quality, or even security risks.
Before you upload a single video, quickly check for these things:
- Security and Privacy: How long do they keep your files? A trustworthy service will clearly state that they delete your data from their servers after a few hours. If you can't find a clear privacy policy, it's best to just move on.
- File Size Limits: This is a big one. Most free services cap the file size you can upload. It’s the first thing I check, so I don't waste time uploading a large video only to have it rejected.
- Watermark-Free Output: Some converters will slap their logo right on your final video unless you pay up. Make sure the service explicitly offers clean, watermark-free downloads on their free tier.
- Batch Processing: Got a handful of clips to convert? A tool that handles batch conversions will save you a ton of time by letting you queue up all your files at once.
My personal rule of thumb is to never upload sensitive or confidential footage to a free online converter. For quick, non-sensitive jobs, they're fantastic. For anything else, a desktop application offers better security.
How Online Converters Fit into a Modern Workflow
The real magic of online tools is how they let you string together a complete workflow right in your browser. You can bounce from one specialized tool to another without ever downloading or installing anything.
Here’s a practical example: say you have an MP4 from a user for a social media campaign. You could first pop it into a tool like VideoBGRemover to instantly strip out the background for a cleaner, more professional look. Once you have that polished MP4, you can take it directly to an online converter to create the WMV version a client needs for their old-school PowerPoint presentation. The whole process, from editing to final delivery, happens without leaving your web browser.
These modern online converters are incredibly efficient, too. We’re at a point where an MP4 to WMV conversion can be done in about one-third of the video's total runtime. That means a 30-minute file can be converted and ready for download in around 10 minutes thanks to powerful cloud servers.
It's common now to see platforms that support over 200 formats. Some handle millions of MP4-to-WMV conversions every month, with a surprising 60% of that traffic coming from mobile users just trying to solve a compatibility problem. You can learn more about these video conversion trends and see just how common the need for on-the-fly format switching has become.
Common Questions About Converting MP4 to WMV
When you start digging into video conversions, a few questions always seem to surface. Getting the answers sorted out upfront can save you a ton of headaches, especially when you're trying to nail the quality or figure out why a file just won't cooperate.
Will I Lose Quality Converting MP4 to WMV?
The short answer is yes, technically. Any time you convert between two compressed formats (like MP4 and WMV), you're doing something called "transcoding." The software has to un-pack your original video and then re-pack it using a different set of rules. A tiny bit of data gets lost in translation.
But here’s the good news: you can make this loss practically invisible.
If you're using a quality converter like HandBrake or FFmpeg, you have control over the settings. For a standard 1080p video, aim for a bitrate somewhere between 2,000-5,000 kbps. This will give you a WMV file that looks fantastic, even if it's a bit larger.
The key is that while some quality loss is inevitable, it's entirely manageable. A good conversion will result in a WMV that's virtually indistinguishable from the original MP4 to the naked eye.
Why Won’t My MP4 File Play?
This is easily the most common snag people hit. You have an MP4 file, but Windows Media Player just gives you an error. Nine times out of ten, it’s a codec issue.
Think of the MP4 file as a container—a box. Inside that box, the video and audio are compressed with specific codecs, like H.264 for video and AAC for audio. If your version of Windows Media Player doesn't have the right "key" (the decoder for that specific codec), it can't open the box to play what's inside.
Converting the file to WMV fixes this because it re-packages everything using codecs that are native to Windows. It essentially hands Windows Media Player a file it's guaranteed to understand.
Can I Convert Back From WMV to MP4?
You sure can. The process isn't a one-way street. Every tool we’ve covered, from the simple drag-and-drop options in VLC to the command-line power of FFmpeg, can reverse the process.
So, if you need to take that WMV and make it compatible with a Mac, an iPhone, or an Android device, you can easily switch it back to the more universal MP4 format.
Just keep in mind that every conversion degrades the quality a little more. Going back and forth repeatedly will start to show. It’s always best practice to hang on to your original, high-quality source file for any new conversions. If file size becomes an issue, you might find that an effective MP4 file compressor can help you shrink it down without a major hit to visual quality.
At VideoBGRemover, we're all about making complex video tasks simple. If you need to polish your video by swapping out the background before converting it, our AI tool delivers professional results in seconds. Give it a try for free at https://videobgremover.com.
Tagged with
Ready to Remove Your Video Background?
See a free preview before you buy.
No credit card required • Free preview on every video