How to Make a Video With No Background A Practical Guide
Learn how to make a professional video with no background. This guide covers filming techniques, editing workflows, and export settings for perfect results.
A video with no background is essentially a clip where the main subject, like a person or a product, is completely isolated. This lets you drop them on top of any other video or graphic you can imagine. The magic happens through what’s called an alpha channel, which is basically transparency data embedded in the video file itself.
Why Videos With No Background Are a Game Changer
Ever see a creator who looks like they're right inside a software demo, or an ad where a product seems to float in a dynamic scene? That's the power of a transparent background. It’s not just a cool visual effect; it's a fundamental technique for creating professional, high-impact content that truly stands out.
Mastering this skill opens up a world of creative possibilities. It gives your videos a polished, professional edge that can make a huge difference in how your message is received. This isn't just a niche trick, either. The market for chroma key backdrops is expected to grow at a 7% CAGR through 2033. Even the massive shift to remote work, with tools like Zoom, pushed the demand for backdrops up by 40%. It’s clear this is a technique with staying power.
Unlocking Creative and Professional Value
Creating videos with a transparent background gives you the kind of visual firepower that used to require a massive studio and budget. It’s an incredibly flexible tool you can use across all sorts of projects to boost engagement.
Here are just a few real-world examples:
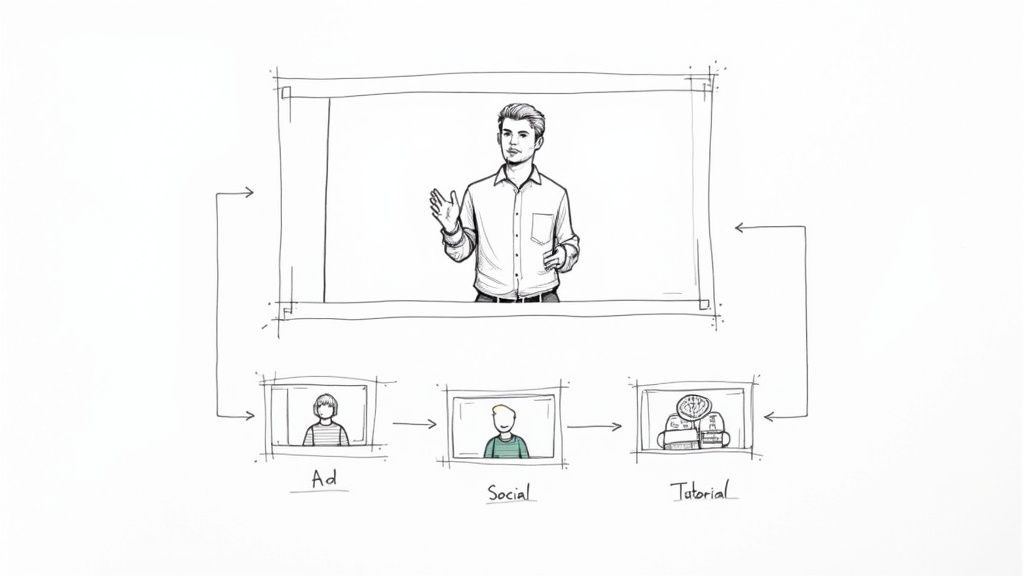
- Engaging Social Ads: Picture a presenter seamlessly layered into a fast-paced ad, or a product floating over a cinematic background. This layering makes your content jump off the screen in a crowded social feed.
- Clearer Tutorials: Instead of a tiny picture-in-picture box, you can place yourself right over a software interface or presentation slide, pointing things out and guiding your audience without blocking crucial information.
- Branded Content: Need to maintain a consistent look? You can place your spokespeople or team members into perfectly branded settings every single time, ensuring a uniform and professional feel for all your video content.
The real advantage here is control. Once you remove the original background, you have total command over the visual story. Every frame can be tailored to fit your exact message.
You have two main ways to get this done. The old-school method is filming against a green screen and then using a process called chroma keying in post-production. The more modern, and often easier, approach is to use powerful AI tools that can automatically cut the subject out from any background.
In this guide, we'll dive into both methods. And if you want a deeper technical dive, you can learn more about how a transparent video background works in our detailed guide.
Filming Secrets for Flawless Background Removal
Long before you even think about opening your editing software, the fate of your transparent video has already been sealed. How you film is, without a doubt, the most critical factor. Get this part right, and you'll save yourself a world of frustration later.
Think of your camera work as the foundation. Whether you’re going the old-school green screen route or letting AI do the heavy lifting, a solid foundation makes everything that follows easier.
When you're working with a green screen, the name of the game is smooth, even lighting. Shadows are the absolute enemy. They create dozens of different shades of green, which completely confuses the keying software and leaves you with a blotchy, amateur-looking result. Your best bet is to use multiple lights to illuminate the screen and your subject separately, hunting down and destroying any dark spots.
Of course, what you do in front of the camera matters just as much.
Pre-Production Checklist for Clean Keys
Before you ever press that record button, it pays to run through a quick mental checklist. These tips are gold for both green screen and AI-based removal, and they’ll help you capture the cleanest footage possible.
- Watch Your Wardrobe: If you're on a green screen, this is non-negotiable: never wear green. Don't forget about sneaky green hues in jewelry or reflective items that can bounce the screen’s color back at the camera. For AI removal, the goal is simply strong contrast between your clothes and whatever is behind you.
- Tame the Fuzz: Fine details are the bane of background removal. Wispy hair and sheer fabrics can be a real nightmare. An easy fix for hair is to tie it back or use a little hairspray to keep flyaways in check.
- Slow Your Roll: Fast, jerky movements create motion blur, which makes it nearly impossible for software to find a clean edge to cut out. Plan your movements to be smooth and deliberate. If you absolutely have to film high-speed action, crank up your camera's shutter speed to keep things crisp.
Here’s a simple way to think about it: You’re trying to create the cleanest, sharpest silhouette possible for the software to trace. The fewer confusing variables you throw at it—like shadows, color spill, or motion blur—the better your final video will look.
If you’re ditching the green screen and relying on AI, the core idea is the same, just simpler. Find a plain, uncluttered background to film against. A solid-colored wall is your best friend here. The more visual separation between you and your environment, the easier it is for the AI to work its magic.
Mastering these filming techniques is a huge step, but a deep dive into green screens can make all the difference. For a complete walkthrough, check out our guide on how to use a green screen, which covers everything from setup to pro lighting.
Putting these secrets into practice is also essential when you create compelling product videos that can genuinely drive sales. Nail the filming process from the start, and you’ll not only save hours of tedious editing but also end up with a much more polished and professional final product.
Your Workflow for Removing the Background
Alright, you've got your footage. Now for the fun part: making that background disappear. You essentially have two roads you can take here. There’s the old-school, hands-on method of chroma keying, and then there's the newer, almost magical approach using AI-powered tools. Knowing which path to choose is half the battle for getting a great result without pulling your hair out.
The traditional route, chroma keying, has been a Hollywood workhorse for ages. It’s been around since the 1930s, and even today, over 70% of major films use it for visual effects. That kind of staying power tells you something—when done right with good green screen footage, it’s incredibly precise and reliable.
The Traditional Chroma Keying Method
When you need absolute, pixel-perfect control, chroma keying is your best friend. Professional software like Adobe Premiere Pro or DaVinci Resolve is built for this. The process usually starts by dropping an effect like "Ultra Key" or "3D Keyer" onto your video clip.
Your first step is to grab the eyedropper tool and click on the main green (or blue) color of your background. This gives the software a starting point for what to remove, instantly creating a rough cutout, or "matte." But the real work begins with refining the edges.
This is where your pre-production efforts really pay off. As the diagram shows, thinking about lighting, clothing, and your background before you ever hit record makes this editing stage so much easier.

A clean shot from the start means less time spent wrestling with stubborn pixels in post-production.
You'll be using a few key tools to get that perfect edge:
- Matte Cleanup: These controls let you "choke" (shrink) or soften the edges of your subject. It's how you get rid of any jagged lines or leftover green halo effects.
- Spill Suppression: This is a non-negotiable step. It neutralizes the faint green light that bounces off the screen and "spills" onto your subject’s hair, shoulders, or clothes. It makes the final composite look believable.
- Transparency and Shadow: Fine-tuning these settings helps you preserve detail in things like semi-transparent objects or subtle motion blur, keeping the shot looking natural.
The real power of chroma keying is precision. For tricky shots with fine details—think wispy hair, fast motion, or intricate patterns—having manual control lets you dial in a perfect result. The catch? It demands a properly lit green screen and a good chunk of your time.
The Modern AI-Powered Approach
So, what if you didn’t use a green screen? Or maybe you’re just on a tight deadline. This is exactly where AI background removal tools come in. These platforms use sophisticated algorithms to identify a person or object and separate them from any background, often with just one click.
Instead of tweaking sliders and adjusting mattes, you just upload your video. The AI does the heavy lifting, analyzing the footage and creating a clean cutout for you. It turns what could be an hour-long editing chore into a quick, minutes-long task.
This is a massive boost for creators who prioritize speed and simplicity. Our own tool at https://videobgremover.com/ai-video-background-remover, for example, is built to give you a high-quality transparent video without needing any special setup during filming.
Many of the best AI video editing software options are integrating these features, which can really speed up your entire workflow.
When to Use AI vs. Chroma Key
Deciding between the two really comes down to the project's specific needs. Here’s a quick cheat sheet based on my experience:
| Scenario | Best Choice | Why? |
|---|---|---|
| You have no green screen | AI Removal | It’s built to handle busy, real-world backgrounds. |
| You need it done yesterday | AI Removal | The automated process is exponentially faster. |
| It’s a high-end commercial | Chroma Key | You get pixel-perfect control for the absolute best quality. |
| Subject has fine hair or motion blur | Chroma Key | Manual tools are better for finessing tricky edges. |
| Quick social media clips | AI Removal | Perfect for getting content out fast where good-enough is great. |
At the end of the day, there's no single "best" method—just the best method for the job in front of you. For that top-tier, professional polish, a well-shot and carefully executed chroma key is unmatched. But for sheer speed, convenience, and versatility, AI tools offer an incredible, powerful alternative.
Alright, you've put in the work and meticulously removed the background from your video. Don't stumble at the last hurdle! Exporting is where all that effort pays off, but one wrong setting can undo everything, leaving you with a solid black or white background instead of that crisp, clean transparency.
The magic behind this is something called an alpha channel. Most videos you see are made up of three color channels: Red, Green, and Blue (RGB). To get transparency, you need a format that supports a fourth channel—the alpha channel. This extra layer of data tells every pixel whether it should be opaque, fully transparent, or somewhere in between.
The catch is, your standard MP4 file (usually using an H.264 codec) doesn't have this. To export a video with no background, you need to be very deliberate about the file type and codec you choose.
Choosing the Right Format for Your Project
The best format isn't a one-size-fits-all answer. It completely depends on where this video is headed. A massive, uncompressed file that’s perfect for a professional video editor would be an absolute nightmare on a website, slowing it down to a crawl. On the other hand, a super-compressed web video won't cut it for a high-end broadcast project.
Let's break down the go-to options for exporting with a transparent background.
WebM (with the VP9 codec): This is the undisputed king for anything web-related. It gives you fantastic compression, which means small file sizes that load quickly, and it works flawlessly in all modern browsers. If you're creating an animated overlay for a website or a slick transparent ad, WebM is almost always the right call.
MOV (ProRes 4444 or Animation codec): This is the heavyweight champion for professional work. When you're making an overlay to use in another video project (think lower thirds or special effects), Apple ProRes 4444 is the industry standard. The files are gigantic, but the quality is absolutely pristine and lossless, preserving every last detail.
PNG Sequence: This is a bit different. Instead of one single video file, you get a whole folder packed with individual PNG images—one for every single frame of your clip. It's a great choice for short animations or when you need to import your video into motion graphics software like Adobe After Effects for more complex work.
My personal rule of thumb is pretty straightforward: If the video is going on the web, I use WebM. If it's being dropped into another video editor's timeline, it's ProRes 4444. Honestly, that simple rule covers about 95% of situations and gets you the right balance of performance and quality every time.
A Practical Comparison
Seeing the trade-offs side-by-side makes the decision much clearer. Here's a quick look at how these formats stack up for different needs.
Comparing Video Formats for Transparency
This table breaks down the best options for exporting your video with an alpha channel, focusing on their key features and ideal applications.
| Format (Codec) | Best Use Case | File Size | Quality | Web Browser Support |
|---|---|---|---|---|
| WebM (VP9) | Websites, online ads, browser animations | Low | Very Good | Excellent |
| MOV (ProRes 4444) | Professional video editing, broadcast | Very High | Perfect | Not for web |
| PNG Sequence | Motion graphics, short animations | High | Perfect | Not for web |
At the end of the day, exporting a transparent video isn't about finding a single "best" setting. It's about picking the right tool for the job. By matching the file format to its final destination, you make sure your hard work shines through with a clean, professional result.
Creative Ways to Use Your Transparent Video
Alright, you've nailed the technical side of making a transparent video. Now for the fun part: figuring out all the cool things you can actually do with it. This isn't just a neat visual trick; it's a game-changer for making content that feels more dynamic, professional, and genuinely engaging. When you can layer a person or a product over literally any background, you unlock a ton of creative freedom.
Let's ditch the theory and jump into some real-world examples that might spark some ideas for your own projects.
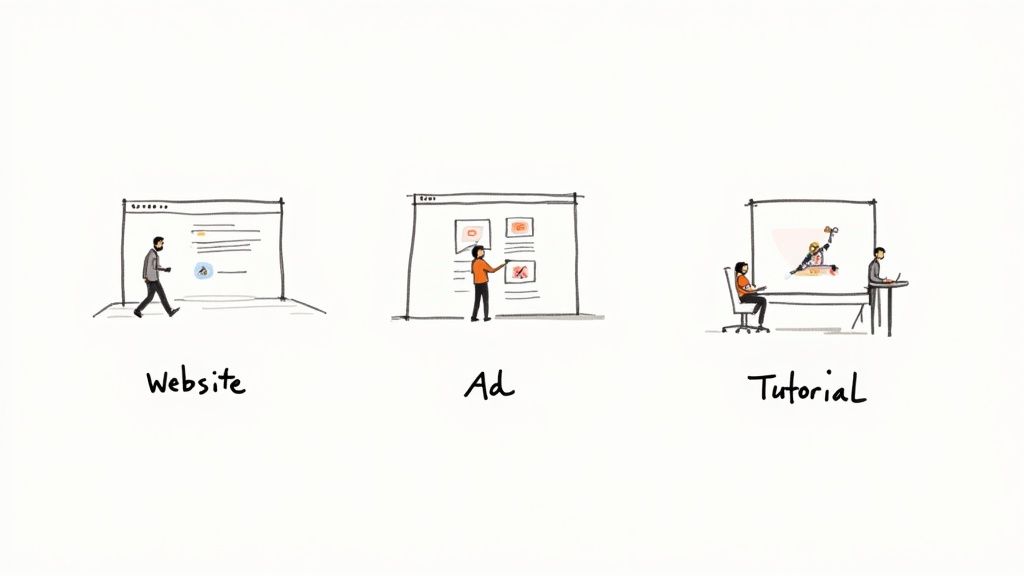
Elevate Your Website and Landing Pages
Let’s be honest, most websites can feel a bit static and impersonal. A video with no background is a fantastic way to bring your landing page to life and create an immediate connection with visitors.
Instead of a boring, boxed-in video embed, imagine a welcome video where you appear to walk right onto the screen, gesturing toward the sign-up form or a key feature. For an e-commerce brand, you could have a model seemingly walk alongside the user as they scroll, showing off an outfit in a way that feels completely integrated into the page. It’s a huge step up from a standard product photo.
Create Unskippable Social Media Ads
On platforms like Instagram and TikTok, you have maybe two seconds to stop someone from scrolling. Transparent videos are your secret weapon for creating ads that break the visual pattern of a user's feed.
Think about a User-Generated Content (UGC) style ad where the creator is layered over eye-catching text, B-roll, and slick graphics. The speaker can point to and interact with elements that pop up behind them, which adds a layer of polish that makes the ad feel both authentic and high-quality. You get the best of both worlds: the trust of UGC with a professional, clean look that can seriously boost engagement.
The real magic is breaking out of the rectangle. By dropping the background, your subject becomes part of the entire visual canvas. This lets you build more creative and immersive scenes that grab—and keep—people's attention.
Polish Your Educational and Tutorial Content
If you create tutorials or educational videos, clarity is everything. A transparent video lets you place yourself right on top of what you're explaining, whether that’s a software interface, a slide deck, or a complex chart.
Forget that tiny picture-in-picture box shoved in the corner. You can appear as a life-sized guide, pointing out specific features and maintaining eye contact with your audience. This is incredibly effective for software demos. You can overlay yourself onto the application, guiding users through the workflow without ever blocking their view. It feels less like a pre-recorded video and more like a personal, one-on-one coaching session.
Your Top Questions About Transparent Videos Answered
Even when you follow all the steps, you can still hit a few snags trying to get that perfect transparent video. It happens to everyone. Let's walk through some of the most common problems I see people run into and how to solve them.
Think of this as your go-to troubleshooting guide for those moments when things just aren't working right. Usually, a small tweak or understanding one key detail is all it takes to go from a frustrating mess to a flawless result.
How Do I Fix Messy or Jagged Edges?
This is easily the number one complaint. You get a fuzzy, pixelated, or just plain messy edge around your subject, and it ruins the whole effect. The cause almost always traces back to your original footage.
If you shot on a green screen, the culprit is usually uneven lighting that’s casting subtle shadows. If you're using an AI tool, it’s often because there wasn't a clean, high-contrast separation between your subject and what was behind them.
Here’s how you can try to fix it in post-production:
- Refine Your Matte: In a program like Adobe Premiere Pro, look for "Matte Cleanup" tools. You can gently "choke" (or shrink) the matte inward by a pixel or two and then add a very subtle feather to soften the transition.
- Watch Out for Motion Blur: Fast movements create natural motion blur, which is a nightmare for any keying software, AI or otherwise. The best solution is to reshoot with a higher shutter speed, but you can also try some de-blurring effects in your editor.
Honestly, the best fix is prevention. A well-lit, high-contrast shot is 90% of the battle. You'll save yourself a massive headache by getting the footage right on set instead of trying to rescue it in the edit.
Why Does My Transparent Video Just Have a Black Background?
Ah, the classic sign of an incorrect export. If you see a black background where there should be transparency, it means you've exported your video without an alpha channel.
Most standard video formats, like the super common MP4 (H.264), simply don't support transparency. When your editing software sees that empty space, it has no choice but to fill it with something, and it defaults to solid black.
The solution is simple: you have to export using a format that is built to handle an alpha channel. The two best choices are typically:
- WebM (VP9): Perfect for web use, like website headers or online ads.
- MOV (ProRes 4444): The professional's choice for high-quality editing workflows where you need to maintain pristine quality between programs.
Always double-check your export settings. Make sure you've selected a codec that explicitly mentions "alpha" or "transparency".
What’s the Best Way to Handle Fine Details Like Hair?
Wispy, fine hair is the ultimate stress test for any background removal method. There’s no easy answer here, but there are different approaches.
With a green screen, your lighting has to be absolutely perfect to avoid green light "spilling" onto the hair and making it impossible to key out cleanly. Even with great lighting, you'll probably spend a good amount of time in your software’s advanced keying tools, meticulously isolating every little strand.
This is one area where AI-powered tools have made a huge difference. They’re often trained on massive datasets of images and can do a surprisingly good job of preserving delicate hair details, even without a perfect studio setup. For projects on a tight deadline, letting an AI do the heavy lifting can save you hours of tedious manual work.
Ready to skip the technical headaches and create a video with no background in minutes? VideoBGRemover uses powerful AI to deliver clean, professional cutouts with just one click. No green screen, no complex software—just upload your video and let our tool do the work. Try it for free at videobgremover.com.
Ready to Remove Your Video Background?
See a free preview before you buy.
No credit card required • Free preview on every video