8 Crucial Video Editing Tips for Beginners to Master in 2025
Discover 8 essential video editing tips for beginners to improve your projects. Learn about pacing, color, audio, and workflows to create professional videos.
Stepping into video editing can feel like learning a new language. With endless timelines, complex software, and countless techniques, it is easy to feel overwhelmed before you even make your first cut. However, creating polished, professional-looking videos does not require years of experience; it requires a solid foundation of key principles and a smart workflow. This guide is designed to provide that foundation, breaking down fundamental concepts that will dramatically improve your editing process and the quality of your final product.
We will move beyond generic advice and focus on actionable video editing tips for beginners that deliver immediate results. You will learn how to structure your projects efficiently, master the art of pacing, and apply basic color and audio enhancements that make your content stand out. We will also cover practical techniques like using B-roll to tell a more compelling story and strategically removing backgrounds for a clean, professional look in your tutorials or product shots. For a deeper dive and more comprehensive guidance, explore these 8 crucial video editing tips for beginners to master in 2025. Whether you are creating your first YouTube video, a social media ad, or an educational tutorial, these core techniques will give you the confidence to turn raw footage into captivating content.
1. Master the Rule of Thirds
One of the most powerful yet simple video editing tips for beginners is to understand and apply the rule of thirds. This fundamental principle of visual composition can instantly elevate your videos from amateur to professional. The concept involves imagining your frame is divided into nine equal rectangles by two horizontal and two vertical lines, creating a 3x3 grid.
The idea is to place the most important elements of your shot along these lines or at their four intersections, known as "power points." This technique creates a more balanced, dynamic, and visually interesting composition that naturally guides the viewer's eye, rather than simply centering the subject, which can often feel static and less engaging.
How to Apply the Rule of Thirds in Editing
While it's best to frame your shots this way during filming, you can easily correct or enhance composition during the editing process. Use the crop and transform tools in your software to reframe your footage.
- Enable Grid Overlays: Most video editing software has a "safe margins" or "grid" overlay option in the preview window. Turn this on to see the 3x3 grid directly on your footage, making it easy to align key elements.
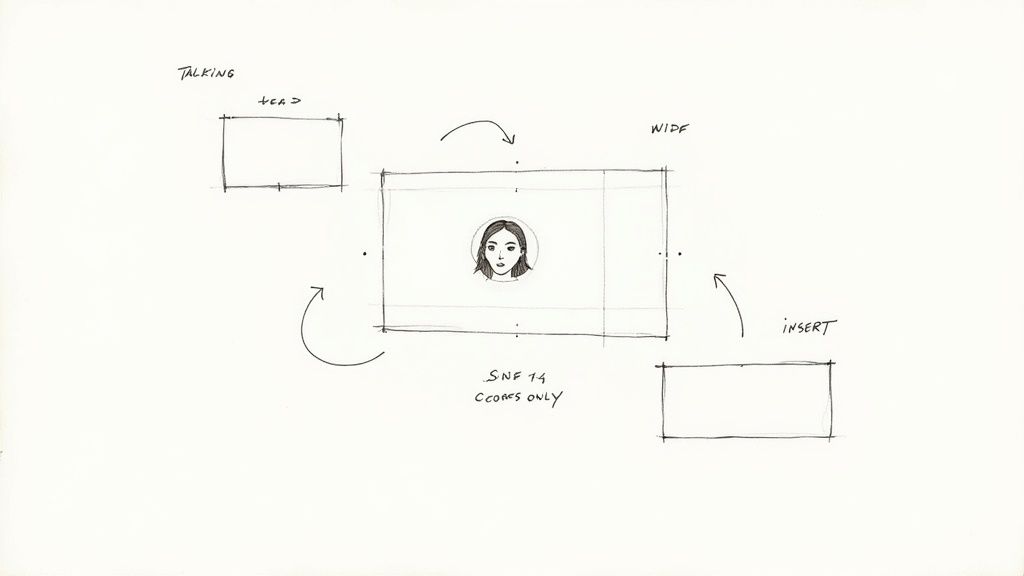
- Position Your Subject: When editing a talking head video for a tutorial, position the subject's eyes along the top horizontal line. This creates a natural and engaging connection with the audience.
- Balance the Frame: If your subject is on the left vertical line, consider placing a secondary element, like a product or a graphic, along the right vertical line to create visual balance.
- Guide Eye Movement: For landscape shots, place the horizon on either the top or bottom horizontal line instead of the middle. This emphasizes either the sky or the foreground, adding dramatic effect.
2. Use B-Roll Effectively
One of the most transformative video editing tips for beginners is learning how to use B-roll footage effectively. B-roll is the supplementary or alternative footage intercut with the main shot (A-roll). Instead of showing a single, continuous "talking head" shot, B-roll adds visual context, breaks up monotony, and makes your narrative more dynamic and professional.
This technique, popularized by filmmakers and news broadcasters, is essential for maintaining viewer engagement. It illustrates what the speaker is talking about, shows a product in action, or sets a specific mood. For example, a travel vlog uses scenic shots as B-roll, while a cooking tutorial shows close-ups of ingredients being mixed. Using B-roll correctly helps hide jump cuts and creates a seamless, polished final product.
How to Apply B-Roll in Editing
Strategic placement of B-roll can elevate your storytelling and visual appeal. It's not just about adding random clips; it's about reinforcing your message.
- Illustrate Your Narrative: When you mention a specific tool or concept, cut to a B-roll clip of that item. In a product promo, your A-roll might be a person talking about a feature, while the B-roll shows a close-up of that feature in use.
- Vary Your Shots: Collect a mix of wide shots, medium shots, and close-ups during filming. Having this variety gives you more creative options in the edit to emphasize different details and control the pacing.
- Use J-Cuts and L-Cuts: Create smoother transitions by having the audio from one clip start before the video (a J-cut) or continue after the video has changed (an L-cut). This is perfect for introducing B-roll without an abrupt change.
- Cover Editing Mistakes: B-roll is an excellent way to hide awkward pauses, mistakes, or jump cuts in your main footage. Simply place a relevant B-roll clip over the flawed section of the A-roll while keeping the primary audio track intact.
3. Perfect Your Audio Editing
A common mistake among new creators is focusing solely on visuals, but poor audio can make viewers click away faster than a blurry shot. One of the most critical video editing tips for beginners is to understand that audio quality is often more important than video quality for viewer retention. Clear, balanced, and professional-sounding audio builds trust and keeps your audience engaged, making your message powerful and easy to understand.
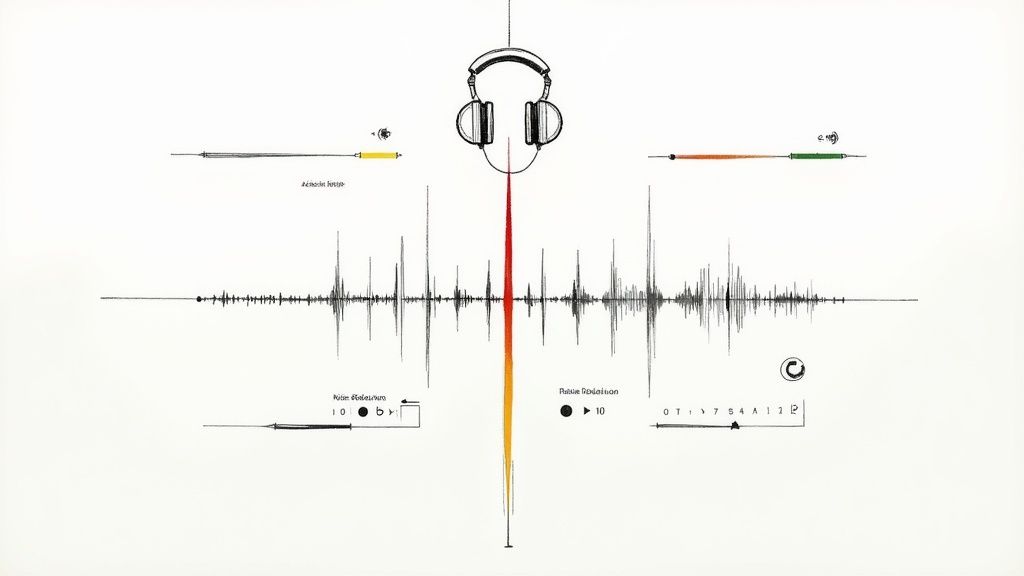
Perfecting your audio involves more than just adding a background track. It means ensuring dialogue is crisp and intelligible, background noise is minimized, and all sound elements are balanced harmoniously. Channels like MrBeast invest heavily in sound design because they know a clean audio experience directly impacts watch time and perceived production value.
How to Improve Your Audio in Editing
Even if your recording environment wasn't perfect, you can significantly enhance audio quality during the post-production phase. Most editing software includes basic tools to clean up and mix your sound effectively.
- Normalize Your Dialogue: The first step is to ensure your primary audio, like dialogue or voiceover, is at a consistent and audible level. A common industry standard is to normalize dialogue to peak around -6dB to avoid distortion while being loud enough.
- Reduce Background Noise: Unwanted sounds like humming air conditioners, computer fans, or distant traffic can be distracting. Use built-in noise reduction tools to clean up your dialogue tracks. For more persistent issues, you can learn more about how to remove background noise with specialized software.
- Balance Music and Effects: Background music should support your content, not overpower it. A good rule of thumb is to set your music volume between -15dB and -20dB below your main dialogue track. This keeps it present but not distracting.
- Use Audio Crossfades: To prevent abrupt cuts in music or ambient sound, apply a short audio crossfade (100-300ms) between clips. This creates a smooth, seamless transition that is much more pleasant for the listener.
4. Learn Essential Transitions
Transitions are the visual bridges that connect one clip to another, guiding your audience through the narrative. For those just starting out, one of the most crucial video editing tips for beginners is learning which transitions to use and, more importantly, when to use them. While flashy effects can be tempting, professional editing often relies on simplicity and purpose to maintain a smooth viewing experience.
The goal of a transition is to be felt rather than seen. A well-placed transition feels invisible and natural, advancing the story without distracting the viewer. Overusing complex wipes, spins, or zooms is a common beginner mistake that can make a video feel amateurish. Mastering a few fundamental transitions will give your edits a clean, polished, and professional look.
How to Apply Essential Transitions in Editing
Focus on the core transitions that form the backbone of nearly all professional video content. Your editing software will have a vast library of effects, but you will use the same few for most of your work.
- Master the Standard Cut: The most common and effective "transition" is the simple cut. This is an instant switch from one shot to the next. Use it for the vast majority of your edits (around 80-90%) to maintain pace and clarity, especially in dialogue scenes or fast-paced vlogs.
- Use Fades for Pacing: A fade to black signifies a major end, like the end of a scene or the entire video. A fade from black signals a beginning. Cross-dissolves, where one shot gently fades into another, are excellent for showing the passage of time or blending two related sequences.
- Keep Durations Short: Effective transitions are quick. Aim for a duration between 0.5 and 1 second. Anything longer can drag the pace down and draw unnecessary attention to the effect itself.
- Sync with Audio: A powerful technique is to time your cuts and transitions to the beat of your background music. This creates a rhythmic, engaging experience that makes your video more dynamic and satisfying to watch.
5. Develop Color Grading Skills
One of the most transformative video editing tips for beginners is learning to develop color grading skills. While color correction fixes technical issues like white balance and exposure, color grading is the artistic process of manipulating colors to create a specific mood, tone, and visual style. This step can elevate a simple video into a cinematic experience by using color to evoke emotion and guide the narrative.

Think of how different genres use color: horror films often use cool, desaturated blues and greens to create an unsettling atmosphere, while travel vlogs use vibrant, saturated tones to make destinations look exciting and beautiful. By learning basic color grading, you gain powerful control over how your audience perceives and connects with your content. It’s the difference between merely showing an event and telling a compelling story.
How to Get Started with Color Grading
Your editing software’s built-in color tools are the perfect place to start. Focus on making subtle changes that enhance the footage without looking unnatural. The key is to establish a consistent look that supports your video’s message.
- Correct First, Grade Later: Always perform basic color correction before you start grading. Ensure your white balance, exposure, and contrast are neutral and accurate. This gives you a clean slate for creative adjustments.
- Use Scopes, Not Just Your Eyes: Your monitor might not display colors accurately. Learn to use video scopes like the Waveform, Vectorscope, and Histogram to make objective, data-driven color decisions.
- Start with LUTs (Look-Up Tables): LUTs are preset color profiles that can be applied to your footage to achieve a specific look instantly. Use them as a starting point, then fine-tune the settings to make the style your own.
- Maintain Consistency: Apply the same color grade across all clips in a scene to ensure visual continuity. Most software allows you to save your color settings as a preset to easily apply them to other clips.
For a deeper dive into the specific tools and techniques, this tutorial provides a great visual guide:
Mastering color is a fundamental part of the post-production process. For more information on the technical side, you can explore the basics of how to edit an MP4 video to build a solid foundation.
6. Master Pacing and Rhythm
One of the most crucial video editing tips for beginners is mastering the art of pacing and rhythm. This invisible element dictates the emotional journey of your audience and is the key to maintaining their engagement. Pacing is the speed at which your story unfolds, controlled by the duration of your shots, the frequency of cuts, and the tempo of your audio.
Good pacing creates a heartbeat for your video, matching its rhythm to the content's mood and purpose. A fast-paced edit with quick cuts, like those seen in MrBeast videos, builds excitement and urgency, while a slower pace with longer shots, common in documentaries, allows for contemplation and emotional absorption. Getting this right ensures your video feels polished and intentional, preventing viewers from clicking away out of boredom or confusion.
How to Control Pacing and Rhythm in Your Edit
Developing a feel for pacing takes practice, but you can start by consciously making choices that influence the video's flow. Your editing software is your primary tool for shaping the rhythm of your narrative.
- Vary Shot Duration: Avoid using shots of the same length back-to-back. For standard dialogue scenes, aim for a mix of shots lasting 2-5 seconds. For high-energy action sequences or montages, use rapid cuts of 1-2 seconds to build momentum.
- Cut to the Beat: For dynamic content like ads or music videos, synchronize your visual cuts with the beat of the background music. This creates a powerful, cohesive experience that is deeply satisfying for the viewer.
- Use J-Cuts and L-Cuts: These professional techniques create a smoother, more natural flow. A J-cut is when the audio from the next clip begins before the video, pulling the viewer into the next scene. An L-cut is the opposite, where the video changes but the audio from the previous clip continues.
- Establish a Rhythm: Use longer, wider shots (5-8 seconds) at the beginning of a scene to establish the location and context. This gives the audience a moment to orient themselves before you transition into quicker cuts for dialogue or action.
7. Organize Your Project Efficiently
One of the most crucial yet overlooked video editing tips for beginners is to establish a strong organizational system before you even import your first clip. Proper project organization prevents lost files, speeds up your workflow, and minimizes frustrating errors. It's the foundational framework that allows you to focus on the creative aspects of editing instead of searching for misplaced assets.
A well-organized project means you can easily locate any piece of footage, audio file, or graphic, making the entire process smoother and more professional. This practice is standard in film studios and production houses for a reason: it saves an immense amount of time and prevents costly mistakes down the line, ensuring your project remains manageable as it grows in complexity.
How to Organize Your Video Editing Project
Adopting a systematic approach from the start is key. Before importing anything into your editing software, create a dedicated master folder for your project on your computer or hard drive. Inside this folder, build a consistent structure that you can reuse for every new video.
- Create a Master Folder System: Within your main project folder, create subfolders like Footage, Audio, Graphics, Project Files, and Exports. This keeps every asset type neatly separated and easy to find.
- Use Descriptive Naming Conventions: Don't stick with generic file names like "video_001.mp4." Instead, use a clear format such as
YYYY-MM-DD_ProjectName_ClipDescription, for example,2024-10-26_ProductPromo_CameraAngle1. This makes searching for specific shots effortless. - Mirror Your Folder Structure: Recreate the same folder structure inside your video editing software using "bins" or folders. Import your media into the corresponding bins to keep your digital workspace as tidy as your computer's file system.
- Implement a Backup Protocol: Protect your hard work by following the 3-2-1 backup rule: keep at least three total copies of your data, store two of them on two different types of media (e.g., a hard drive and cloud storage), and keep one copy offsite. For streamlined remote access and collaboration, modern solutions are also worth exploring. You can learn more about how cloud-based video editing can enhance your workflow and organization.
8. Use Keyboard Shortcuts and Efficiency Workflows
One of the most impactful video editing tips for beginners is to prioritize learning keyboard shortcuts. While clicking through menus works, it's incredibly slow and inefficient. Mastering shortcuts dramatically accelerates your editing speed, reduces repetitive mouse-related strain, and transforms your workflow from clunky to fluid. Think of it as learning to touch-type instead of hunt-and-peck; the initial effort pays off exponentially over time.
This practice involves using key combinations to perform common actions instantly, such as cutting clips, navigating the timeline, or adding effects. Professional editors in film, television, and high-speed YouTube production rely on these workflows to meet tight deadlines. By integrating shortcuts early, you build powerful muscle memory that lets you focus on the creative aspects of editing rather than the mechanics of the software.
How to Implement Shortcuts and Workflows
Every second saved on a repetitive task adds up to hours over the course of a project. Instead of trying to learn every shortcut at once, focus on the ones you use most frequently and build from there.
- Start with the Essentials: Begin by mastering 10-15 fundamental shortcuts. Focus on commands like the "cut" or "blade" tool (often 'C' or 'B'), play/pause (spacebar), undo (Ctrl/Cmd + Z), and timeline navigation (J, K, L keys are standard for shuttle controls).
- Create a Cheat Sheet: Write your most-used shortcuts on a small card and keep it by your monitor. This physical reminder helps reinforce the commands until they become second nature.
- Customize Your Workspace: As you get more comfortable, customize your keyboard layout to group related functions together. Map tools you often use in sequence to keys that are physically close, creating an ergonomic and intuitive setup tailored to your needs.
- Practice Deliberately: Dedicate a few minutes of each editing session to practicing shortcuts without using your mouse. This intentional practice is the fastest way to build the muscle memory required for a truly efficient workflow.
Beginner Video Editing Tips: 8-Point Comparison
| Technique | Implementation Complexity 🔄 | Resource Requirements ⚡ | Expected Outcomes ⭐📊 | Ideal Use Cases | Key Advantages 💡 |
|---|---|---|---|---|---|
| Master the Rule of Thirds | Low — simple guideline, needs practice | Minimal — grid overlay or framing awareness | ⭐ Improves composition and balance | Portraits, thumbnails, landscapes, interviews | Quick visual improvement; easy to teach |
| Use B-Roll Effectively | Moderate — requires planning and shot variety | Medium–High — extra shoot time, storage, organization | ⭐⭐ Boosts engagement; smooths edits | Tutorials, vlogs, news, product demos | Adds context, hides cuts, enhances storytelling |
| Perfect Your Audio Editing | Moderate — technical tools and techniques to learn | Medium — headphones, editing software, time | ⭐⭐⭐ Major impact on retention and perceived quality | Podcasts, narration-heavy videos, ASMR, interviews | Large quality gain for moderate effort |
| Learn Essential Transitions | Low — easy to apply, requires good judgment | Low — built-in effects, minimal assets | ⭐ Smoothes narrative when used sparingly | General editing, scene changes, hiding jump cuts | Improves flow; quick to implement correctly |
| Develop Color Grading Skills | High — steep technical & creative learning curve | Medium–High — calibrated monitor, software, time | ⭐⭐ Creates mood, consistency, professional look | Cinematic content, branded videos, storytelling | Strong aesthetic control; compensates lighting issues |
| Master Pacing and Rhythm | Moderate–High — needs intuition and testing | Medium — music, careful cutting, analytics | ⭐⭐ Improves retention and emotional impact | Action, comedy, educational, long-form videos | Maintains energy; aligns with audience expectations |
| Organize Your Project Efficiently | Moderate — initial setup and discipline required | Medium — storage, backups, folder structure | ⭐ Speeds workflow; reduces errors and rework | Any multi-asset projects, team workflows | Saves time long-term; enables collaboration |
| Use Keyboard Shortcuts & Workflows | Low — short learning curve, practice required | Low — time investment; optional tools (Streamdeck) | ⭐⭐ Greatly increases editing speed and comfort | Frequent editors, high-volume channels, prosumers | Saves hours; reduces physical strain and repetition |
Start Editing Smarter, Not Harder
Embarking on your video editing journey can feel like learning a new language, but the collection of tips we've explored provides a powerful Rosetta Stone. You now have a foundational roadmap to bypass the most common pitfalls and start producing content that commands attention. This isn't about memorizing every button in your software; it's about internalizing the core principles that separate amateur edits from professional productions.
Think of each tip as a distinct tool in your creative arsenal. Mastering project organization isn't glamorous, but it’s the bedrock that prevents frustrating delays and lost work. Similarly, dedicating time to perfect your audio is non-negotiable, as audiences are far more likely to forgive mediocre visuals than poor sound. These foundational practices are your springboard to more advanced techniques. As you grow more comfortable, the rhythm of your edits, the strategic use of B-roll, and the subtle art of color grading will shift from conscious decisions to creative instincts.
Key Takeaways for Your Next Project
To truly elevate your work, focus on these critical areas first. They offer the highest return on your time and effort:
- Pacing is Your Storyteller: More than any fancy effect, the rhythm of your cuts dictates the viewer's emotional journey. Use quick cuts to build excitement and longer takes to let important moments breathe.
- Audio is Half the Experience: Clean, balanced audio is essential. Never treat it as an afterthought. A small investment in learning basic audio mixing will dramatically improve your video's perceived quality.
- Organization Equals Speed: A tidy project folder and a structured timeline are your best friends. The time you spend organizing at the start will be paid back tenfold during the editing process.
- Simplicity Wins: Resist the urge to use every transition and effect you discover. A simple, well-timed cut is almost always more powerful and professional than a distracting wipe or dissolve.
Ultimately, these video editing tips for beginners are designed to help you edit with intention. Every choice, from selecting the right B-roll to applying a subtle color grade, should serve the story you are trying to tell. To truly edit smarter, selecting the right platform is your first critical step. Discover the ultimate guide to drone video editing software to streamline your workflow and find tools that match your creative ambitions.
The path to becoming a skilled video editor is paved with practice and patience. Apply these principles to your next project, analyze the results, and refine your approach. With each video, these techniques will become second nature, freeing you to focus less on the technical "how" and more on the creative "why."
Ready to instantly upgrade your production value? With VideoBGRemover, you can remove and replace distracting backgrounds from any video with just one click, no green screen required. Try VideoBGRemover for free and give your content the professional polish it deserves.
Tagged with
Ready to Remove Your Video Background?
See a free preview before you buy.
No credit card required • Free preview on every video