10 Video Editing Best Practices to Master in 2025
Discover 10 essential video editing best practices for professionals. Learn file management, pacing, color, audio, and export settings to elevate your work.
In the world of video content, the difference between an amateur upload and a professional production often lies in the invisible art of editing. It's more than just stringing clips together; it's a disciplined craft built on principles that ensure efficiency, quality, and narrative impact. This guide moves beyond simple cuts and transitions to explore the foundational video editing best practices that top-tier editors, content creators, and social media marketers use every day. Think of it as the framework that supports creative decisions, turning raw footage into a polished and engaging final product.
From structuring your project before the first clip is even imported to mastering the nuances of color, audio, and platform-specific exports, these actionable strategies will streamline your process. You will learn not just what to do, but why it matters for everything from YouTube tutorials and TikToks to professional product advertisements. We will cover the technical and creative steps that elevate your storytelling and ensure your final product looks and sounds as compelling as your original vision.
Whether you're a course creator recording a webinar, a UGC creator producing a Reel, or a developer integrating bulk processing via an API, mastering these core practices is the key to unlocking consistent, high-quality results. This comprehensive list provides a repeatable workflow to help you avoid common pitfalls, save valuable time, and consistently produce video that captivates your audience. Let's dive into the 10 essential practices that will transform your editing process from a series of tasks into a systematic art form.
1. Organize Your Project Structure and Assets
Before importing a single clip, the most crucial of all video editing best practices is establishing a logical and consistent project structure. This foundational step involves creating a standardized folder hierarchy and a clear naming convention for every asset, from raw footage to final exports. A disorganized project leads to lost files, broken media links, wasted time searching for assets, and significant friction if you need to collaborate or hand off the project.

This methodical approach, championed by professional production houses and software developers like Adobe and Avid, ensures every file has a designated home. It prevents the dreaded "Media Offline" error, streamlines your workflow, and makes your projects portable and future-proof.
How to Implement a Robust Project Structure
Start by creating a master project template folder that you can duplicate for every new video. This template should contain a pre-defined set of subfolders.
- 01_Project Files: For your editing software files (.prproj, .drp, .fcp).
- 02_Footage: Contains subfolders for different cameras or recording dates (e.g., A-Cam, B-Cam, Screen_Recordings).
- 03_Audio: Separate folders for Music, Voiceover, and Sound Effects (SFX).
- 04_Graphics: Holds logos, lower thirds, and other visual elements.
- 05_Exports: A dedicated place for all final rendered videos.
For naming conventions, a common professional format is [Date]_[ProjectName]_[ShotDescription]_[Version], such as 20240915_SummerPromo_InterviewWide_v01.mov. This system makes files instantly identifiable and sortable.
Key Insight: Treat your project folder as a self-contained ecosystem. By keeping all assets within this main folder and using relative paths, you can move the entire project to another drive or computer without breaking a single link. This discipline is non-negotiable for serious editors.
2. Use High-Quality Source Material
The quality of your final video is fundamentally limited by the quality of your source footage. This core principle, often summarized as "garbage in, garbage out," is one of the most critical video editing best practices. Starting with high-resolution, well-exposed, and high-bitrate footage gives you the maximum flexibility in post-production for color grading, reframing, and applying effects without introducing digital artifacts like banding or noise.
This practice was championed by pioneers like RED Digital Cinema and is a non-negotiable standard in professional filmmaking. Shooting in formats like 4K RAW or LOG provides a greater dynamic range and more color information, allowing you to recover details in shadows and highlights that would be lost in a compressed format. Even if your final delivery is 1080p, capturing in 4K allows you to crop, reframe, or stabilize shots without losing sharpness. To ensure your editing process begins with excellent footage, consider these essential wedding videography tips which apply broadly to capturing high-quality video in any setting.
How to Prioritize High-Quality Acquisition
Even without a Hollywood budget, you can significantly improve your source material by focusing on a few key areas during production.
- Resolution and Bitrate: Record at the highest resolution (e.g., 4K) and bitrate your camera allows. A higher bitrate captures more data per second, resulting in a cleaner, more detailed image.
- Shoot in LOG or RAW: If available, use a flat or LOG picture profile. This preserves the maximum dynamic range, giving you a "digital negative" that is perfect for color grading.
- Prioritize Lenses and Lighting: A high-quality lens on a mid-range camera will often produce a better image than a premium camera with a cheap lens. Good lighting is equally crucial for a clean, professional look.
- Maintain Consistent Settings: Ensure your frame rate, shutter speed, and white balance are consistent across all cameras to simplify the editing and color matching process. If your footage has a distracting background, a high-quality source makes it easier to use an AI video background remover.
Key Insight: Treat your camera sensor like a canvas. By providing it with as much light and data as possible through proper exposure and high-bitrate settings, you give yourself the most creative freedom in the edit bay. You can always stylize and compress a clean image, but you can never truly fix a poorly captured one.
3. Create and Work with Proxy Files
Working with high-resolution footage like 4K, 6K, or even 8K can bring even powerful editing computers to a crawl, resulting in stuttering playback and a frustratingly slow workflow. A cornerstone of professional video editing best practices is using a proxy workflow. This involves creating low-resolution, lightweight copies of your original high-resolution media files to use during the editing process.
This method, native to industry-standard software like Adobe Premiere Pro and DaVinci Resolve, allows for a responsive and fluid timeline, regardless of the original footage's size. When the edit is complete, the editing software seamlessly relinks to the original high-resolution files for the final export, ensuring maximum quality. This balances the need for a nimble editing experience with a pristine final product.
How to Implement a Proxy Workflow
Most modern NLEs (Non-Linear Editors) have built-in tools to automate this process. You can often set your software to generate proxies automatically upon importing your media.
- Choose a Lightweight Codec: Select a proxy codec designed for editing, not for final delivery. Formats like Apple ProRes Proxy or Avid DNxHR LB are excellent choices.
- Set a Lower Resolution: A resolution of 1280x720 or 1920x1080 is typically sufficient for the editing proxy, even if your source footage is 8K.
- Store Proxies Wisely: Keep your proxy files on your fastest internal drive (like an SSD) for maximum playback performance, while the larger original files can live on a slower, high-capacity external drive.
- Toggle Proxies On/Off: Familiarize yourself with the "Toggle Proxies" button in your software. This allows you to switch between the low-res proxies and the high-res originals with a single click to check focus or detail.
Key Insight: A proxy workflow is not just for high-end cinema cameras; it's a game-changer for anyone working with modern mirrorless camera footage, drone shots, or screen recordings. It decouples your editing performance from your final output quality, enabling you to edit complex 4K projects smoothly even on a mid-range laptop.
4. Master the Art of Pacing and Rhythm
Beyond technical cuts, one of the most powerful video editing best practices is mastering the invisible art of pacing and rhythm. This is the deliberate control over the timing of shots, cuts, and sounds to guide the viewer's emotional journey and maintain their engagement. Expert pacing isn't just about making things fast; it's about creating a heartbeat for your video, knowing when to accelerate for excitement and when to slow down for impact.
This fundamental skill separates amateur work from professional storytelling. Editors like Thelma Schoonmaker (a frequent Martin Scorsese collaborator) and directors like Edgar Wright build entire cinematic languages around rhythmic cutting. They understand that the duration of a shot or the precise moment of a cut can evoke tension, humor, or sorrow, turning a simple sequence into a memorable experience.
How to Control Pacing and Rhythm
Effective pacing comes from a conscious manipulation of time. It involves varying shot lengths and using audio as a guide to create a cohesive flow that feels intentional.
- Edit to the Beat: For music-driven content, use the music as your foundation. Place key cuts on the beat or at major musical shifts to create a powerful, synchronized effect. For dialogue, let the rhythm of the conversation guide your cuts.
- Vary Shot Duration: Avoid monotony by intentionally mixing short, rapid cuts with longer, more contemplative shots. Fast-paced sequences with sub-second cuts build intensity, while allowing a shot to linger for several seconds gives the audience time to absorb information and emotion.
- Use J-Cuts and L-Cuts: These techniques are essential for creating a smooth, professional rhythm. An L-cut (audio leads video) or J-cut (video leads audio) allows the sound from one clip to bleed into another, bridging the visual transition and preventing the pace from feeling jarring or robotic.
- Study the Masters: Analyze films, trailers, and even TikToks that hold your attention. Mute the video and just watch the cuts. How long does each shot last? When does the pace change? Deconstructing effective editing is a masterclass in itself.
Key Insight: Pacing is a tool for managing audience attention. In an era of shrinking attention spans, a dynamic rhythm is non-negotiable. Watch your edits with fresh eyes after a break; if you feel your own attention wandering, it's a clear sign your pacing needs adjustment. The goal is to keep the viewer leaning in, never looking away.
5. Color Grading and Correction Workflow
Beyond simply assembling clips, a professional video editor must implement a systematic approach to color. This workflow involves two distinct phases: color correction, which fixes technical issues like exposure and white balance to create a neutral, consistent baseline, and color grading, which applies a creative aesthetic to evoke a specific mood or style. This disciplined process ensures visual continuity across shots from different cameras or lighting conditions and is a cornerstone of high-quality production.
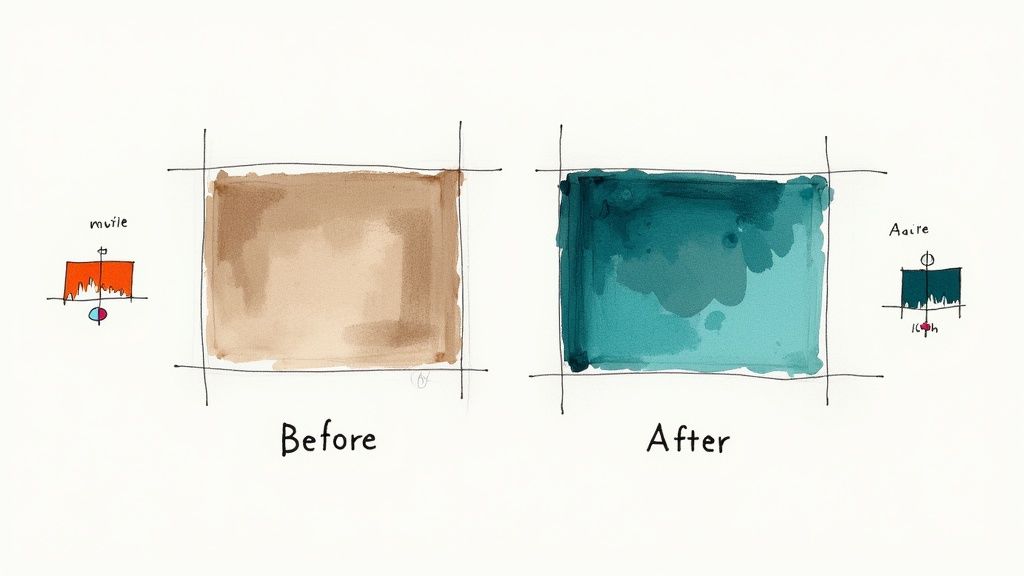
This methodology is fundamental in professional filmmaking, seen in the work of cinematographers like Roger Deakins and enforced by platforms like Netflix, which mandates strict color standards. The intentional teal-and-orange palette of shows like Dexter became a signature part of its identity, demonstrating how color can be a powerful storytelling tool. This practice elevates a project from an amateur assembly to a polished, cinematic piece.
How to Implement a Color Workflow
Always perform color correction before creative grading. The goal of correction is to make the footage look as true-to-life as possible, providing a clean canvas for artistic adjustments.
- Primary Correction: Use video scopes (Waveform, Vectorscope, Parade) to analyze and correct technical issues. Adjust exposure, contrast, and white balance to neutralize the image and match shots. Avoid relying solely on your eyes, as they can be easily deceived.
- Secondary Grading: Once all clips are balanced, apply creative looks. This can be done using Look-Up Tables (LUTs), custom adjustments to hue and saturation, or by creating power windows to isolate and change specific parts of the image.
- Consistency is Key: Create a grading preset or use an adjustment layer to apply a consistent look across an entire scene or project. This saves time and ensures a cohesive final product.
- Quality Control: Before exporting, review your grade on different devices (a phone, a laptop, a TV) to see how it translates across various screen types.
Key Insight: Treat color correction as a science and color grading as an art. The scientific step of using scopes to achieve a technically perfect baseline is non-negotiable. Only after achieving this neutrality can you effectively and consistently apply a creative grade that enhances the story's emotional impact.
6. Implement Proper Audio Editing and Mixing
One of the clearest distinctions between amateur and professional video is the quality of the audio. A critical video editing best practice is to treat sound design with the same rigor and attention as your visuals. This means moving beyond simple volume adjustments and embracing a dedicated audio editing and mixing workflow to create a clean, balanced, and immersive soundscape that elevates the entire viewing experience.
This meticulous approach is standard practice in professional productions, from the sophisticated spatial audio in films like 1917 to the pristine vocal clarity in podcasts like The Joe Rogan Experience. By separating the processes of noise reduction, equalization (EQ), leveling, and mixing, you ensure that every auditory element serves its purpose without competing for attention, preventing a muddy or distracting final product.
How to Implement a Professional Audio Workflow
Begin by organizing your audio tracks logically on the timeline before you start mixing. This mirrors the organizational principles used for visual assets and is just as vital.
- Dialogue & Voiceover: Dedicate specific tracks solely for spoken words. This allows for uniform processing to enhance clarity.
- Sound Effects (SFX): Group your diegetic (environmental) and non-diegetic (designed) sound effects on their own tracks.
- Music: Place background scores or musical cues on separate tracks to control their dynamics and prevent them from overpowering dialogue.
- Noise Reduction: The first step is often cleaning your primary audio. An essential part of this is knowing how to effectively remove background noise to create a professional foundation.
- Mixing: Once cleaned and organized, balance the levels of each track. Ensure dialogue is king, SFX adds texture, and music sets the mood without being intrusive. Always edit and mix using high-quality headphones to catch subtle imperfections.
Key Insight: A common mistake is finishing the visual edit and simply dropping in a music track. Professional sound design is an intentional, layered process. Mix your audio in a separate, dedicated pass after your picture is locked to give it the focus it deserves. Test the final mix on different systems (headphones, laptop speakers, TV) to ensure it translates well everywhere.
7. Use Keyboard Shortcuts and Customize Your Workflow
Navigating menus with a mouse is the single biggest bottleneck in any editing workflow. The practice of mastering and customizing keyboard shortcuts transforms video editing from a series of slow, deliberate clicks into a fluid, rapid process driven by muscle memory. This personal optimization of your digital workspace is a non-negotiable step for moving from amateur to professional-level speed.
This principle is universally adopted in high-pressure environments, from competitive editing events to fast-turnaround newsrooms. By remapping your most frequent actions to easily accessible keys, you can perform cuts, trims, and effects application almost instantaneously, keeping your creative focus locked on the timeline instead of hunting through menus.
How to Implement an Efficient Shortcut-Driven Workflow
Begin by learning the default shortcuts for your most common actions. Software like Adobe Premiere Pro and DaVinci Resolve have hundreds of built-in commands, but you only need a handful to see a dramatic improvement.
- Learn the Core 20: Start with foundational shortcuts. Master playback controls (J-K-L), setting In/Out points (I/O), cutting (Ctrl/Cmd + K), and ripple deleting.
- Customize for Comfort: As you identify your most repeated actions, remap them to keys that are easy to reach. For example, you might map "Add Edit" to the 'S' key and "Ripple Trim" to 'Q' and 'W'.
- Organize Your Workspace: Save custom panel layouts. Create one workspace optimized for assembly (large timeline, small program monitor) and another for color grading (large scopes, large program monitor), and assign shortcuts to switch between them.
- Expand with Tools: Consider using a programmable keypad like a Stream Deck to create custom macros that execute a series of commands with a single button press.
By investing time in this customization, you build a personalized editing environment tailored precisely to how you work, making every session more efficient.
Key Insight: Don't try to learn 200 shortcuts at once. Start by identifying the five menu commands you click most often and assign them to unused keyboard keys. Once those become second nature, find the next five. This incremental approach builds muscle memory without feeling overwhelming.
8. Master Transitions and Avoid Overusing Them
A common mistake among novice editors is the overuse of flashy transitions. One of the most important video editing best practices is understanding that transitions are powerful storytelling tools, not just decorative filler between clips. The default, and most common, edit should be a simple hard cut, which maintains pacing and provides a seamless viewing experience. An intentional transition, like a dissolve or a wipe, must have a clear purpose.
This principle, rooted in classic film editing theory, emphasizes clarity and narrative function over unnecessary flair. Filmmakers like Christopher Nolan rely almost exclusively on hard cuts to create a sense of immediacy and realism. Conversely, directors like Wes Anderson use highly stylized, consistent transitions as a key part of their signature aesthetic. The key is that the choice is always deliberate.
How to Implement Purposeful Transitions
Before adding any transition, ask yourself: what is the narrative justification for this effect? The goal is to guide the audience's understanding of time, place, or mood without distracting them.
- Hard Cut: Use for continuous action, dialogue, or to maintain a quick pace. This should be your default for over 90% of your edits.
- Dissolve (or Crossfade): Ideal for indicating a short passage of time, a change in location, or blending two related visual ideas.
- Fade to Black/White: Signifies a major scene change, the end of an act, or a significant time jump.
- Wipes and Stylized Effects: Reserve these for specific, motivated purposes, such as creating a retro feel, mimicking a certain genre, or aligning with a brand's unique graphic style.
When editing to music, timing your transitions to land on a significant beat or musical shift can create a powerful, satisfying impact for the viewer.
Key Insight: A transition should be felt, not seen. If the audience is consciously noticing the effect itself rather than absorbing the story it's telling, the transition has failed. Your primary goal is invisible editing; use effects sparingly and with clear intention to support the narrative.
9. Implement a Revision and Feedback Process
Editing in a vacuum is one of the fastest routes to project failure. A structured revision and feedback process is a non-negotiable video editing best practice that transforms the post-production phase from a subjective art form into a collaborative, goal-oriented workflow. This system establishes clear channels for stakeholders to review drafts, provide precise feedback, and approve changes, ensuring the final product aligns perfectly with the project's objectives. Without it, editors risk endless cycles of confusing changes, wasted effort, and dissatisfied clients.
This systematic approach, formalized by platforms like Frame.io and practiced rigorously in agency and corporate settings, prevents miscommunication and scope creep. It provides a documented trail of decisions and ensures that every stakeholder, from the creative director to the legal department, has given their approval before the final render. This process builds confidence and turns potential conflicts into constructive collaboration.
How to Implement a Structured Feedback Loop
The goal is to make providing and implementing feedback as efficient and unambiguous as possible. This starts with setting clear expectations before the first draft is even delivered.
- Set Revision Limits: Clearly state the number of revision rounds included in the project scope (e.g., two or three rounds). This prevents the project from dragging on indefinitely.
- Use Time-Based Notes: Instruct all reviewers to provide feedback with specific timecodes. A comment like "change the music at 01:15" is far more actionable than "I don't like the song."
- Centralize Communication: Use a single platform or document for all feedback. Avoid collecting notes from scattered emails, text messages, and verbal conversations, which inevitably leads to missed changes.
- Establish a "Picture Lock": Define a point in the process where all visual edits are considered final. After this "picture lock," only changes to color, audio, and minor graphics should be permitted.
- Require Consolidated Feedback: Whenever possible, ask the primary stakeholder to collect and consolidate all notes from their team into a single, prioritized list.
Key Insight: Treat feedback as a formal part of the production process, not an informal chat. By creating a clear, documented system with firm deadlines and precise, time-coded notes, you eliminate ambiguity, manage client expectations, and ensure the project moves forward efficiently toward a successful final export.
10. Optimize and Export for Intended Distribution Platform
The final step of the editing process, exporting, is not a one-size-fits-all procedure. One of the most critical video editing best practices is to customize your export settings, including codec, bitrate, and aspect ratio, specifically for the intended distribution platform. A video destined for a Netflix submission has vastly different technical requirements than one created for an Instagram Reel, and ignoring these differences can lead to poor playback, compression artifacts, and reduced audience engagement.
This platform-aware approach, championed by streaming services like Netflix and professional broadcasters, ensures your video maintains the highest possible quality while adhering to the platform’s specific delivery specifications. It respects the technical limitations and viewing environments of each medium, from a 4K HDR television to a vertical smartphone screen, guaranteeing your creative vision is preserved.
How to Implement Platform-Aware Exporting
Before exporting, always consult the official technical delivery documentation for your target platform. This will provide the exact specifications you need to follow. Based on this, you can create and save export presets within your editing software for recurring projects.
- Social Media (e.g., TikTok, Reels): Prioritize a vertical 9:16 aspect ratio, use a highly compatible H.264 codec, and keep bitrates moderate (e.g., 10-15 Mbps for 1080p) to ensure fast loading on mobile devices. Beyond general export settings, mastering the specific nuances is key; for example, fully mastering the Instagram Reels format involves understanding safe zones and audio trends.
- Streaming (e.g., YouTube): For optimal quality on YouTube, use the H.265 (HEVC) codec if available, which offers better compression. Aim for a bitrate of 35-45 Mbps for 4K uploads to give YouTube’s algorithm more data to work with, resulting in a cleaner final transcode. You can find more details on this in our guide to video compression without losing quality.
- Professional Delivery (e.g., Netflix, Broadcast): Adhere strictly to the provided spec sheet, which may require high-bitrate codecs like ProRes 422 HQ, specific color spaces (e.g., P3-D65), and distinct audio channel configurations like 5.1 surround sound.
Key Insight: Your master or archival file should always be exported at a higher quality than any single delivery file. Export a master version in a robust codec like Apple ProRes or DNxHR first. Then, create all your platform-specific deliverables from this high-quality source, not from other compressed versions.
10-Point Comparison of Video Editing Best Practices
| Item | Implementation Complexity 🔄 | Resource Requirements ⚡ | Expected Outcomes ⭐ | Key Advantages 📊 | Ideal Use Cases 💡 |
|---|---|---|---|---|---|
| Organize Your Project Structure and Assets | Low→Moderate — initial setup/time investment | Low — folders, naming docs, basic backups | Consistent workflow; fewer missing-media errors | Faster navigation, easier collaboration and archiving | Team projects, long-term or multi-editor productions |
| Use High-Quality Source Material | Moderate→High — capture knowledge & setup | High — storage, higher-end cameras, faster drives | Superior final image quality and grading flexibility | Future-proofing, better color/zoom latitude | Cinema, commercials, archival and high-end content |
| Create and Work with Proxy Files | Moderate — proxy generation and relinking steps | Moderate — extra storage and CPU for proxies | Smooth timeline playback on lower-end machines | Enables editing of 4K/8K on mid-range systems; faster rough cuts | Remote editors, large-resolution projects on limited hardware |
| Master the Art of Pacing and Rhythm | High — skillful, iterative timing decisions | Low — time and practice more than hardware | Increased engagement and viewer retention | Emotional control, improves perceived production value | Narrative films, trailers, ads, high-retention YouTube content |
| Color Grading and Correction Workflow | High — technical color knowledge and steps | High — grading software, calibrated monitors | Unified visual style and broadcast-legal output | Cinematic look, brand consistency, technical compliance | Features, series, commercials, branded content |
| Implement Proper Audio Editing and Mixing | High — audio engineering skills required | High — DAW/software, monitors/headphones, plugins | Clear intelligibility and immersive sound | Professional polish, accessibility, stronger storytelling | Films, podcasts, trailers, any content where clarity matters |
| Use Keyboard Shortcuts and Customize Your Workflow | Low→Moderate — learning curve for muscle memory | Low — time; optional hardware controllers | Significant speed and reduced menu friction | Large productivity gains; lower RSI risk | Frequent editors, tight-deadline workflows, competitive editing |
| Master Transitions and Avoid Overusing Them | Low — conceptual judgment and restraint | Low — standard editing tools suffice | Cleaner storytelling; fewer distracting effects | Polished, intentional tone shifts when applied sparingly | Most genres; use for time jumps, mood changes, music videos |
| Implement a Revision and Feedback Process | Moderate — coordination and versioning discipline | Moderate — time, review tools (Frame.io, comments) | Fewer late-stage reworks; clearer stakeholder alignment | Documented decisions, accountable approvals | Client work, agency projects, collaborative teams |
| Optimize and Export for Intended Distribution Platform | Moderate→High — platform specs knowledge | Moderate — encoding tools, time for multiple exports | Correct playback, optimal quality vs. filesize | Prevents rejections, faster uploads, better viewer experience | Multi-platform releases (streaming, social, broadcast) |
| Color Grading and Correction Workflow | High — specialized tools, methodical stages | High — Resolve/software, scopes, calibrated displays | Consistent color and mood; technical accuracy | Elevates visual storytelling; industry-standard looks | Features, episodic TV, branded series |
Putting It All Together: From Process to Professionalism
Navigating the world of video editing can feel like a complex journey, but as we've explored, success isn't about a single secret trick. It's about building a robust, repeatable system founded on a collection of interconnected video editing best practices. Moving beyond basic cuts and transitions requires a conscious shift in mindset, transforming you from a reactive assembler of clips into a proactive post-production artist. The principles we've covered, from meticulous project organization and the strategic use of proxies to the nuanced arts of pacing, color grading, and audio mixing, are the very pillars of this transformation.
Adopting these habits systematically eliminates the most common roadblocks that derail creative projects. A well-organized asset folder prevents frustrating searches for missing files. A disciplined color correction workflow ensures visual consistency. Mastering keyboard shortcuts shaves hours off your timeline, liberating valuable time that can be reinvested into creative experimentation and storytelling. This structured approach isn't about stifling creativity; it’s about creating the perfect conditions for it to flourish. When the technical foundation is solid, your mental energy is free to focus on what truly matters: crafting a compelling narrative that captivates your audience.
The Cumulative Impact of Best Practices
Individually, each practice offers a marginal gain. Using high-quality source material improves final clarity. Implementing a clear feedback process reduces revision cycles. Optimizing exports ensures your work looks its best on every platform. However, the true power of these video editing best practices is revealed when they are combined into a cohesive workflow.
Consider the cumulative effect:
- Efficiency Unleashed: When you combine an organized project structure, the use of proxy files, and a customized set of keyboard shortcuts, you create an editing environment built for speed. Edits that once took an hour can be completed in minutes, drastically accelerating your project turnaround time.
- Quality by Default: A workflow that integrates proper audio mixing, a deliberate color grading process, and platform-specific export settings ensures that a high standard of quality is not an occasional achievement but a consistent, reliable outcome for every project.
- Creative Freedom: By systemizing the technical and logistical aspects of editing, you build a dependable framework. This structure provides the safety net needed to take creative risks, experiment with new techniques, and push your storytelling boundaries without the fear of a project collapsing into chaos.
Your Next Steps to Mastery
The journey to becoming a proficient editor is a continuous process of refinement and learning. Don't feel pressured to implement every single one of these practices overnight. Instead, identify the biggest friction point in your current workflow and start there.
Is file management a constant headache? Dedicate your next project to building a perfect folder template. Does your audio consistently fall flat? Focus on learning the fundamentals of EQ and compression. As you master one practice, it will naturally create the space and momentum to integrate the next. The ultimate goal is to internalize these processes until they become second nature, an invisible framework that supports and elevates your creative vision. Remember, the most skilled editors aren't just creative; they are incredibly disciplined, and that discipline is what allows their creativity to shine through, turning every project into a polished, professional, and impactful piece of work.
Ready to supercharge your workflow and eliminate one of editing's most time-consuming tasks? VideoBGRemover leverages powerful AI to perfectly remove video backgrounds without the need for a green screen, aligning perfectly with the best practices of efficiency and high-quality output. Try VideoBGRemover today and see how you can achieve professional-grade transparent exports and composites in just a few clicks.
Tagged with
Ready to Remove Your Video Background?
See a free preview before you buy.
No credit card required • Free preview on every video