video background editor online: Quick Pro Edits in Minutes
Use our video background editor online to remove or replace skies, blur edges, and polish your footage in minutes. Fast, user-friendly, professional results.
A good video background editor online gives you the power to completely swap out or remove your video’s background in seconds. No green screen required. This is all thanks to smart AI that takes over a job that used to be incredibly tedious, putting professional-looking video within anyone’s reach.
Why Online Background Editors Are a Game Changer
It wasn’t long ago that creating polished video content meant serious investment. You needed expensive software, a dedicated studio space, and a clunky green screen setup. This high barrier to entry meant many creators and small businesses just couldn't produce the kind of high-quality videos necessary to compete. It was a slow, costly process that demanded a ton of technical skill.
Thankfully, things have changed completely. The rise of powerful browser-based tools has made video editing accessible to everyone. Now, anyone with a camera and an internet connection can get studio-quality results from their home office, living room, or even while traveling. This shift has been a huge problem-solver for millions of users.
The Power of AI in Your Browser
At the heart of this change is artificial intelligence. Modern algorithms can analyze every single frame of a video, instantly identifying the subject and separating it from the background with incredible precision. This AI-driven process, sometimes called "semantic segmentation," is smart enough to know the difference between a person, their hair, and the messy bookshelf behind them.
This is what makes online editors so effective—they do all the heavy lifting. This gives you back precious time to focus on your message and creative vision. Forget about painstakingly tracing outlines frame by frame; now you can get a clean, crisp cutout with just a few clicks.
The real advantage is speed and simplicity. An edit that could take an hour in traditional software can now be completed in under a minute, directly in your browser, without installing a single program.
Here’s a quick summary of the core capabilities to look for in a video background editor. This will help you choose the right tool for your needs.
Essential Features in a Modern Online Editor
| Feature | What It Does for You | Why It's a Must-Have |
|---|---|---|
| AI-Powered Removal | Automatically detects and isolates the subject from the background. | Saves hours of manual masking and rotoscoping. It’s the core technology that makes it all work. |
| Custom Backgrounds | Lets you upload your own images or videos as the new background. | Gives you complete creative control to match your branding or create the perfect scene. |
| Transparent Export | Allows you to export the subject with a transparent (alpha channel) background. | Incredibly useful for layering your video on websites, presentations, or other video projects. |
| Real-Time Preview | Shows you the final result instantly as you make changes. | Speeds up your workflow by eliminating the guesswork. You see what you get. |
| High-Resolution Output | Supports exporting in HD, 4K, or other high-quality formats. | Ensures your final video looks crisp and professional on any screen, from phones to monitors. |
Ultimately, a good editor combines these features into a simple, intuitive package that anyone can pick up and use right away.
A Growing Market Driven by Demand
The demand for easy-to-use video tools is absolutely exploding. The global video editing software market is growing fast, with cloud-based tools leading the way. This trend is part of a much larger movement in the AI video editing market, which is projected to grow from USD 0.9 billion in 2023 to USD 4.4 billion by 2033. This shows a massive shift toward smarter, more efficient video workflows.
This move toward intelligent automation has clear, practical benefits for everyone:
- Content Creators: Can now produce more content, faster. This is crucial for keeping up with the never-ending demands of platforms like TikTok, Instagram Reels, and YouTube Shorts.
- Marketers: Are able to quickly create polished product demos, testimonials, and social media ads without blowing their production budget.
- Educators and Trainers: Can record clean, professional-looking tutorials and webinar presentations from anywhere, instantly removing distracting backgrounds.
The rise of advanced AI video editing software, which contrasts automated and manual approaches, marks a major turning point. It’s all about empowering creativity and making high-quality video the standard, not a luxury.
Shoot Better Footage for Flawless Edits
The secret to a flawless background removal isn't just about the software—it starts with the video you shoot. While today's AI tools are incredibly smart, they're not miracle workers. The single best thing you can do for a professional-looking result is to give the algorithm a clean, well-shot video to work with.
Think of it this way: better ingredients make a better meal. A few simple tweaks on set will save you a massive headache during the edit. It’s all about creating a clear, sharp distinction between your subject and everything else.
Light Your Subject Deliberately
Good lighting is everything when it comes to a clean AI cutout. Your goal is simple: make your subject "pop" right off the background. This creates a crisp, well-defined edge that the software can easily trace. Don't worry, you don't need a massive Hollywood lighting rig.
A classic three-point lighting setup is the gold standard for a reason. You have a key light (your main source), a fill light (to soften shadows), and a back light (to create that halo of separation). Even a DIY version with lamps you already own can make a world of difference.
If you’re on a tight budget, just focus on making sure your subject is lit more brightly than the background. A ring light is a fantastic, affordable option for talking-head videos because it throws even, direct light right where you need it.
Pro Tip: Whatever you do, avoid filming with a bright window or a strong light source directly behind you. This turns you into a silhouette, and the AI will struggle to find your edges in the shadows, leaving you with a jagged, messy cutout.
Stabilize Your Camera
Shaky, handheld footage is the enemy of clean background removal. Every jolt and jitter creates motion blur, which softens the edges of your subject. The AI gets confused about where you end and the background begins, often resulting in that weird, "boiling" effect on the final cutout.
The fix is simple: use a tripod. Keeping your camera locked down ensures every frame is sharp and gives the AI consistent data to work with. No tripod? No problem. Just prop your camera or phone on a sturdy surface like a stack of books or a shelf. Anything is better than going handheld.
Choose Your Background Wisely
Even though the whole point is to remove the background, the one you shoot against still makes a huge difference. A cluttered space with colors that blend into your clothing is asking for trouble. You’ll end up with the AI either erasing parts of your shirt or leaving distracting chunks of the background behind.
For the best possible outcome, try to shoot against a background that is:
- Plain and Uncluttered: A solid-colored wall is your best friend. The less visual noise the AI has to sift through, the cleaner your result will be.
- High Contrast: This is crucial. If you're standing in front of a blue wall, don't wear a blue shirt. The more your clothing color contrasts with the background, the easier it is for the software to separate you.
- Free of Complex Patterns: Busy wallpaper, a packed bookshelf, or moving objects like a ceiling fan can seriously confuse the algorithm.
Even with powerful AI, the old-school rules still apply. To really master this, it helps to understand the fundamentals. Our guide on how to use a green screen is packed with timeless tips that will improve your results, even when you're not using a physical screen. By controlling what you can during the shoot, you’re setting the AI up for a home run.
Your Practical Guide to Editing Video Backgrounds
Alright, let's get our hands dirty. Moving from theory to practice is where you'll really see the power of a modern video background editor online. I'm going to walk you through a typical editing workflow, step-by-step, to show you how to take your raw footage and turn it into something polished and professional. We’ll focus on the essential controls that give you the best results.
The whole process is built to be intuitive, even if you’ve never touched a video editor before. Most online tools follow the same simple logic: upload your clip, let the AI do its thing, refine the details, and export. The real magic happens in that refinement stage—a few small tweaks there can make a world of difference.
From Upload to First Preview
The first step is always the easiest: getting your video into the system. Most online platforms have a simple drag-and-drop interface. Just pull your file onto the webpage, and the AI immediately starts analyzing your clip. This can take anywhere from a few seconds to a couple of minutes, mostly depending on your video's length and resolution.
This initial processing is where all the heavy lifting happens. The AI scans every single frame, identifies the main subject (usually a person), and creates a precise "mask" around them. This is what separates your subject from everything else in the shot. Once it's done, you'll get a preview of your subject on a plain or transparent canvas, with the original background completely gone.
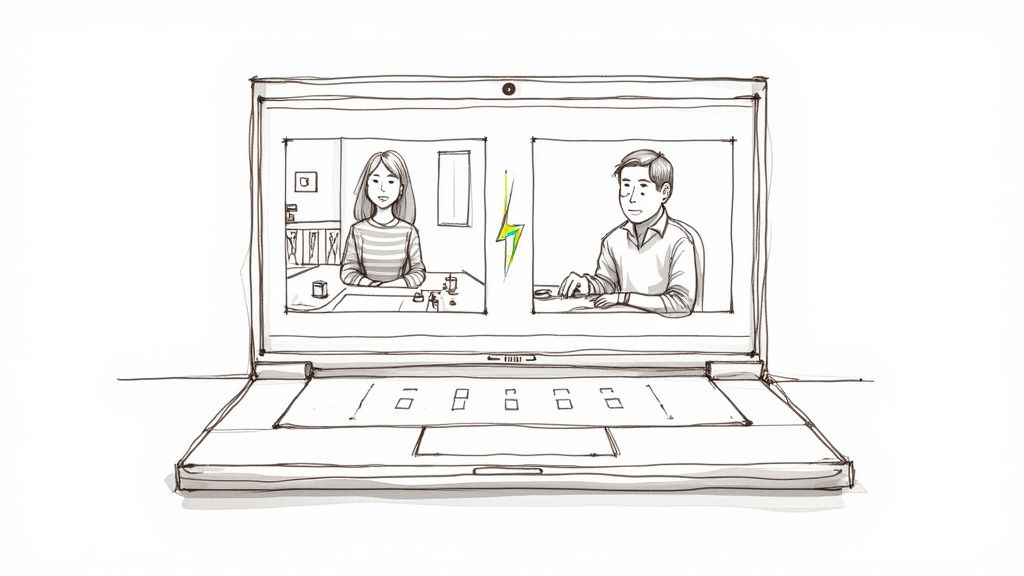
This is a good example of what a typical editor's interface looks like right after that first pass.
See how the person is cleanly isolated? The background options are right there on the side, ready to go. This instant preview is your starting point for everything that comes next.
Swapping for a New Background
With your subject perfectly cut out, the fun part begins. Now you can replace that old background with something that actually fits the story you're trying to tell. The options are usually pretty straightforward, but they offer a ton of creative freedom.
Most tools will let you choose from a few standard options:
- Solid Colors: This is perfect for creating clean, branded content or simple talking-head videos. A neutral gray can look sleek and professional, while a bold brand color helps reinforce your identity.
- Images: Have a high-resolution photo you want to use? Just upload it. You can place your subject in a virtual office, on a tropical beach—anywhere you can imagine. This is fantastic for product demos where the setting matters.
- Videos: Using another video as your background adds dynamic movement and a much more professional feel. You could place yourself in front of a bustling city scene, a calming nature loop, or even abstract motion graphics.
This is usually as simple as clicking a button and selecting your new background file. The editor automatically layers your subject right on top, so you can see how it all looks in real-time.
Here's a pro tip I've learned from experience: The key to a believable result is choosing a background where the lighting and perspective match your original footage. If your subject is lit from the left, a background image with a strong light source coming from the right will immediately look fake.
Fine-Tuning the Edges for a Seamless Blend
The initial AI cutout is often surprisingly good, but for that truly professional look, you'll want to spend a minute with the refinement tools. These controls are all about cleaning up the edges of the mask, making sure your subject blends naturally into their new environment instead of looking like a sticker.
The most important tool for this is often called edge refinement or feathering. A hard, sharp edge can look really artificial, like a cardboard cutout. Feathering softens that edge by just a few pixels, creating a subtle blur that tricks the eye into seeing a more natural transition. Just be careful—use it sparingly. Too much feathering will create a weird, hazy glow around your subject.
It’s amazing how efficient artificial intelligence has made this whole process. AI-driven automation is now saving professional editors an estimated 200 hours annually, and these one-click tools are a huge part of that. In fact, 75% of video marketers are already using AI in their video creation workflow. Studies have shown that AI can slash the time spent on tedious editing tasks by an average of 34%.
Preparing Your Footage for the Best Results
Before you even think about uploading, a few simple steps in the preparation stage can make a massive difference in your final edit. A little bit of planning helps the AI do its best work.
This quick infographic breaks down the process for shooting better footage from the start.
As you can see, it really boils down to three pillars of good source material: proper lighting to create strong contrast, a steady camera to avoid motion blur, and a clear, uncluttered background to reduce any confusion for the AI. Getting these fundamentals right makes the entire editing process smoother and gives you a much more professional result. Our comprehensive guide on how to remove a video background online dives even deeper into perfecting your setup.
And as you get better at editing video backgrounds, don't forget the fundamentals. Brushing up on these 8 essential video editing tips for beginners will improve the overall quality of your videos, making your background swaps even more convincing and your content more engaging.
Getting Your Hands Dirty: Advanced Edits for Tricky Footage

Sometimes, that one-click AI process gets you 95% of the way there, which is a fantastic starting point for most projects. But what about that final 5%? That’s where the real magic happens, especially when you’re dealing with footage that can stump even the smartest algorithms.
This is where you’ll learn to wrestle with the tough stuff—the complex details that separate a decent edit from a professional one. We’re talking about wispy hair, blurry motion, and objects you can see right through. Nailing these challenges will make your videos truly stand out.
Taming Fine Hair and Fuzzy Edges
Fine, detailed hair is the classic nightmare for any background removal tool. The AI has to make a pixel-by-pixel decision: is this a strand of hair or the background peeking through? If it gets this wrong, you end up with either a blocky "helmet head" or a weird, transparent halo around your subject.
The fix usually involves getting a bit more hands-on with manual refinement tools. Most professional-grade online editors offer a "masking" or "paint" brush. This lets you go in and tell the AI exactly what to keep and what to erase, either frame-by-frame or with a global adjustment. It takes more effort, but for a critical shot, it’s completely worth it.
Here are a few tips I've learned from experience:
- The Restore Brush is your friend: Gently paint over areas where the AI got too aggressive and clipped off strands of hair. I always use a soft, small brush to be as precise as possible.
- Erase lingering pixels: Carefully clean up any background artifacts stuck between strands of hair. Don’t be afraid to zoom way in to see what you’re doing.
- Feather the edges slightly: Once your mask is clean, adding a tiny bit of feathering—just 1-2 pixels—can soften the edges and help the hair blend more naturally into its new environment.
Dealing with Motion Blur and Fast Action
Fast movement creates another common headache. When a subject moves quickly, the camera captures motion blur, softening their outline. The AI then struggles to find a clean, hard edge to cut, which can result in a blurry or distorted silhouette that looks totally out of place against a crisp new background.
While you can't remove motion blur that's already baked into the footage, you can manage it. The trick is to make the blur feel intentional by matching it to the new background. A subject with motion blur against a perfectly static image just looks wrong.
A great workaround is to use a video background that also has some movement. Another option is to apply a subtle directional blur to your new background image that matches the direction of your subject’s motion. This little detail helps integrate the subject into the scene, making the whole effect much more convincing.
Handling Semi-Transparent Objects
What about things like a glass of water, a sheer scarf, or a pair of glasses? These semi-transparent objects are tricky because they aren't fully solid or fully see-through. A basic AI might just delete them or leave them as an opaque, unrealistic blob.
This is where a more advanced video background editor online really proves its worth. The best tools can handle alpha channel transparency, which means they can preserve that partial see-through quality.
When the automated tool fails, a creative workaround is often the best solution. I've found it's sometimes easier to duplicate the video layer, mask out just the transparent object, and then manually adjust its opacity over the new background. This gives you total control.
Adding Shadows to Ground Your Subject
One of the biggest giveaways of a replaced background is a "floating" subject. When someone is just pasted into a new scene without a shadow, our brains immediately know something is off. They don't look like they are actually in the environment.
A simple drop shadow can solve this problem instantly. It grounds your subject in the new scene and makes the entire composition feel more realistic and cohesive.
Here’s a quick process for creating a believable shadow:
- First, duplicate your cutout to create a copy of your isolated subject layer.
- Next, fill this new layer with solid black. This will become the shadow.
- Position and distort the black layer, moving it down and using skew or distort tools to make it look like a shadow being cast on the ground.
- Then, add a Gaussian blur to soften the shadow's edges. Real shadows are almost never perfectly sharp.
- Finally, lower the opacity until it looks natural. A realistic shadow is often only 15-30% opaque.
This simple technique adds an incredible amount of depth to your video. It only takes a couple of minutes but elevates the final product significantly. It's these small, thoughtful details that truly make all the difference.
Getting Your Final Video Out Into the World
https://www.youtube.com/embed/DHSw4yghUZs
You've done the hard work—you’ve nailed the edit, cleaned up the edges, and picked the perfect new background. Now for the final hurdle: exporting. This is where your creation gets packaged up for the world to see, and the settings you choose here are just as important as the edit itself.
Get it right, and your video looks sharp and professional everywhere, from a 4K TV to a smartphone. Get it wrong, and all your effort can be wasted on a pixelated, blurry final cut. A good export honors the quality of your original footage and delivers it beautifully to your audience.
The Best File Formats for the Job
When you’re ready to download from a video background editor online, you’ll usually see a few format options. MP4 is almost always the one you want. Why? It's the universal language of web video, offering a fantastic balance between high quality and a file size that won’t take forever to upload. It just works, everywhere.
Inside that MP4 container is a codec that does the heavy lifting of compression. The H.264 codec is the industry workhorse for a reason. It's incredibly efficient and supported by pretty much every device and platform on the planet. For most projects, MP4 (H.264) is your best bet.
But what if you need to layer your subject into another video project? That’s when you need a format that supports transparency, like MOV ProRes 4444 or WebM. These are the go-to formats for pros who need to composite their footage in tools like Adobe Premiere Pro or DaVinci Resolve.
Exporting with a Transparent Background
This is where things get really creative. Exporting with a transparent background means you get a video file of just your subject—no background, not even a solid color. It’s a game-changer for so many workflows.
Here’s how people are using it every day:
- Motion designers drop transparent videos of people into complex animated graphics.
- Web developers create interactive experiences by having a spokesperson appear to float over the webpage content.
- Video editors composite presenters into virtual sets or create slick picture-in-picture effects for tutorials.
To pull this off, you have to choose a format that supports an alpha channel—that’s the extra bit of data that tells the software which parts are transparent. Think of it as a stencil for your video.
Optimizing for Quality and File Size
The final piece of the export puzzle is balancing resolution and file size. You want the sharpest image possible, but you also need a file that’s practical to upload and stream. It’s a constant tug-of-war.
High-quality video isn't just a "nice to have" anymore; it's an expectation. Video now reaches 92% of all internet users, and a staggering 87% of consumers say video quality directly influences their trust in a brand. This is why 85% of companies now rely on video for marketing. While professional desktop tools like Adobe Premiere Pro (which holds about 35% market share) have been the standard, online editors are making this level of quality much more accessible. You can find more of these fascinating video editing statistics on electroiq.com.
My Two Cents: Always export at the highest resolution your target platform recommends. For YouTube, that's at least 1080p, but 4K is even better. For Instagram Reels or TikTok, you'll want a vertical 1080x1920. Don't sabotage your hard work with a low-res export.
Choosing the Right Export Settings
Use this quick reference guide to select the best export settings for your video based on where you plan to share it.
| Platform | Best Format | Ideal Resolution | Key Tip |
|---|---|---|---|
| YouTube | MP4 (H.264) | 1920x1080 or 3840x2160 | Upload in 4K if possible; YouTube's compression is kinder to higher-res files. |
| Instagram/TikTok | MP4 (H.264) | 1080x1920 | Keep it vertical. High frame rates (60fps) can make motion look smoother. |
| Website Embed | WebM or MP4 | 1920x1080 | Focus on compression to ensure fast page load times. A smaller file is better here. |
| Pro Editing | MOV (ProRes 4444) | Same as source | This is for when you need transparency (alpha channel) to composite in another editor. |
Getting this right ensures your video looks its best, loads quickly, and provides a great experience for your viewers.
Striking that perfect balance between visual clarity and file size can be tricky. If you want to go deeper, we've put together a guide on video compression without losing quality that's packed with practical tips. A smart export strategy is the final touch that ensures your video truly stands out.
Common Questions About Removing Video Backgrounds
Even with the best tools, you're bound to have a few questions when you start out. When it comes to swapping out video backgrounds online, a handful of common hurdles and curiosities always seem to surface. Getting the right answers can be the difference between a headache and a smooth, creative workflow.
Let's walk through some of the things people ask most often. These insights should help you get much better results and feel more confident in your edits.
Can I Actually Edit Videos in 4K?
You can, but this feature is a major dividing line between different tools. Many free or basic editors will cap your output at 720p or 1080p. It's a way for them to manage processing times and keep their costs down. For serious work, though, you need more firepower.
If you’re creating anything professionally, you should specifically look for a platform that supports 4K (3840x2160 pixels) processing. Working in 4K from the start means your final video will be incredibly crisp and detailed. It just gives you so much more flexibility down the line, even if you ultimately export in 1080p, because you started with higher quality source material.
Do I Still Need to Bother with a Green Screen?
Honestly, for most projects today, you don't. Modern AI has gotten shockingly good at separating a person from just about any background you throw at it. This is probably the single biggest win of using a modern online editor—the pure convenience.
That said, a physical green screen still gives you the absolute sharpest, most precise cutout. If you're shooting a big-budget commercial where every single pixel counts, a well-lit green screen provides the AI with a perfectly clean, unmistakable edge to work with. It's especially helpful for getting those tricky, fine details like wisps of hair just right.
For 95% of creators making content for social media, internal training, or YouTube, a decent shot without a green screen will look fantastic. The tech has really come that far.
How Do These Online Tools Handle Really Long Videos?
This is a huge one, especially if you create webinars, interviews, or in-depth tutorials. The ability to process long-form content is what separates the casual apps from the genuinely professional services.
A lot of online editors have surprisingly strict time limits, often capping videos at just a few minutes long. It makes sense—longer videos demand a ton of processing power. If your work involves longer footage, you have to find a platform that was specifically built for that workload.
Here’s a general idea of the limitations you’ll run into:
- Free Tiers: You'll be lucky to get more than 60 seconds.
- Basic Subscription Plans: These often top out around 10-20 minutes per video.
- Pro-Level Services: These can handle much longer files, sometimes up to 60 or even 120 minutes, and are usually priced accordingly.
My advice? Always check the platform’s specs before you upload that hour-long interview. It’ll save you a ton of time.
What's the Best Way to Deal with Motion Blur?
Motion blur is one of the trickiest artifacts to work with because it’s not an editing mistake—it's baked right into your original footage. When you or your subject moves fast, the camera naturally creates soft edges that are tough for any AI to cleanly separate from the background.
While you can't magically remove the blur, you can make it look more natural. The best approach is to place your subject against a new background that also has some inherent motion. For instance, a person with a bit of motion blur will look way more believable against a video of a busy cityscape than a perfectly static, crisp photograph. It helps the blur feel intentional.
Here’s another pro tip: if your camera supports it, shoot at a higher frame rate, like 60 frames per second (fps). This captures more visual information every second, which means less blur in each individual frame. It gives the AI a much cleaner plate to work with from the get-go.
Ready to create stunning videos with flawless backgrounds? VideoBGRemover makes it simple. Upload your footage, let our AI do the work, and export a professional-quality video in minutes. Try it for free and see the magic for yourself at videobgremover.com.
Tagged with
Ready to Remove Your Video Background?
See a free preview before you buy.
No credit card required • Free preview on every video