8 Pro TikTok Video Editing Tips to Master in 2025
Level up your content with our top 8 TikTok video editing tips. Learn expert techniques for transitions, sound, and effects to go viral this year!
In the fast-paced world of TikTok, capturing attention within the first three seconds is crucial. While a great idea is the starting point, the magic that transforms a simple clip into a viral sensation often lies in the edit. Seamless transitions, perfectly synced audio, and dynamic effects are no longer just for professional videographers; they are the tools of today's most successful creators. This guide moves beyond the basics, offering a curated roundup of essential tiktok video editing tips that will elevate your content, hook viewers instantly, and give you the polished, professional edge needed to stand out on the For You Page.
Mastering these techniques directly impacts view duration and engagement, which are key metrics for the platform's algorithm. Higher engagement not only boosts your visibility but can also increase your earnings. Understanding how much TikTok pays per view provides a powerful incentive to refine your editing skills, as a more polished video is more likely to be shared and rewatched, maximizing its monetization potential.
We will break down eight specific, actionable strategies that you can implement immediately. From mastering the art of the jump cut to leveraging advanced background removal, these techniques will help you create videos that not only get watched but get shared. Whether you're a UGC creator, a social media marketer, or an editor looking to optimize for vertical formats, this list provides the practical details you need. We'll cover everything from speed ramping and sound design to advanced color grading and trending effects, ensuring you have the knowledge to produce high-impact content consistently.
1. Jump Cuts and Quick Transitions
One of the most powerful and widely used TikTok video editing tips is mastering the jump cut. This technique involves filming a continuous take and then deliberately cutting out small sections of the footage. The result is a dynamic, slightly jarring transition that makes the subject appear to "jump" from one position or state to another. It's a fundamental tool for compressing time, eliminating unnecessary pauses, and maintaining a high-energy pace that keeps viewers hooked from the very first second.
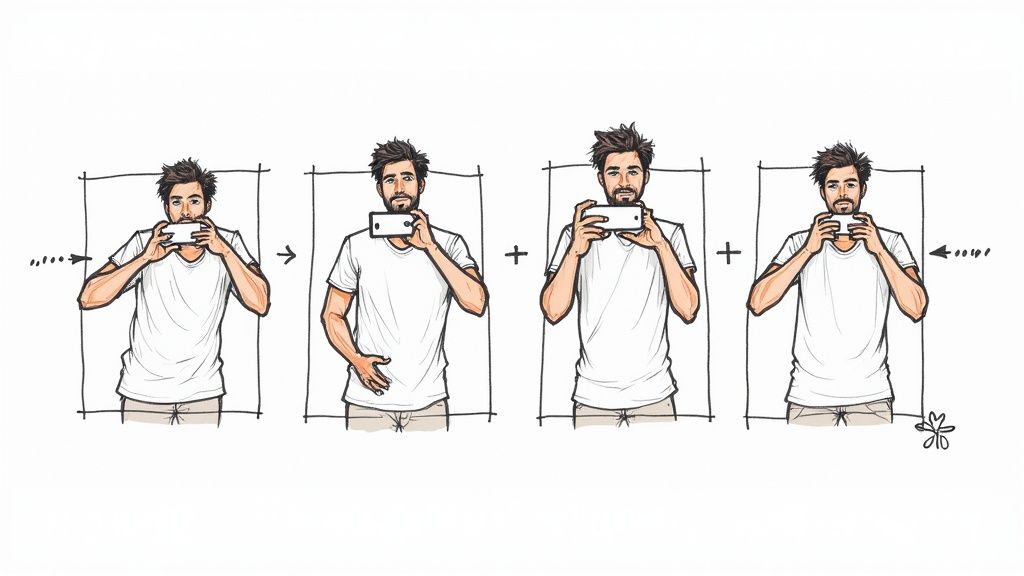
This editing style is incredibly effective on TikTok because it directly caters to the platform's fast-paced nature. By removing dead air, you ensure every moment of your video delivers value, whether it's information, humor, or visual transformation. It’s the secret behind those seamless beauty tutorials where makeup looks appear instantly, or educational videos where creators condense complex topics into 60 seconds.
How to Implement Jump Cuts Effectively
To make your jump cuts feel intentional and polished rather than accidental, follow these actionable tips:
- Cut on Pauses: The best time to make a cut is during a natural pause in your speech or right after you've completed an action. This creates a smoother, more logical transition for the viewer.
- Maintain Consistency: Establish a rhythm with your cuts. If you're cutting every 2-3 seconds, try to maintain that pace throughout the video. This creates a predictable and engaging viewing experience.
- Enhance with Sound: Add a subtle "swoosh" or "pop" sound effect at the moment of each cut. This audio cue emphasizes the transition and makes it feel more deliberate and impactful.
- Try the J-Cut: For a more advanced technique, use a J-cut where the audio from the next clip begins a fraction of a second before the visual cut. This helps pull the audience smoothly into the next scene. For those just starting, mastering fundamental cuts is a great first step. You can explore more about foundational editing techniques in this guide on video editing for beginners.
2. Text Overlay and On-Screen Graphics
An essential TikTok video editing tip for boosting clarity and engagement is the strategic use of text overlays and on-screen graphics. This technique involves adding contextual information, punchlines, or captions directly onto your video footage. By doing so, you make your content more accessible, emphasize key points, and cater to viewers who watch with the sound off, which is a significant portion of the platform's audience.

This method is incredibly versatile and powerful on TikTok. It allows creators to add another layer of storytelling or humor, such as placing a punchline on screen right as it's delivered. For educational content, on-screen text can highlight important terms or summarize key takeaways, reinforcing the message and improving information retention. In a fast-scrolling environment, text can immediately communicate your video's value proposition, convincing a user to stop and watch.
How to Implement Text Overlays Effectively
To ensure your on-screen text enhances rather than detracts from your video, follow these actionable tips:
- Prioritize Readability: Keep text legible on small mobile screens. Use bold, clear fonts (sans-serif fonts like Helvetica or Poppins work well) and ensure the color contrasts sharply with the background. Adding a subtle outline or shadow to the text can make it pop.
- Time It Perfectly: Sync your text appearance and disappearance with audio cues or on-screen actions. Having text pop up to emphasize a specific word or phrase makes the video feel more dynamic and professionally edited.
- Keep It Concise: Avoid cluttering the screen. Limit on-screen text to short, impactful phrases of 3-5 words at a time. This makes the information easy to digest quickly without overwhelming the viewer.
- Respect the Safe Zones: Be mindful of TikTok’s interface elements. Place your most important text and graphics away from the bottom and right edges of the screen where captions, usernames, and engagement icons live. For a more in-depth exploration of adding text effectively, check out this complete guide to text overlays for video.
3. Green Screen and Background Replacement
One of the most transformative TikTok video editing tips is leveraging green screen technology, also known as chroma keying. This powerful effect allows you to completely replace your real-world background with any image or video you choose. It opens up a universe of creative possibilities, letting you transport your viewers to a tropical beach, a bustling city, or even the surface of Mars, all without leaving your room. It’s the key to crafting immersive stories and visually striking content that stands out on the "For You" page.

This technique is a game-changer for creators across all niches. Educational accounts can use it to display complex diagrams or historical photos behind them as they teach. Comedy creators can place themselves in absurd situations or play multiple characters in different locations within the same video. It’s also incredibly useful for news-style updates, product reviews where you can show the product page in the background, and reaction videos where you overlay yourself onto another video. The green screen effect empowers you to produce high-concept videos on a minimal budget.
How to Implement Green Screen Effectively
To achieve a clean, professional-looking green screen effect and avoid a pixelated or glitchy final product, focus on a proper setup and execution with these actionable tips:
- Ensure Even Lighting: The most critical factor is lighting. Your green screen needs to be lit evenly and brightly, without any hot spots or dark shadows. This helps the software cleanly distinguish the background from the subject.
- Avoid the Color Green: Do not wear any clothing, jewelry, or accessories that are green or have green tones. Any green on your person will be keyed out along with the background, making you appear transparent.
- Maintain Distance: Position yourself at least three to four feet away from the green screen. This prevents the green light from reflecting off the screen and spilling onto your skin or clothes, which can create a messy "keyed" edge.
- Use a Wrinkle-Free Backdrop: Wrinkles and creases on your green screen create shadows and variations in color, making it much harder for the software to isolate the background. Use a smooth, taut fabric screen for the best results. For a deeper dive, explore this guide on becoming a green screen creator for more advanced techniques.
4. Speed Ramping and Slow Motion Effects
Manipulating the speed of your footage is one of the most effective TikTok video editing tips for creating a cinematic and engaging feel. Speed ramping, the technique of smoothly transitioning between different playback speeds within a single clip, allows you to dictate the video's rhythm. You can slow down moments for dramatic emphasis, then speed them up to quickly move through less critical parts, creating a dynamic flow that captivates viewers.

This technique is incredibly versatile and powerful on TikTok. Fashion creators use it to showcase outfit details in slow motion before rapidly switching to the next look. Sports creators emphasize a key athletic move, and cooking tutorials use fast-forward to breeze through chopping or mixing. By controlling time, you guide the audience's focus, making your content feel more professional, intentional, and perfectly synchronized with trending audio.
How to Implement Speed Ramping Effectively
To make your speed effects look smooth and serve a purpose rather than feeling random, follow these actionable tips:
- Shoot in High Frame Rate: For silky-smooth slow motion, you must film at a higher frame rate. Set your camera to at least 60 frames per second (fps), or 120 fps if available. This provides more frames to work with, preventing choppy or blurry results when you slow the footage down.
- Sync Speed to the Beat: The most impactful use of speed ramping is syncing it to the music. Align a transition from fast to slow motion with a beat drop or a significant musical cue. This synergy between audio and video creates a powerful, satisfying effect that resonates with viewers.
- Emphasize Action or Emotion: Use slow motion to highlight a moment of high action, a dramatic reveal, or a subtle emotional expression. Conversely, use fast-forward to condense repetitive or time-consuming actions, like setting up a scene or a long walk, keeping the viewer engaged.
- Enhance with Sound Design: Amplify your speed changes with corresponding sound effects. A "whoosh" sound as the video speeds up or a deep, resonant "boom" as it slows down can make the effect feel much more immersive and polished.
5. Audio Syncing and Sound Effects
On TikTok, audio is not just background noise; it's a core component of the viewing experience. Audio syncing is the art of perfectly aligning your video cuts, on-screen actions, and transitions with the beat of the music or the timing of a sound effect. This technique transforms a simple video into a captivating, almost rhythmic piece of content that feels professional and satisfying to watch. It's the magic behind perfectly timed dance challenges, comedic skits, and seamless transition videos.
This meticulous editing style is crucial for engagement on a platform driven by trending sounds. When a viewer's brain recognizes a pattern between what they see and what they hear, it creates a powerful sense of cohesion and polish. Syncing to a popular audio track also tells the TikTok algorithm that your content is relevant to a current trend, significantly boosting its potential reach. From a simple "swoosh" effect on a transition to cutting a clip precisely on a song's bass drop, sound is your most powerful storytelling partner.
How to Implement Audio Syncing Effectively
To make your audio work in perfect harmony with your visuals, apply these practical TikTok video editing tips:
- Cut to the Beat: Import your chosen audio track first and listen for its distinct beats, claps, or instrumental changes. Mark these moments in your editing timeline and make your video cuts align perfectly with them. This creates a seamless, professional flow.
- Layer Sound Effects: Don't rely on just the background music. Add subtle sound effects to emphasize actions. A "pop" for an object appearing, a "ding" for a new text overlay, or a "punch" sound for a comedic moment adds another layer of engagement and entertainment.
- Balance Your Audio Levels: Ensure your primary audio (music or voiceover) is the loudest, while sound effects are secondary. You want effects to enhance the experience, not overwhelm it. A video with chaotic, unbalanced sound is an instant scroll-past for most viewers.
- Prioritize Clean Audio: Even the best syncing can be ruined by distracting background noise. Ensuring your original recording is clear is fundamental. For videos where ambient noise is unavoidable, you can find helpful resources on how to remove background noise to ensure your primary sound stands out.
6. Color Grading and Filters
Beyond the cuts and transitions, color is one of the most powerful storytelling tools in your editing arsenal. Color grading is the process of adjusting the color, contrast, saturation, and brightness of your footage to evoke a specific mood or aesthetic. On TikTok, this goes beyond simple filters; it's about creating a signature visual identity that makes your content instantly recognizable and emotionally resonant.
This editing technique is crucial for establishing brand identity and influencing a viewer's emotional response. A warm, vintage filter can create a feeling of nostalgia, while a high-contrast, cool-toned grade can feel more moody and cinematic. For creators, consistent color grading is what transforms a series of individual videos into a cohesive, professional-looking portfolio. It's a key element in many successful TikTok video editing tips because it adds a layer of polish that can elevate your content from amateur to expert.
How to Implement Color Grading Effectively
To make your colors look intentional and professional rather than over-processed, follow these actionable tips:
- Establish a Visual Theme: Decide on a mood for your content. Do you want it to feel bright and energetic, dark and moody, or soft and dreamy? Choose a color palette and stick to it across your videos for brand recognition.
- Start with Presets, Then Customize: Many editing apps offer presets or LUTs (Look-Up Tables). Use these as a starting point, but always tweak the settings like contrast, saturation, and temperature to create a unique look that perfectly fits your footage.
- Match Colors to Your Message: Ensure your color grade complements the content. A vibrant, saturated look works well for high-energy dance videos or travel vlogs, while a more desaturated, subtle grade might be better for educational or serious topics.
- Avoid Oversaturation: A common mistake is pushing colors too far, which can make your video look unnatural and cheap. Aim for subtle enhancements that make your footage pop without overwhelming the viewer. Unless it's a specific stylistic choice, less is more.
7. Picture-in-Picture and Multi-Layer Editing
One of the more advanced TikTok video editing tips that can significantly elevate your content is mastering picture-in-picture (PiP) and multi-layer editing. This technique involves overlaying one or more video clips or images onto a primary video, allowing multiple visuals to share the screen simultaneously. It’s the engine behind reaction videos, detailed tutorials, and dynamic split-screen comparisons, transforming a single frame into a multi-faceted storytelling canvas.
This editing style is incredibly powerful for providing context, commentary, or additional information without cutting away from the main action. On TikTok, where viewers’ attention is scarce, showing a product in action while also displaying a user’s genuine reaction in a small window is far more compelling than showing each sequentially. This technique adds layers of depth and engagement, allowing creators to convey complex ideas or reactions efficiently within a short timeframe.
How to Implement Picture-in-Picture Effectively
To make your multi-layer edits look professional and intentional rather than cluttered and confusing, follow these actionable tips:
- Establish a Visual Hierarchy: Your main subject or primary video should always occupy the largest portion of the screen. Position the secondary clip (the "picture-in-picture") in a corner where it doesn't obstruct crucial details. This guides the viewer's focus.
- Create Clear Separation: Use a thin border, a subtle drop shadow, or a colored background behind your overlayed clip. This small detail helps visually distinguish the layers and makes the composition look cleaner and more professional.
- Balance Your Audio: If both video layers have audio, ensure they don't compete. Lower the volume of the secondary clip significantly or remove it entirely, so the primary audio remains clear and dominant. The only exception is in reaction videos, where balancing both audio sources is part of the experience.
- Animate Your Layers: Instead of having the PiP window just appear, add a simple slide-in or fade-in animation. This subtle motion makes its entrance feel smoother and more polished, adding a dynamic touch to your video. You can achieve this effect easily within CapCut or other third-party editing apps that offer more robust multi-layer support than TikTok's native editor.
8. Trending Transitions and Visual Effects
Beyond simple cuts, mastering trending transitions and visual effects is a key TikTok video editing tip that can make your content feel current and algorithm-friendly. These techniques use creative, often eye-catching effects to bridge scenes, moments, or transformations. They are more than just a way to move between clips; they are a form of visual storytelling that leverages popular trends to boost engagement and visibility on the platform.
This editing style is crucial for creators in niches like fashion, beauty, and comedy, where a clever transition can become the centerpiece of the video. Think of the seamless outfit changes using a hand swipe, a "before and after" reveal behind a closing door, or a spin transition perfectly timed to a song's beat drop. These effects grab attention and create a "wow" factor that encourages viewers to re-watch and share, signaling to the algorithm that your content is valuable.
How to Implement Trending Transitions Effectively
To make your transitions look polished and intentional, focus on precision and creativity. Follow these actionable tips:
- Study the For You Page: The best way to find trending transitions is to actively watch your For You Page. Pay attention to how top creators are moving between clips and save videos that inspire you.
- Time It to the Beat: The most satisfying transitions are synchronized with the audio. Align your visual effect, like a snap or a jump, perfectly with a beat drop or a specific sound cue in the music. This makes the edit feel incredibly smooth.
- Maintain Consistency Between Shots: To create a seamless effect, ensure your lighting, background, and camera position are as consistent as possible between the two clips you are connecting. This is vital for "magic" transitions where an object or person transforms.
- Practice Your Movements: Many transitions, like the popular zoom or spin, require physical movement. Practice the motion several times to ensure it's fluid and matches the pace of the edit you have in mind. A smooth camera movement is much easier to edit than a shaky one.
TikTok Editing Tips: 8-Point Comparison
| Technique | 🔄 Complexity | ⚡ Resource Requirements | 📊 Expected Outcomes | 💡 Ideal Use Cases | ⭐ Key Advantages |
|---|---|---|---|---|---|
| Jump Cuts and Quick Transitions | 🔄 Low — simple trimming and cuts | ⚡ Low — basic phone/editor, minimal render time | 📊 Higher retention; tighter pacing | 💡 Vlogs, tutorials, comedy, condensed explanations | ⭐ Fast to produce; improves engagement and professionalism |
| Text Overlay and On-Screen Graphics | 🔄 Medium — timing, legibility, animation | ⚡ Low–Medium — text tools, careful layout | 📊 Better accessibility and comprehension; silent-feed performance | 💡 Educational clips, punchlines, captions, lyrics | ⭐ Improves clarity and shareability; accessible to deaf/hard-of-hearing |
| Green Screen and Background Replacement | 🔄 Medium–High — lighting and keying precision | ⚡ Medium — backdrop, even lighting; or phone effect | 📊 High creative flexibility; boosted production value | 💡 Virtual sets, character skits, simulated locations | ⭐ Enables varied environments without location shoots |
| Speed Ramping and Slow Motion Effects | 🔄 Medium — fps planning and smooth ramp curves | ⚡ Medium — high-fps footage needs storage and support | 📊 Dramatic emphasis; trendy visual style increases engagement | 💡 Action, beauty reveals, fashion, music-synced edits | ⭐ Highlights key moments; enhances storytelling dynamics |
| Audio Syncing and Sound Effects | 🔄 Medium–High — beat alignment and mixing | ⚡ Low–Medium — sound libraries, mixing controls | 📊 Strong emotional/comedic impact; higher viral potential | 💡 Lip-sync, comedy timing, transition hits, dance videos | ⭐ Polishes final product; maximizes impact and timing |
| Color Grading and Filters | 🔄 Medium — color theory and subtle adjustments | ⚡ Low–Medium — presets or manual sliders, LUT support | 📊 Consistent branding; mood and aesthetic cohesion | 💡 Fashion, lifestyle, cinematic content, brand videos | ⭐ Establishes visual identity and improves perceived quality |
| Picture-in-Picture & Multi-Layer Editing | 🔄 Medium–High — compositing and audio management | ⚡ Medium — more processing, multi-track editor needed | 📊 Enables comparisons/reactions; richer storytelling | 💡 Reaction videos, tutorials with close-ups, before/after | ⭐ Shows multiple perspectives; increases informational density |
| Trending Transitions & Visual Effects | 🔄 Medium — precise timing and choreography | ⚡ Low–Medium — transition packs or manual effects | 📊 Short-term trend reach; high shareability if well-executed | 💡 Outfit changes, trend-driven clips, choreographed edits | ⭐ Boosts discoverability when paired with current trends |
From Editor to Creator: Putting These Tips into Action
You have now explored the essential framework for elevating your content, moving from simple recordings to polished, engaging TikTok videos. We've navigated a comprehensive toolkit of tiktok video editing tips, covering everything from the rhythmic precision of jump cuts and the dynamic energy of speed ramping to the visual storytelling power of color grading and multi-layer editing. These eight core techniques are not just isolated tricks; they are the fundamental vocabulary of the TikTok platform.
The journey from a passive video editor to a proactive content creator is built on the deliberate application of these skills. It’s about understanding that a well-timed sound effect can amplify a punchline, a seamless transition can hold a viewer’s attention through a complex story, and a clean background can make your subject the undeniable star of the show. Your goal should be to internalize these concepts until they become an intuitive part of your creative process.
Synthesizing Skill and Strategy
Mastering these techniques is less about technical perfection and more about strategic implementation. A common pitfall for aspiring creators is attempting to cram every effect and transition into a single 15-second clip. This often results in a video that feels chaotic and amateurish. The real artistry lies in restraint and purpose.
Instead, focus on a methodical approach. For your next three videos, challenge yourself to perfect a single technique.
- Video 1: Focus on Pacing. Concentrate solely on your cuts. Use jump cuts to remove every single unnecessary pause and create a brisk, forward-moving narrative.
- Video 2: Focus on Text. Experiment with on-screen text overlays. Use them not just to add captions but to emphasize key points, ask questions, and guide the viewer’s eye.
- Video 3: Focus on Atmosphere. Dedicate your edit to color grading and sound design. See how a specific filter combined with a subtle background sound can completely transform the mood of your footage.
This deliberate practice builds muscle memory and a deeper understanding of why a particular editing choice works. It shifts your mindset from "what can I add?" to "what does this story need?"
Your Actionable Path Forward
The most successful TikTok creators are perpetual students of the platform. The tiktok video editing tips that are effective today will evolve tomorrow. Your next steps are crucial for building and sustaining momentum.
First, create a "swipe file" of edits you admire. When you see a transition, a text effect, or a color grade that captivates you, save the video. Deconstruct it frame by frame. Ask yourself what makes it effective and how you could adapt that concept to your own niche and style. This is not about copying; it’s about learning the language of visual trends.
Second, commit to a creation schedule. Consistency is the engine of growth on TikTok. Even if you only post a few times a week, a regular schedule forces you to constantly practice and refine your editing skills. Each video is a new opportunity to experiment with a different technique from this guide.
Finally, leverage tools that streamline your workflow. As we discussed, a clean and professional aesthetic can make a massive difference. Techniques like green screen and background replacement used to be complex and time-consuming. Now, with specialized tools, you can achieve a high-production look with minimal effort, allowing you to focus more on the creative and strategic elements of your content.
Embrace the process of iteration. Your first attempt at speed ramping might feel clumsy, and your initial color grades might look unnatural. That is part of the journey. With each edit, you are not just making a video; you are honing a valuable skill set that is directly tied to audience growth, engagement, and effective communication in the digital age. Go beyond just consuming content and become the creator who sets the next trend.
Ready to elevate your videos with a clean, professional look? VideoBGRemover makes background replacement effortless, allowing you to seamlessly place yourself in any environment without a physical green screen. Visit VideoBGRemover to try it for free and unlock a new level of creative freedom in your TikTok edits.
Ready to Remove Your Video Background?
See a free preview before you buy.
No credit card required • Free preview on every video