A Modern Guide for the Green Screen Creator
Become a pro green screen creator. Our guide covers everything from classic lighting setups to modern AI workflows for flawless video effects.
At its heart, a green screen creator uses a technique called chroma keying to swap out a solid-colored background for pretty much any image or video you can imagine. This effect, which used to be the exclusive domain of Hollywood blockbusters, is now something anyone with a camera and some basic software can pull off, unlocking endless creative options right from a home studio.
From Hollywood Magic to Your Home Studio
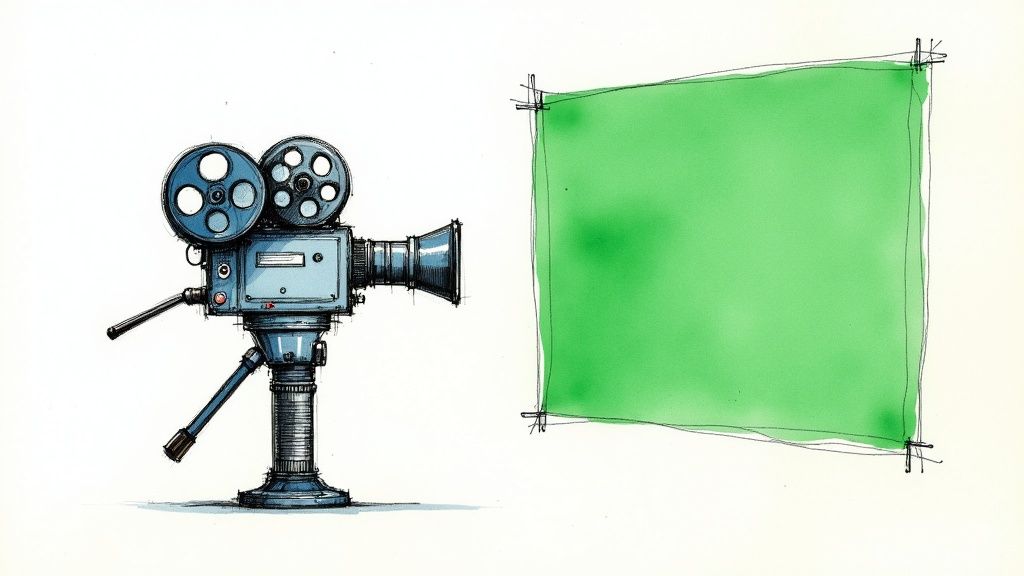
Being able to transport yourself to a bustling cityscape, a distant galaxy, or even just a clean, branded backdrop is one of the most powerful tools in a video creator's arsenal. This "magic" is actually a pretty straightforward process called chroma keying. The idea is simple: film your subject in front of a single, solid color—that famously vibrant green—and then tell your software to make that specific color transparent. Whatever video or image you place on the layer underneath will show right through.
This is exactly how a meteorologist appears to be standing in front of an animated weather map or how your favorite streamer seems to be right inside their video game. It's not just for flashy special effects, either. It’s a practical tool for creators who need to control their environment, keep their branding consistent, or film in a location they can't actually get to.
Why Green Became the Industry Standard
So, why green? You could technically use any color, but green (and to a lesser extent, blue) became the go-to choices for some very practical reasons. This technology didn't just appear overnight; it evolved over decades, starting with blue screen techniques pioneered in the late 1930s. One of the most famous early examples is the 1940 film The Thief of Bagdad, which used a blue screen to create the illusion of a genie flying out of a bottle—a true marvel for its time. You can find some fascinating deep dives on this from movie history experts.
But over the years, green started to win out. Here’s why:
- Digital Cameras See Green Best: Modern digital camera sensors are actually most sensitive to green light. This means they capture more detail and less digital noise in the green channel, giving you a much cleaner and more precise result when it's time to key out the background.
- Less Conflict with Skin Tones: Green has very little overlap with human skin tones compared to colors like red or blue. This dramatically reduces the risk of accidentally making parts of your actor transparent or dealing with that annoying colored fringe (known as "spill") around their hair and shoulders.
- It’s Not a Common Wardrobe Color: Think about it—how often do people wear bright, vibrant green? On the other hand, blue is incredibly common, especially in denim. Using a green screen minimizes the chances of your subject's clothing disappearing along with the background.
The software works by identifying that specific shade of green and creating a "matte," or an alpha channel. This matte is essentially a map that tells the program which parts of the image to keep and which parts to make transparent, letting the new background shine through.
The Foundation for Every Creator
Understanding the "why" behind all of this is more than just trivia; it's the foundation that helps you make smarter decisions as a creator. When you know that the goal is to create a single, solid shade of green for the software to easily remove, you'll understand why lighting your screen evenly is so critical. Getting this right will save you hours of headaches in post-production.
Key Takeaway: A great green screen effect is 90% setup and 10% software. The quality of your raw footage—especially how well you've lit your screen and your subject—will always be the biggest factor in your final result.
This foundational knowledge is also the perfect baseline as we start looking at newer technologies. AI tools like VideoBGRemover can now achieve similar results without a physical screen at all, but they still operate on the same core principle: separating a foreground subject from a background.
Whether you're hanging fabric and setting up lights or just letting an algorithm do the heavy lifting, the goal is always the same: create a clean separation. By mastering the core concepts of chroma keying, you’ll be far better equipped to troubleshoot problems, adapt on the fly, and choose the right tool for your creative vision.
Building Your First Green Screen Setup
Alright, let's get our hands dirty. Building your physical setup is one of the most satisfying parts of the process, and frankly, it's where the magic really begins. The quality of your raw footage dictates everything down the line, and a little thought here will save you hours of headaches in the edit.
You don’t need a Hollywood budget to pull off professional-looking results. The secret is finding a material that kills wrinkles, stops light from bouncing around unevenly, and actually fits your space. Each option has its own pros and cons, so the best choice really comes down to your specific situation.
Selecting Your Screen Material
First things first: you need a backdrop. The goal is simple—a smooth, non-reflective surface with a consistent color. Let's break down the usual suspects.
- Fabric Screens: These are the ones you see in most starter kits. They’re portable and cheap, which is great. The downside? They wrinkle if you so much as look at them wrong. Wrinkles create shadows, and shadows are the mortal enemy of a clean key. You'll spend a good amount of time with a steamer or stretching the fabric to get it smooth.
- Seamless Paper Rolls: A staple in photo studios for a reason. Seamless paper gives you a perfectly smooth, glare-free surface straight off the roll. But it's delicate. It can tear or get dirty easily, and once a section is ruined, you have to cut it off. Think of it as a consumable expense.
- Chroma Key Paint: If you have a dedicated space, this is the gold standard. A few coats of specialized chroma key paint on a wall transforms it into a permanent, perfect, and durable green screen. It delivers the best quality by far, but you obviously can't pack it up and take it with you.
Pro Tip: If you go with a fabric screen, grab some cheap A-clamps from a hardware store. Use them to pull the fabric tight on its stand from all sides. This one simple trick can eliminate 90% of the wrinkles that would otherwise ruin your shot.
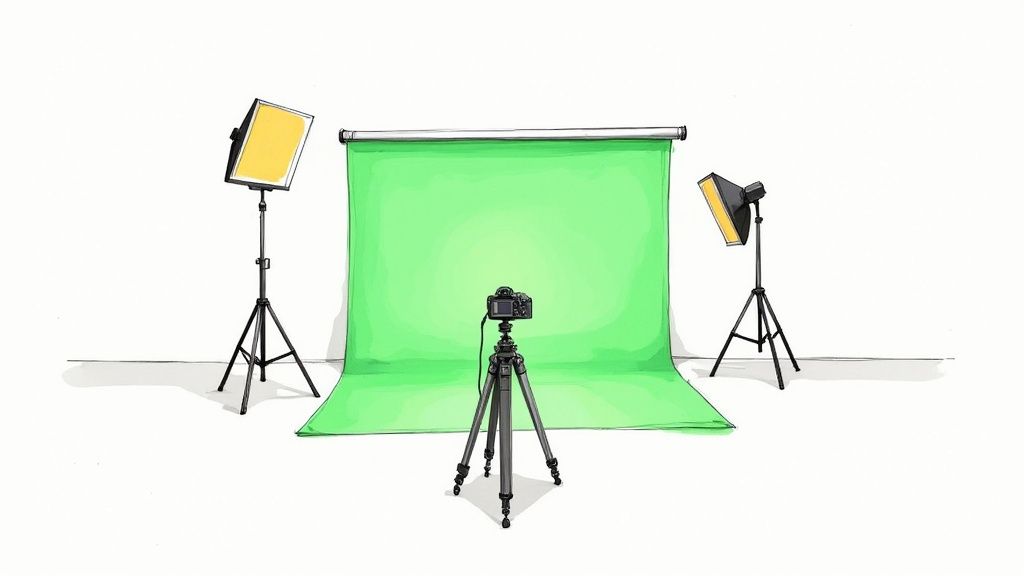
The Art of Lighting Your Screen
If the screen is the foundation, lighting is the whole house. Seriously. More than anything else, your lighting will determine whether you get a crisp, clean key or a pixelated, amateur-looking mess. The goal is to light the green screen itself completely separate from your subject, turning it into a flat, even canvas of color.
You don't need to break the bank on gear. A couple of affordable softboxes or LED panels will get the job done. It's all about the technique.
First, position one light on each side of your green screen, aimed at it from roughly a 45-degree angle. These lights are for the screen and only the screen.
Next, look through your camera and adjust the lights until the entire screen is evenly lit. You want to hunt down and destroy any bright "hotspots" or dark, shadowy corners.
Finally, use a completely separate key light to illuminate your subject. This is your main light, and you need to position it carefully so it doesn't spill onto the screen behind them. This separation is what prevents your subject’s shadow from falling on the green screen and messing up the key.
Dialing in Your Camera Settings
Your camera settings are the final piece of the physical setup puzzle. A faster shutter speed is your best friend here because it drastically reduces motion blur. Blurry edges between your subject and the screen are a nightmare for editing software and almost always result in a garbage key.
While every camera is a little different, these core principles are universal.
| Setting | Recommended Value | Why It Matters |
|---|---|---|
| Shutter Speed | 1/100 or higher | Creates sharp edges for a clean key by reducing motion blur. |
| Aperture | f/4 - f/5.6 | Keeps both your subject and the screen in nice, sharp focus. |
| ISO | As low as possible | A low ISO keeps ugly digital noise or "grain" out of your shot. |
| White Balance | Manual (Custom) | Prevents weird color shifts that can confuse your editing software. |
These ideas aren't new; they've been refined over a century of moviemaking. Early filmmakers were pulling off amazing tricks like double exposures in films like 1903's The Great Train Robbery long before chroma keying was a thing. If you're curious, you can learn more about the fascinating history of early special effects on Tella.com.
By taking the time to nail your setup—the right material, perfect lighting, and sharp camera settings—you’re setting yourself up for a smooth ride long before you ever touch the "Ultra Key" effect in your editor.
Pulling the Perfect Key in Post-Production
Alright, you've wrapped the shoot. The lighting was dialed in, and your footage is now sitting on your hard drive. This is where the real magic happens—the digital alchemy of post-production. It's time to isolate your subject from that sea of green, a process we call "pulling a key."
Whether you're working in Adobe Premiere Pro, Final Cut Pro, or DaVinci Resolve, the built-in keying tools are incredibly powerful these days. Premiere has its Ultra Key effect, and Final Cut has the Keyer. While the names are different, the way they work and the knobs you'll be turning are pretty much the same across the board.
Starting with the Basics
The first thing you'll always do is grab the eyedropper tool and click on the green screen in your footage. In one click, the software finds that color and makes it transparent. Honestly, if you've lit your scene perfectly, this single step can get you 80% of the way to a clean key.
But let's be real, it's rarely that easy. You'll probably notice some green pixels still hanging around the edges of your subject, or worse, see-through spots appearing where they shouldn't. This is where the fine-tuning begins.
This infographic gives a great visual breakdown of the three main settings you'll be wrestling with to clean things up.
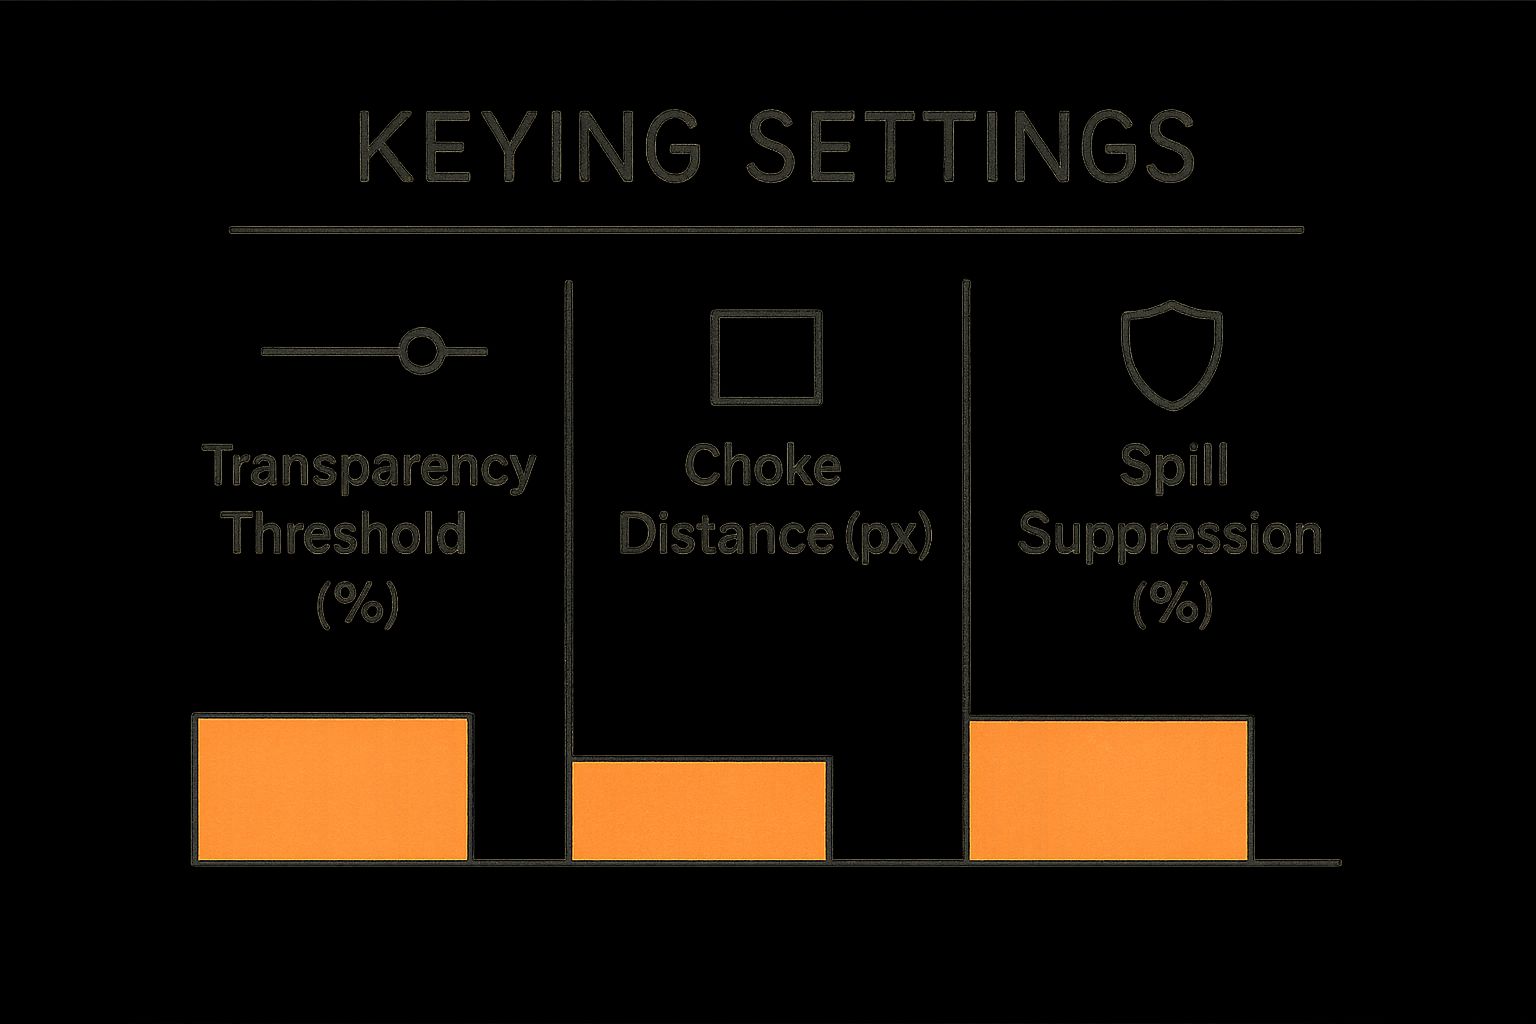
As you can see, getting that perfect key is all about finding the right balance between these three core adjustments. It’s a bit of a dance.
Advanced Cleanup Techniques
Sometimes, no matter how much you fiddle with the main keying settings, some problems just won't go away—especially when stuff you didn't want in the shot makes an appearance. Maybe a C-stand leg snuck into the corner, or you can see the edge of your fabric screen. The fix for this is a garbage matte.
Think of a garbage matte as a quick and dirty mask. You just draw a rough shape around your subject, telling the software, "Hey, ignore everything outside this box." This instantly gets rid of any junk on the periphery, letting your keyer focus only on the tricky stuff right around your talent.
For example, say you filmed someone at a desk, but a tripod leg is visible in the bottom corner. Instead of trying to key it out (which would be a nightmare), you'd just draw a quick mask around the person and desk. Poof. The tripod is gone, and your key isn't affected at all.
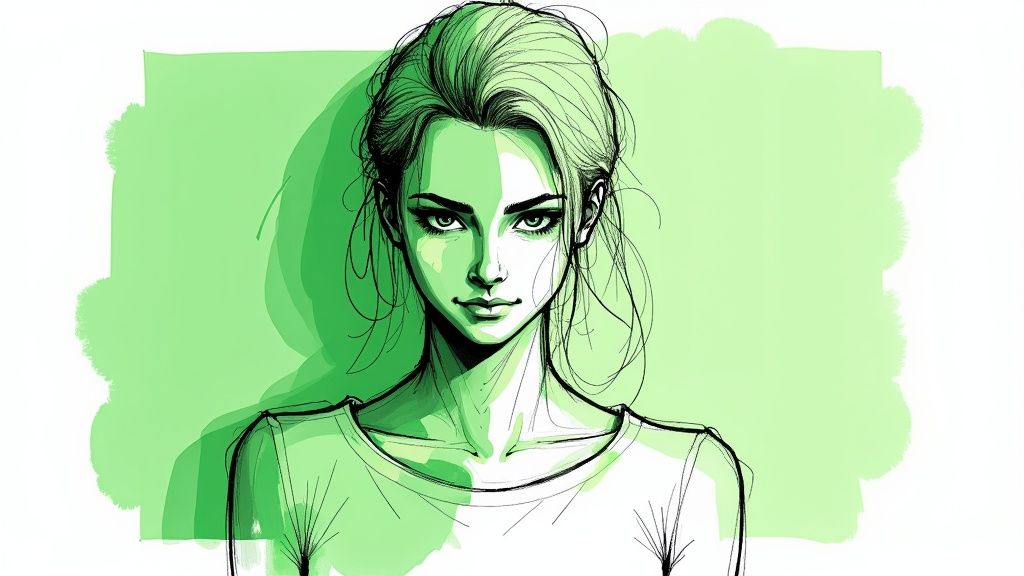
Another classic headache is that nasty green fringe.
Key Takeaway: Green spill is that faint, ugly green halo that reflects off the screen onto your subject. You'll see it most in their hair or on their shoulders, and it’s a dead giveaway of a cheap-looking green screen effect.
Luckily, every pro keying tool has a feature called Spill Suppression. This is a lifesaver. It specifically hunts down those leftover green pixels on your subject’s edges and either desaturates them or shifts their color to look more natural. Just be gentle with it; pushing spill suppression too hard can create an equally weird magenta or gray outline. A little bit goes a very long way.
If you're ready to get into even more complex compositing work, our in-depth guide on green screen effects in After Effects covers some more advanced tricks.
Refining the Edges for a Believable Composite
With the spill handled, the final touch is to perfect the edges of your matte. These last few tweaks are subtle, but they're what truly sell the effect and make it look like your subject actually belongs in their new environment.
- Matte Cleanup: This setting is great for getting rid of any little flecks or "noise" in the transparent parts of your shot, giving you a solid, clean matte to work with.
- Choke: This setting literally shrinks the edges of your matte inward. It’s a fantastic tool for nipping that last tiny bit of a green halo in the bud. Use it sparingly, though—too much choke will look like someone took a cookie-cutter to your subject.
- Soften (or Feather): A touch of softness on the edges helps your subject blend more smoothly into the new background. Just 1-2 pixels of feathering can be the difference between a sharp, artificial cutout and a natural-looking composite.
By moving through these steps—getting a good initial key, cleaning up the garbage, suppressing the spill, and then finessing the edges—you can pull off a green screen effect that looks polished, professional, and totally believable.
Creating Without a Green Screen Using AI
What if you could get a perfect background replacement without ever setting up a single light or a piece of fabric? This isn't science fiction anymore—it's what modern AI-powered tools bring to the table. This technology is a massive shortcut for any creator, delivering professional results with just a few clicks.
https://www.youtube.com/embed/5TAoyBloaq0
Instead of hunting for a specific green or blue color to remove, AI models are trained on millions of images and videos to actually understand what a person or object looks like. They can intelligently separate your subject from its surroundings, frame by frame, creating a pixel-perfect mask (what we call an "alpha matte") around it. This process, known as rotoscoping, used to take artists countless hours of meticulous, manual work. Now, AI can get it done in minutes.
The best part? You can forget about flawless lighting and a dedicated studio. Shoot in your office, on a busy street, or even in your living room, and just let the algorithm do the heavy lifting of separating you from the background.
The New Workflow: AI vs. Traditional Setups
Let's be clear: AI isn't making physical green screens obsolete, but it offers a seriously powerful alternative with its own unique advantages. Deciding which to use really comes down to your specific project, your shooting environment, and how much time you have.
If you're a creator who's always on the go or working out of a small apartment, setting up a full screen with multiple lights is a non-starter. AI tools give you incredible flexibility, turning literally any location into a potential virtual set. This is a huge shift, and learning how AI Integration in Post-Production is opening up new creative avenues shows just how far we've come from traditional methods.
To really see the difference, it helps to put them side-by-side.
Traditional Green Screen vs. AI Background Removal
Here’s a breakdown comparing the old-school physical setup with the new-school AI approach. Each has its place, but they solve the problem in fundamentally different ways.
| Feature | Traditional Green Screen | AI Background Removal |
|---|---|---|
| Setup Time | High (Requires lighting, space, and a wrinkle-free screen) | Minimal (Just need a camera and a clear subject) |
| Flexibility | Low (Tied to a specific physical location) | High (Shoot anywhere, anytime) |
| Control | High (Precise manual control over keying parameters) | Medium (Reliant on the AI's accuracy, with some tools offering refinement) |
| Best For | High-budget film, commercials, scenes with fast motion | Social media content, talking heads, remote work, quick turnarounds |
As you can see, the choice often comes down to a trade-off between control and convenience.
A Quick Guide to Using an AI Tool
Getting started with an AI background removal tool is refreshingly straightforward. Using a platform like VideoBGRemover, for example, completely sidesteps the tricky parts of the traditional process.
It really just takes a few steps:
- Upload Your Footage: Just drag and drop your video file onto the platform. Most services handle common formats like MP4 and MOV without any issues.
- Let the AI Do Its Thing: The algorithm gets to work analyzing your video, detecting the main subject, and separating it from the background. You can typically see a free preview before committing.
- Download Your Clean Plate: Once you're happy with the result, you can export the video. For maximum flexibility, grab a format with a transparent background, like a PNG sequence or a MOV ProRes 4444 file. This lets you drop it over any new background in your video editor. Some tools even let you swap the background right there on the platform.
This workflow is a lifesaver for creators who need to pump out content fast and consistently. If you're curious about your options, check out our detailed list of the best AI tools for video background removal to see which one fits your style.
Expert Insight: I've found that AI really shines with the details that are a nightmare to key manually—think fine, wispy hair or semi-transparent objects. A traditional green screen can really struggle with those, often leaving a messy or unnatural-looking edge.
For decades, chroma keying was the only game in town. By the late 1990s, green screens were the backbone of huge productions like The Lord of the Rings trilogy, allowing filmmakers to blend actors into breathtaking digital worlds. That same core technology powers everything from your local weather forecast to virtual reality experiences. AI is simply the next logical step in this evolution, making powerful visual effects accessible to everyone, not just big-budget studios.
Solving Common Green Screen Problems
Even with years of experience, a green screen project can hit a snag. But here’s the good news: almost every common problem has a fix. Consider this your field guide for turning those frustrating hiccups into polished, professional footage.
By far, the most common culprit behind a messy composite is uneven lighting. When your screen has bright hotspots and dark, shadowy patches, your software can't isolate a single, consistent shade of green. The result? A blotchy, pixelated key that looks amateurish and is a total nightmare to clean up later.
Fixing Uneven Lighting and Hotspots
The real solution here starts long before you press record. Your goal is to make the green screen a perfectly flat, evenly lit canvas. Start by dedicating at least two lights just for the screen, placing one on each side at a 45-degree angle. This cross-lighting is the secret to canceling out shadows and creating a consistent, even surface.
Next, use your camera’s monitor to hunt down any lingering imperfections. See a bright spot? Move that light further away or add a layer of diffusion. Spot a dark patch? Adjust the light’s angle until it's filled in. Pro-level creators often rely on their camera's "waveform" monitor—a perfectly flat line on the waveform means your screen is perfectly lit.
Key Takeaway: Always treat your screen and your subject as two completely separate lighting scenarios. Light the screen first, get it perfect, and then bring in your key light and other lights for your talent. This separation is the golden rule for a clean key.
When your lighting is smooth from the start, you'll be amazed at how well your software’s keying tool works with just a few clicks. A great setup saves hours of tedious cleanup.
Eliminating Green Spill and Fringe
Another classic headache is green spill. That's the faint, green halo that reflects off the screen and taints the edges of your subject, especially noticeable in hair and on shoulders. It’s a dead giveaway that you're using a green screen.
Spill is almost always caused by placing your subject too close to the backdrop. The green light literally bounces off the screen and onto them. The simplest fix is to just create more distance. As a rule of thumb, have your subject stand at least six feet away from the green screen. This one adjustment can dramatically cut down on the amount of reflected light.
Even with perfect positioning, a subtle green fringe might remain. This is where your software’s spill suppression tool becomes your best friend.
- How It Works: Spill suppression tools intelligently target those leftover green pixels on your subject’s edges and either desaturate them or shift their color to be more neutral.
- A Gentle Touch: Be careful not to overdo it. Pushing this setting too high can create an equally unnatural magenta or gray outline. Always start low and slowly increase the value until the green fringe just barely disappears.
If you find yourself wrestling with multiple background issues, from spill to tricky lighting, our guide on 8 common video background issues and their solutions offers even more troubleshooting tactics.
Tackling Motion Blur and Jagged Edges
The final hurdle for many is achieving crisp, clean edges, especially when the subject is moving. If your actor's hands look blurry or their outline gets jagged every time they move, the problem is almost certainly in your camera settings.
A slow shutter speed is the enemy of a clean key. It creates motion blur, which makes it impossible for the software to find a clear, sharp line between your subject and the screen. To fight this, you need a faster shutter speed—a starting point of 1/100th of a second or higher is great practice. This ensures every frame is sharp, giving your keyer a crisp edge to work with.
By methodically working through these common issues—nailing your lighting, managing spill, and dialing in your camera settings—you can conquer the most frequent green screen frustrations and consistently produce high-quality, believable effects.
Pro Tips for Your Next Project
Getting the big stuff right is one thing, but it’s the little details that truly sell a green-screen effect and make your work stand out. Here are a few hard-won lessons I've learned that you can put into practice on your very next shoot.
Pre-Production: Your First Line of Defense
A solid pre-production checklist is your best friend. Seriously, it can save you hours of headaches later on. Before anyone even steps in front of the camera, get a final sign-off on wardrobe. The obvious one is to avoid green, but don't forget about anything highly reflective. Jewelry, eyeglasses, and even shiny fabrics can bounce green light back at the camera, creating a nasty spill that is a nightmare to clean up in post.
On-Set Tricks for Realism and Efficiency
To make your final shot feel grounded and believable, try adding a little camera movement. A perfectly static, locked-off shot can sometimes look a bit sterile or fake. Even a subtle, slow pan or a bit of handheld movement can trick the eye into believing the subject and background are truly in the same space.
When you're ready to roll, a few simple habits will streamline your entire process:
- Shoot with intention. Have your background plate already picked out. Knowing what the final scene will look like dictates everything from your lighting setup and camera angle to how you frame your subject.
- Mark your positions. A few pieces of tape on the floor showing your talent where to stand is a simple but effective trick. This keeps them at the perfect distance from the screen to minimize shadows and green spill.
- Always grab a "clean plate." Once you've got your takes, don't pack up just yet. Record a few seconds of just the empty, evenly lit green screen. This clean plate is an absolute lifesaver for masking out things you don't want, like microphone stands or cables.
I see so many creators obsess over the keying software, but they forget the most crucial rule. A clean, well-lit source video is 80% of the battle. Get that right, and the entire post-production process becomes infinitely easier and more effective.
Polishing your post-production workflow is the final piece of the puzzle. If you want to dive deeper, you can learn how to edit videos like a pro and really elevate your final product. Adopting these small habits makes a massive difference in both your efficiency and the quality of your work.
Your Green Screen Creator Questions Answered
Jumping into the world of chroma keying always brings up a handful of practical questions. As a new green screen creator, it's easy to get stuck on the details, whether you're dealing with a tight budget, tricky keying problems, or deciding between a physical setup and digital tools. Let's clear up some of the most common hurdles you're likely to face.
What Is the Best Budget-Friendly Lighting Setup for a Green Screen?
If you're looking for an affordable setup that still gets the job done right, you can't go wrong with a pair of large softbox lights. They're brilliant at diffusing light, creating a soft, even glow that kills the harsh shadows that make for a messy key.
You can find all-in-one kits that won't break the bank, complete with stands and energy-efficient LED bulbs. The key is to dedicate these lights only to the screen. Place one on each side, angled at about 45 degrees, to light it evenly. You'll still need a separate key light for your subject to create that crucial separation between them and the background.
How Do I Deal with Fine Details Like Hair When Keying?
Ah, hair—the classic chroma key nightmare. The secret here really starts with your source video. A backlight, sometimes called a "hair light" or "rim light," is an absolute must. It creates a crisp, thin line of light around your subject, physically separating their outline from the green screen behind them.
Once you’re in post-production, don't just crank up the main keying effect. That’s a surefire way to get chunky, artificial-looking hair. A better technique is to create a couple of different layers of your keyed footage. Use a much softer, more forgiving key for the hair, and then a tighter, harder "core" matte for the solid parts of the body. Blending these together gives you a much cleaner, more believable result.
Pro Tip: Most professional editing software, like Adobe After Effects, has built-in 'Refine Edge' or 'Refine Matte' tools. These are designed specifically for this problem, helping you intelligently isolate those difficult, semi-transparent details around the edges.
Are AI Tools Good Enough to Replace Physical Green Screens?
Honestly, it all comes down to what you're creating. For quick social media clips, talking-head videos, or any scenario where setting up a physical screen just isn't practical, AI tools are a game-changer. They’re incredibly fast, flexible, and often more than "good enough" for the job.
But for high-end cinematic projects, big-budget commercials, or scenes with a lot of fast motion and complex details, a properly lit physical green screen still reigns supreme. It delivers a cleaner, more precise key with fewer of the digital artifacts you can sometimes get with AI. The smartest workflow today is knowing which tool to pull out of your toolbox for the right job, not trying to force one solution for everything.
Ready to skip the setup and get studio-quality results in a fraction of the time? VideoBGRemover uses powerful AI to erase your video background in minutes—no green screen needed. Join over 30,000 creators and try it for free at videobgremover.com.
Tagged with
Ready to Remove Your Video Background?
See a free preview before you buy.
No credit card required • Free preview on every video