Mastering After Effects Green Screen
A practical guide to After Effects green screen keying. Learn professional techniques for clean composites, spill suppression, and edge refinement.
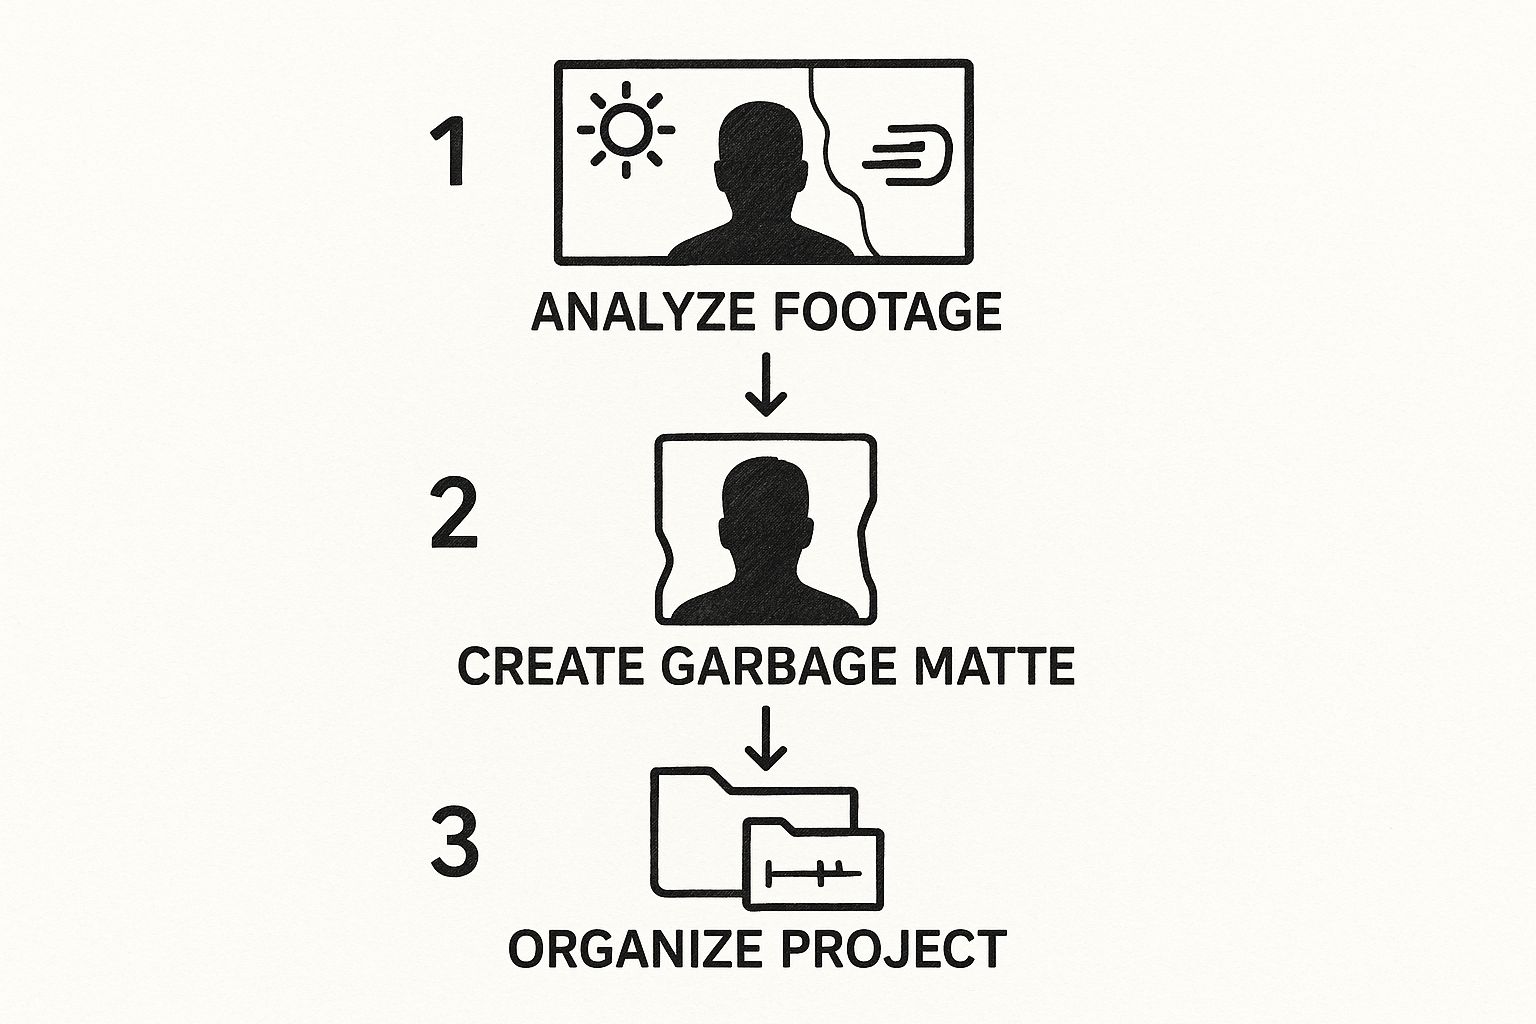
Pulling a great key is less about magic sliders and more about solid prep work. Seriously. If you take five minutes to set up your project the right way, you can save yourself hours of headaches down the road. It all starts with having a clean, organized foundation before you even touch a single effect.
A successful composite begins the moment you import your footage, not when you start fiddling with keying parameters.
Setting Up Your Project for a Flawless Key
Before you even dream of applying Keylight, the very first thing you need to do is give your footage a hard look. Pop the clip open and play detective. Are there any of the classic key-killers?
Look for uneven lighting that creates bright hotspots or muddy, dark corners on the green screen. Check for motion blur that can make your subject's edges look semi-transparent. And definitely watch out for stray C-stands, boom mics, or tracking markers creeping into the shot. Catching these problems now makes your life infinitely easier.
This initial review isn't just a suggestion; it's what separates the pros from the amateurs. It’s the difference between wrestling with the software and confidently telling it exactly what to do.
Isolate Your Subject with a Garbage Matte
Once you know what you're working with, your next move is to draw a garbage matte. This is just a quick, rough mask you draw around your talent to block out everything else. Don't worry about being precise here—the goal is simply to get rid of all the junk that isn't your subject and the green screen right behind them.
Why is this so critical? By masking out the studio lights, random crew members, or a corner of the set you didn't light, you're cleaning the plate for After Effects. You're removing all the visual noise and giving the keyer a much simpler job. Instead of analyzing a messy frame with tons of different colors and brightness levels, it only has to focus on a nice, uniform green. This one simple action can dramatically improve the accuracy of your first pull.
A clean garbage matte is the single most impactful thing you can do for a better key. It tells After Effects to ignore irrelevant pixels, leading to a more accurate and efficient keying process from the very beginning.
This initial workflow—from analyzing the footage to creating a clean matte—is the bedrock of professional keying.
This flow from analysis to masking primes your project for a clean extraction and helps you sidestep common problems before they even start.
The Power of a Clean Plate
This whole process is built on a fundamental principle of chroma keying that goes way back: create the cleanest possible separation between your foreground and background. The tech really took off in the 1980s, largely because the specific color spectrum of green is so different from human skin tones, which made for much cleaner composites. If you want to dive deeper, you can find some great insights into the history of chroma keying on Motion Array. When you create a garbage matte, you're just following this time-tested tradition of giving the software the cleanest plate you can.
Finally, get organized. Once you have your garbage matte, pre-compose that layer. This keeps your main timeline from turning into a chaotic mess. It also gives you a self-contained element where you can apply color correction, spill suppression, and other finishing touches without cluttering up your main comp. A little organization goes a long, long way.
Pulling a Clean Key with Keylight
Alright, with your project prepped and organized, it's time for the main event. We're going to dive into Keylight 1.2, the powerhouse keyer that’s already built into After Effects. It might look a little intimidating with all its sliders and settings, but once you get the hang of it, the core process is actually pretty logical.
Our entire goal here is to create a perfect alpha channel. Think of it as a black-and-white stencil that tells After Effects what to keep (the white parts) and what to throw away (the black parts). Keylight is fantastic for this, especially with its built-in diagnostic views.
Dialing in the Initial Key
First things first, drop the Keylight effect onto your footage layer. The very first thing you need to adjust is the Screen Colour. This is the most important click you'll make.
Grab the eyedropper and find a good, representative patch of green on your screen. You want to aim for a mid-tone, somewhere near your subject's hair or other detailed edges. A common mistake is clicking on the brightest part of the screen or a deep shadow—try to avoid those.
As soon as you select the color, the green screen should disappear. But don't celebrate just yet; the key is far from done. This is the point where a lot of people start messing with sliders randomly. We're going to be more strategic.
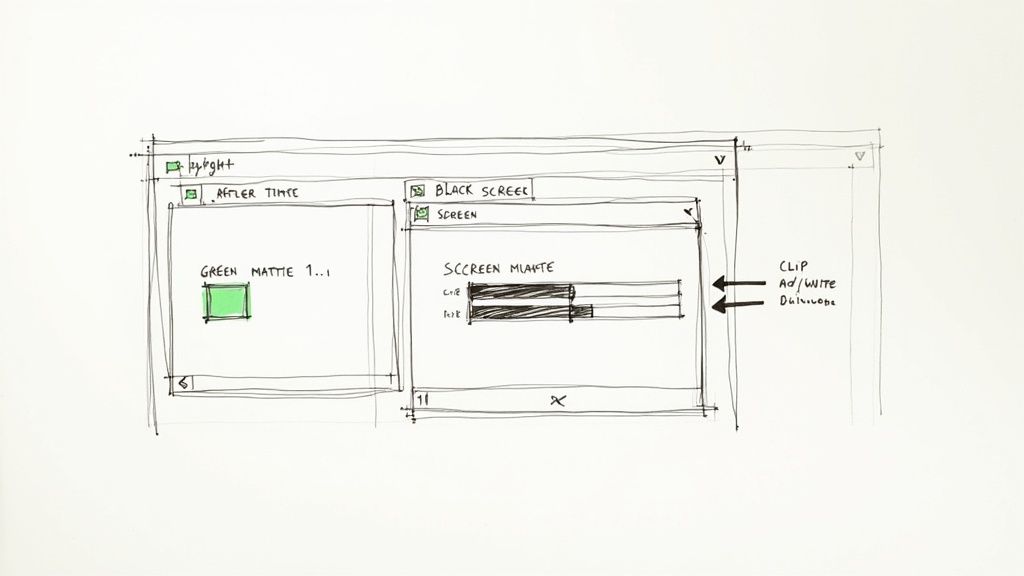
Head over to the View dropdown and switch it from "Final Result" to "Screen Matte." This view is your new best friend. It shows you that black-and-white stencil we talked about. Your mission is simple: get your subject to be solid, pure white and the background to be solid, pure black. No gray noise, no holes.
The Screen Matte view is your secret weapon. It cuts out all the distracting colors and lets you focus only on the quality of the key itself. A clean Screen Matte almost always leads to a clean final composite.
Refining with Clip Black and Clip White
Looking at your Screen Matte, you'll probably notice your subject isn't totally white and the background isn't perfectly black. That's where Clip Black and Clip White come into play. These two sliders do most of the heavy lifting.
Think of them as a contrast adjustment for your matte:
- Clip Black: This slider crushes the dark areas. Nudge the value up a bit, and you'll see the grainy gray pixels in your background turn to solid black. This is how you clean up noise.
- Clip White: This one does the opposite, clipping the highlights. You'll want to decrease its value to push any grayish, semi-transparent spots inside your subject to a solid, opaque white. This fills in the gaps.
The trick is to be gentle. If you push these values too far, you’ll start to see fine details like hair get eaten away, or you'll end up with hard, blocky edges. I usually adjust them just enough to get a solid matte without sacrificing that crucial edge detail.
This whole process is the bedrock of any good keying job. If you want to dig deeper into the "why" behind it all, this guide on the fundamentals of chroma key technology is a great read. Honestly, mastering the Screen Matte view and getting a feel for these two sliders is the single most important skill for nailing the After Effects green screen workflow.
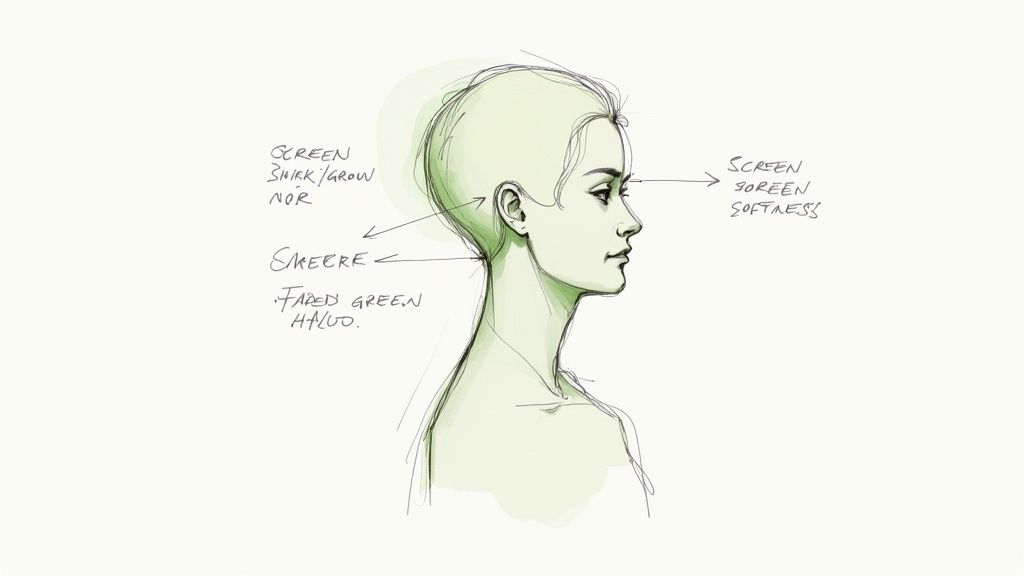
Refining Edges and Eliminating Green Spill
Pulling a clean initial matte is a great first step, but the real magic happens in the details. This is where you elevate your composite from looking "cut out" to truly believable. We need to tackle two dead giveaways of a beginner's key: harsh, unforgiving edges and that tell-tale green halo, known as spill.
Getting these two things right is what separates the pros from the amateurs. The matte you created with Clip Black and Clip White is probably too sharp. Details like flyaway hair or the texture of clothing can look jagged and artificial. We need to soften those just enough to blend them seamlessly into the new background.
Finessing Edges with Screen Matte Controls
Jump back into your Keylight effect and look for the Screen Matte dropdown. This is your control center for edge refinement. My biggest piece of advice here? Be subtle. It's incredibly easy to overdo it and ruin your hard work.
Here are the two main controls you'll be using:
- Screen Shrink/Grow: This does exactly what it says—it either expands or contracts your matte. I often find myself using a tiny negative value, like -0.5, to gently "choke" the matte. This pulls the edge in just a fraction, effectively cutting off any thin green lines that might be lingering.
- Screen Softness: This adds a very subtle feather or blur to the edge of your matte. A small value like 1 or 2 is usually all you need to remove that harsh, digital crispness without making the subject look out of focus.
As you adjust these, keep flicking between your Final Result and Screen Matte views. You're looking for that sweet spot where the edges feel natural, but you haven't started to erode important details like fine hair.
The secret to realistic edges isn’t just softness; it's a careful combination of shrinking the matte slightly to remove the fringe and then adding a whisper of softness to help it blend. This two-step process provides much more control.
Removing Unwanted Green Spill
Even with a perfect matte, light from the green screen has a nasty habit of bouncing back onto your subject, casting a green tint on their hair, shoulders, or clothes. This is spill, and it will instantly shatter the illusion. Thankfully, After Effects has some fantastic tools built specifically to deal with it.
Keylight has its own spill suppression, but I almost always reach for a separate effect for more precise control. The best tool for the job is the Advanced Spill Suppressor. Just find it in your Effects & Presets panel and drop it onto your footage layer, making sure it comes after the Keylight effect in the stack.
In most cases, the default settings work wonders. The effect is smart enough to identify and neutralize the green without messing up other colors in your shot. Adobe has poured years of development into these tools, and it shows. In fact, modern keying and roto tools can cut down on manual cleanup time by up to 60%. You can read more about how green screen post-production has evolved.
If you're still fighting with stubborn edges, especially around wispy hair, try adding the Key Cleaner effect. It's designed to work with Keylight to intelligently refine and smooth out the matte's edge. And for those really tough shots where automatic tools just won't cut it, you might need to turn to manual techniques. Our guide on the After Effects Roto Brush is a great place to start for those more complex scenarios.
How to Fix Common Green Screen Problems
https://www.youtube.com/embed/4lyzpmadVOs
Let's be honest: perfect green screen footage is a unicorn. Every single project I've ever worked on has its own quirks, whether it's motion blur from a fast-moving subject or nasty shadows in the corners from uneven lighting. This is where the real skill comes in—turning a frustrating shot into a flawless composite.
Even when everything goes right on set, keying is almost never a one-click affair. Knowing how to spot and fix the inevitable issues is what separates the pros from the amateurs.
Tackling Uneven Lighting
One of the most common headaches you'll run into is a poorly lit screen. If you've got dark, shadowy areas and bright hot spots, a single instance of Keylight is going to have a rough time. Tweak the settings to fix the shadows, and the bright spots will start to fall apart. Adjust for the hot spots, and the shadows become a noisy mess.
The go-to professional solution is surprisingly simple: use more than one keyer.
- First, duplicate your Keylight effect on the layer after you've got your base key dialed in.
- Next, grab the pen tool and draw a rough mask around the problem area—say, that dark corner. Feather the mask edges generously to make the blend invisible.
- Now, on that second Keylight instance, you can adjust the settings to focus only on the area inside your mask. The first Keylight continues to handle the rest of the well-lit screen.
This layered technique lets you make surgical corrections without wrecking the parts of your key that are already working. It's a lifesaver for footage that wasn't shot under ideal conditions.
Solving Motion Blur and Transparency
Fast action is another classic key-killer. When your subject moves quickly, the camera captures motion blur, which turns solid edges into semi-transparent pixels. This is a nightmare for most keyers, and you’ll often see the new background bleeding straight through your subject.
The trick isn't to eliminate the motion blur—you need it for realism! The goal is to preserve that natural blur while still getting a clean matte. Your subject would have motion blur in the new scene, so removing it makes the shot look fake and stuttery.
A great way to handle this is to duplicate your keyed footage layer. On the bottom layer, you can actually remove the keyer and apply a Directional Blur that mimics the original motion. Then, on the top (keyed) layer, choke the matte inward just a bit to create a solid core. When you combine the two, you get the feeling of motion back without the ugly transparency artifacts.
The Finishing Touch: Light Wrap
To truly sell a composite and make your subject feel like they're in the new environment, you need a light wrap. This is an advanced trick that subtly blends the light and color from your new background around the edges of your subject.
It’s a subtle effect, but it mimics the physics of real-world light and is one of those details that immediately signals a high-quality visual effect. By the 21st century, techniques like this were used in over 80% of Hollywood's major productions, showing just how critical these finishing touches are. You can learn more about how green screen technology evolved to see just how far we've come.
While dedicated plugins exist, you can build a fantastic light wrap yourself right inside After Effects using a combination of blurs and channel effects, giving you complete creative control over the final look.
Integrating Your Subject Into a New Scene
Pulling a clean key is a huge milestone, but your work isn't done just yet. Now for the fun part: the art of compositing. This is where you make your subject look like they actually belong in the new environment. Even a technically flawless matte will look fake if the lighting and colors don't match, and that immediately shatters the illusion for your audience.
This final stretch is all about selling the shot. We need to fool the viewer's eyes into believing the foreground and background were filmed at the same time, in the same place. It's a delicate dance of matching color tones, adding subtle atmospheric effects, and creating a believable interaction between your subject and their new surroundings.
Matching Colors and Light
Color correction is the first—and most important—piece of the puzzle. Your subject was probably filmed under controlled studio lights, which almost never matches the lighting of your background plate. The mission here is to make the blacks, whites, and mid-tones of your keyed subject feel totally consistent with the background.
Your best friend for this task is an Adjustment Layer with the Lumetri Color effect. By placing this layer over both your keyed footage and the new background, you can apply a final, unifying color grade that acts like glue, holding the entire scene together.
For more granular control, you can apply Lumetri Color directly to your keyed subject's layer. Play with the exposure, contrast, and color temperature until the light on your subject makes sense with the light source in the background. Is the background a bright, sunny day? Then your subject shouldn't look like they were lit in a dimly lit office.
Pro Tip: Don't just rely on your eyes to match the colors. Pop open the Lumetri Scopes panel in After Effects. Comparing the Waveform and Vectorscope for your foreground and background layers gives you hard data, helping you align brightness and color saturation with real precision.
Adding Realistic Details
Once the colors are dialed in, it's time for the finishing touches that truly sell the composite. These subtle details are often the difference between a good shot and a great one.
Here are a few essential tricks I always use to make my composites more convincing:
- Grain Match: Your background footage will almost certainly have some film or digital grain. Your keyed subject, by comparison, might look a little too clean. Use the Add Grain effect to add just a touch of grain to your foreground so it blends right in.
- Camera Blur: If your background has a shallow depth of field, your subject's edges shouldn't be tack-sharp. A tiny bit of blur, like a Camera Lens Blur with a very small radius, can help your subject sit more naturally in the scene.
- Shadows: Nothing grounds a subject in a scene like a believable shadow. I usually create a black solid, mask it into a rough shadow shape, feather the heck out of it, drop the opacity way down, and then parent it to the subject's feet.
These small additions complete the visual puzzle, making the After Effects green screen composite feel authentic. After keying your subject, you can drop them into all sorts of new worlds, even integrating them into scenes that involve working with 3D objects in After Effects. Of course, starting with the right backdrop makes a world of difference; you can find great video backgrounds for green screen that will make this integration process even smoother.
Common Green Screen Questions Answered
Even when you have a solid process, keying in After Effects can throw you a curveball. Let's walk through some of the most common questions and sticking points that artists run into.
Can I Key a Different Color Besides Green?
Absolutely. While green is the go-to for a reason—it's about as far from human skin tones as you can get—the tech behind chroma keying works on any distinct color. Keylight and other After Effects tools have an eyedropper that lets you select any color on your screen to be keyed out.
This comes in handy when you're handed footage shot against a blue screen or even something less common, like a white or black background. The steps are identical: pick your color, jump over to the Screen Matte view, and start tweaking. The only catch? If your talent is wearing a color that’s too close to the background, you’ll probably have to do some rotoscoping to get a clean separation.
The real magic of keying isn't about the color green itself. It's about isolating a very specific, consistent color to create transparency. As long as your background is a solid color that doesn't show up in your foreground, you can pull a great key.
Why Does My Subject Look Transparent?
This is a classic problem, and it usually points to one of two things: motion blur or a key that’s just too aggressive. When your subject moves quickly, their edges naturally blur and become semi-transparent. A heavy-handed key will interpret that blur as part of the background, making your new backdrop show right through them. Pushing the Clip Black and Clip White sliders too far can also "eat away" at your subject, causing that see-through effect.
Here’s how to tackle it:
- Back off your key settings. First, ease up on the Clip Black and Clip White values in Keylight. It's always better to start with a slightly "dirty" matte and clean it up later than to destroy the details in your foreground.
- Bring in the Key Cleaner effect. After Keylight, add the Key Cleaner effect. It’s built specifically to fix these semi-transparent spots while trying to hold onto the edge detail.
- Try a duplicate and blur trick. If the motion blur is really bad, you might need to duplicate your keyed layer. On the bottom copy, remove the key entirely and then add a motion blur that mimics the original movement. This can help bring back that sense of motion without the ugly transparency.
How Do I Handle Fine Hair Details?
Hair is the ultimate stress test for any key. The secret is to avoid crushing the matte with settings that are too harsh. Always check your work in the Screen Matte view to make sure you aren't accidentally deleting those fine, wispy strands. Instead of relying only on the Clip Black/White sliders, play with the Screen Shrink/Grow and Screen Softness controls. Even a tiny bit of softness can make the difference between hair that looks natural and hair that looks like a chunky, jagged helmet.
Tired of wrestling with manual keying? VideoBGRemover is a much faster, AI-powered way to get it done. Just upload your video, and our AI does the heavy lifting, removing the background in minutes. You get a perfect cutout without ever needing to touch a slider—and no green screen required. Get professional results at https://videobgremover.com.
Ready to Remove Your Video Background?
See a free preview before you buy.
No credit card required • Free preview on every video