Pro Video Backgrounds for Green Screen
Learn how to choose and use video backgrounds for green screen. Get expert tips for flawless chroma key effects and professional-looking video content.
Picking the right video backgrounds for green screen is what separates amateur footage from a truly professional-looking production. This is about more than just swapping out a green wall; it's about building a whole new, believable world that pulls your audience in.
Go Beyond Basic Green Screen Backgrounds
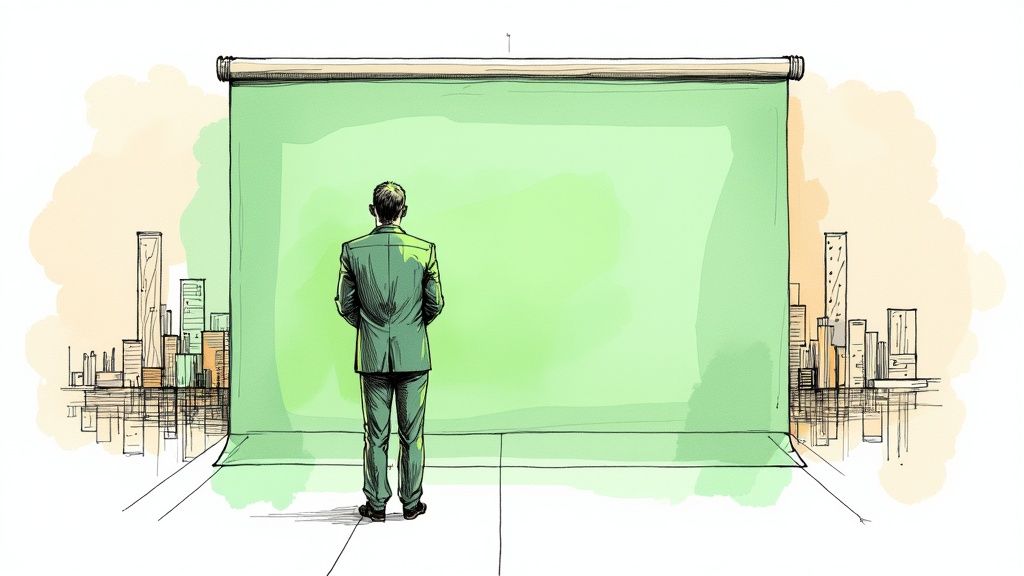
We've all seen those clunky, unconvincing green screen effects online. The key to avoiding that is using a high-quality video background to create something that feels completely authentic, whether you're a streamer, marketer, or indie filmmaker. Your goal should be to make the new scene look so real that no one questions it.
A well-chosen background does more than just fill empty space—it boosts your credibility and hooks viewers from the moment they press play. I'll walk you through the whole process, from shooting the raw footage to putting it all together, and show you that you don't need a massive budget to get polished, impressive results.
Why Green Screen Skills Matter Now
Green screen tech isn't just for big studios anymore. Its adoption by everyday creators has exploded, especially with the boom in online video. In 2024, nearly 30% of internet users worldwide watched live streaming video content every single week. That's a huge jump.
This demand for engaging live content—for everything from gaming and remote work to online classes—makes mastering green screen an essential skill if you want to stand out.
A great green screen effect isn’t about how complex the background is. It’s about how seamlessly that background blends with your subject to tell a story. The best composites are the ones you don't even notice.
This approach unlocks incredible creative freedom. Instead of being stuck in your home office, you can transport your audience anywhere imaginable. All it takes is mastering a few key techniques to ensure the final video looks clean and professional.
To see what's possible, check out these amazing video background examples and get some ideas for your next project. Let's dive in and unlock the creative power you have at your fingertips.
How to Choose the Right Video Background
Choosing the right video background is where your technical skills and creative vision really come together. Honestly, getting this part right is probably the single most important thing you can do to sell the effect and create a professional-looking video. A bad choice here, and the whole thing can look fake and instantly pull your audience out of the experience.
Before you get lost in the fun, creative side of things, you absolutely have to get the technical details ironed out. This is all about making sure the background footage is a perfect match for your original green screen recording. Any small mismatch is like a flashing neon sign telling your viewers, "Hey, this is a composite!"
Aligning Technical Specs for a Believable Scene
The first, non-negotiable rule is to match the resolution and frame rate. It’s simple: if you shot your subject in beautiful 4K at 30 frames per second (fps), your background must also be 4K at 30 fps. Dropping a grainy 1080p background behind your crisp 4K subject creates a jarring, amateur look that screams low-budget.
Lighting is just as crucial. You need to create the illusion that your subject and the background exist in the same space, under the same light. If the main light on your subject is coming from the left, make sure the dominant light source in the background video also appears to be on the left. This kind of consistency is a subtle but powerful trick that helps the viewer's brain accept the scene as real.
Getting these details right is more important than ever. While big studios still exist, the biggest growth is in portable green screens for home and office setups. According to Google Trends, search interest for portable green screens hit a peak of 100 in June 2024, showing just how many people are creating content from flexible, personal spaces. You can learn more about the video marketing trends reshaping content production and see how this shift plays out.
To help you keep track of these technical details, I've put together a quick checklist. Run through this before you commit to a background clip.
Technical Checklist for Your Video Background
Use this quick reference to ensure your background footage is technically compatible with your green screen recording.
| Technical Aspect | Why It Matters | Best Practice |
|---|---|---|
| Resolution | Mismatched resolution makes the composite look fake and low-quality. | Match your background resolution to your green screen footage (e.g., 4K for 4K). |
| Frame Rate | A frame rate mismatch can cause stuttering or unnatural motion. | Match the background's frames per second (fps) to your subject's footage (e.g., 30 fps for 30 fps). |
| Lighting Direction | Inconsistent lighting breaks the illusion of a single, cohesive scene. | Ensure the main light source in the background aligns with the key light on your subject. |
| Color Temperature | Different color temperatures (warm vs. cool) make the subject look out of place. | Color correct your subject to match the color tones of the background environment. |
| Camera Angle & Lens | The perspective must feel consistent between the subject and the background. | If your subject is shot at eye-level, choose a background with a similar perspective. |
Getting these technical specs locked in is half the battle. Once they're aligned, your composite will look exponentially more realistic.
Matching Creative Intent and Context
With the technical stuff handled, you can now focus on the story. Your background should always support your message, not distract from it. Ask yourself: What's the mood I'm going for? What world am I trying to build for my viewer?
Think about it in these practical terms:
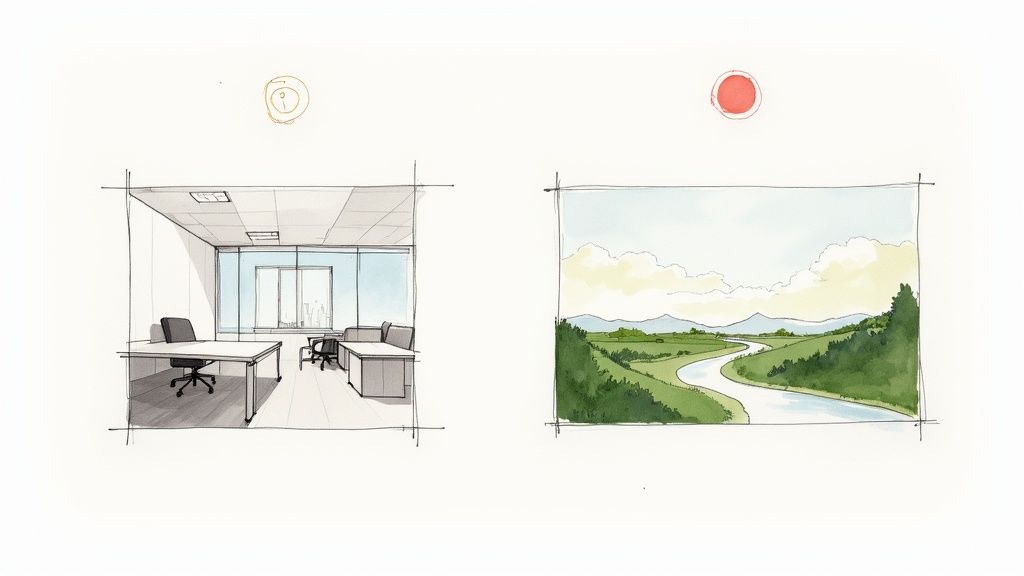
- For a Corporate Presentation: You'll probably want a clean, subtly blurred office setting or maybe a minimalist motion graphic. It looks professional without being busy.
- If You're a Gaming Streamer: This is where you can have fun. Dynamic cityscapes, sci-fi interiors, or energetic animated patterns can really match the vibe of your stream.
- For Educational Content: A library, a clean classroom, or a relevant outdoor scene helps put your information into context for the viewer.
- For Fitness or Wellness Videos: Think calming. A looping video of a serene beach or a quiet forest can create the perfect, tranquil atmosphere for yoga or meditation.
The best video backgrounds for green screen don't just replace a wall; they build a world. Your choice should feel intentional, adding depth and context that enhances the viewer's experience rather than just filling space.
One final, critical point: always check the licensing for any footage you use. There are fantastic resources out there, from free stock sites like Pexels to professional subscription libraries like Storyblocks. Just make sure you read the fine print to ensure you have the rights to use the video, especially if it's for a commercial project.
Setting Up Your Shot for a Flawless Composite
A stunning final result always starts with a clean, well-planned shot. I can't stress this enough—think of this as your pre-production checklist. Every little detail you get right here will save you from pulling your hair out in the editing room later. When it comes to green screen, one thing is king: even lighting.
Shadows are the absolute enemy of a good chroma key. If your screen has dark patches or bright hotspots, your editing software will have a nightmare trying to isolate the green. This leads to that choppy, amateur-looking cutout we all want to avoid. To get your footage perfectly lit, it’s worth understanding a pro lighting setup for video recording.
Another game-changer is putting some distance between your subject and the screen. I always aim for at least three to five feet. This one simple move dramatically cuts down on the green light bouncing back onto your subject’s hair and shoulders, a nasty problem we call green spill. Minimizing this during the shoot makes your life infinitely easier later on.
Prepping Your Background Footage
Don't forget that your background video needs just as much love as your subject. Before you even think about dropping it into your timeline, take a few minutes to get it ready. Trim the clip to the exact length you need. If you’re working with a long scene, you might need to create a seamless loop so the background doesn't just cut to black halfway through.
This infographic breaks down the essential steps for a clean setup.
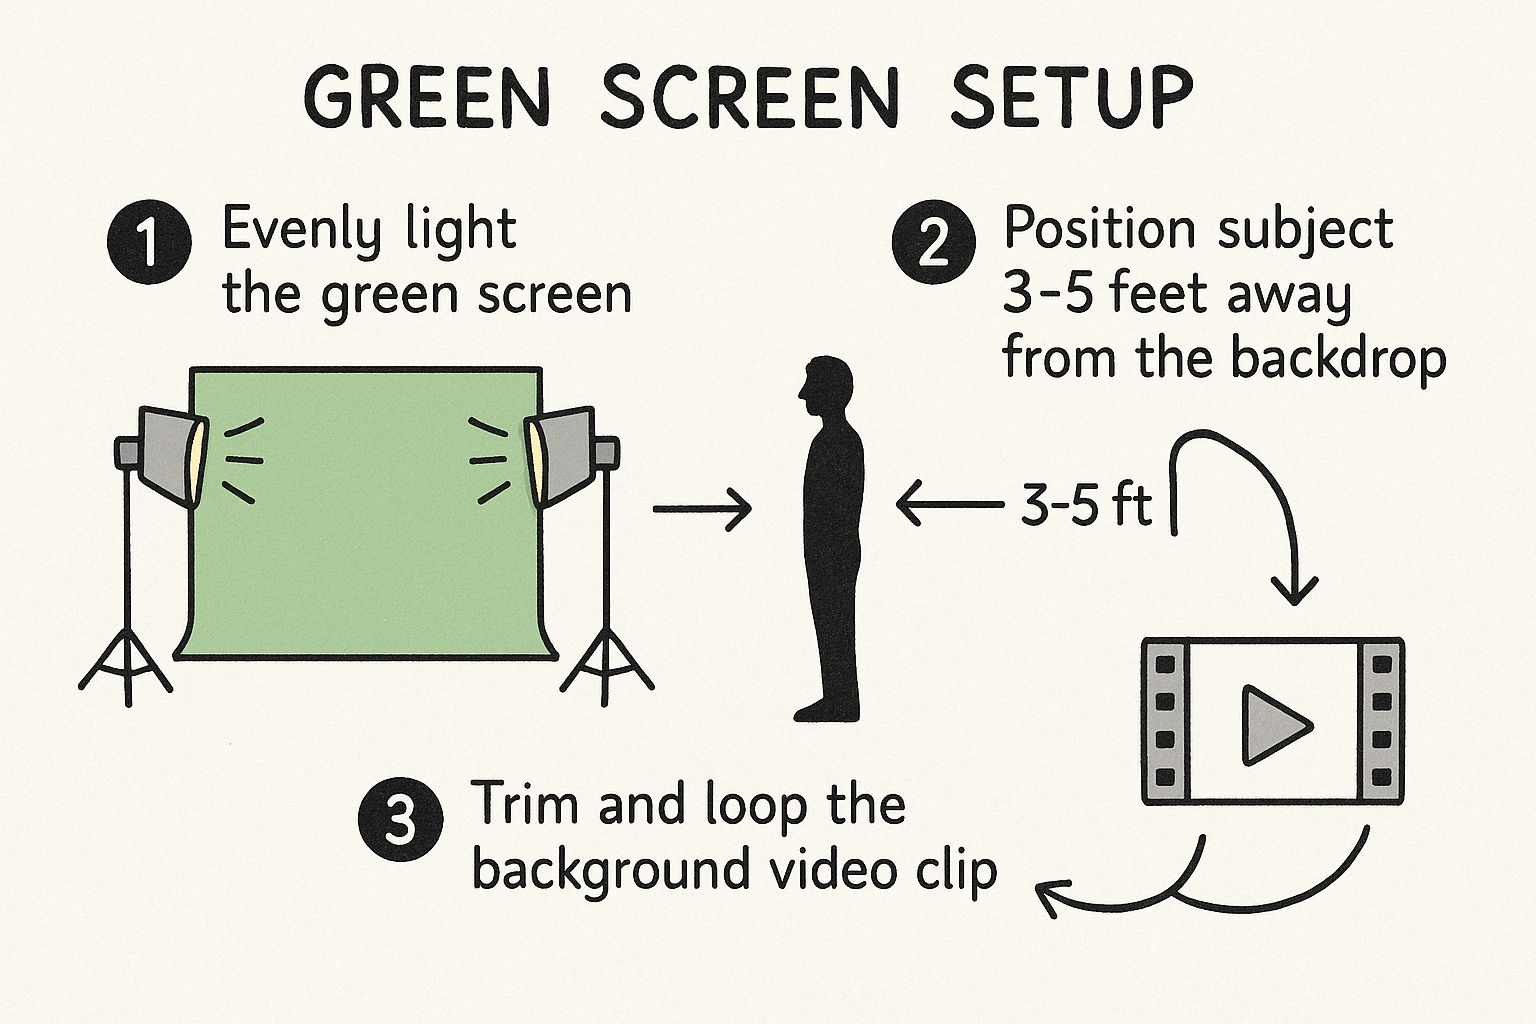
As you can see, it’s a three-part process: lighting the screen correctly, positioning your subject properly, and getting that background clip ready to go.
Color correction is a vital prep step for your video backgrounds for green screen. The lighting in the background has to believably match the light hitting your subject. It’s a dead giveaway if they don’t line up. For instance, if your subject is lit with a warm key light, you need to warm up the background’s color temperature to match. This is what truly sells the illusion. If you run into issues, you can learn more by troubleshooting common lighting fixes.
The goal of pre-production isn't just to light a green screen; it's to create two separate video elements that are already primed to look like they belong together. A few minutes of adjustment here saves hours of color grading later.
Let's walk through a real-world example. Imagine you're filming a presenter for a corporate video. They're lit by standard office fluorescent lights, which give off a cool, slightly blueish tint. If you drop them onto a background of a sunny, warm outdoor scene, the color clash will be jarring and instantly break the illusion. A quick color correction to cool down the background footage will make the composite feel ten times more believable.
It’s these small, intentional choices that elevate your work from a simple effect to a seamless new reality.
Putting It All Together: Compositing Your Green Screen Footage
Alright, this is where the fun really begins. You've prepped your background and nailed the shoot; now it's time to merge those worlds inside your video editor. This process is called compositing, and it’s how we'll turn two separate video clips into one believable, seamless scene.
No matter your software of choice—whether it's Adobe Premiere Pro, DaVinci Resolve, or something else—the fundamental steps are the same. You'll drop your new background clip onto a lower video track in your timeline. Then, place your green screen footage on a track directly above it. This stacking order is critical; it ensures the background will appear behind your subject once the green is removed.
Pulling the Perfect Key
The magic wand for this whole operation is an effect typically called a chroma key. In Premiere Pro, for instance, your best friend is the Ultra Key effect. Once you drag that onto your green screen clip, your first move is to tell the software which specific color to make transparent.
Grab the eyedropper tool and click on a clean, evenly lit patch of green on your screen. Try to avoid areas that are too dark with shadows or blown out with bright hotspots. In a flash, you should see your background video pop right through where the green used to be. That first click gets you 80% of the way there, but the real skill is in the fine-tuning. For a more detailed look at the core concept, our guide on the essentials of chroma key technology is a great resource.
Refining the Composite for Realism
Now, let's dial in the settings to make this look truly convincing. Instead of just yanking sliders back and forth, it pays to know what each one does.
- Matte Cleanup: The "matte" is basically the black-and-white silhouette of your subject that the software creates. These settings let you clean up that outline. You can choke the edges in or expand them to get rid of any lingering green pixels that the initial key missed.
- Spill Suppression: Remember that faint green glow reflecting onto your subject? This is how you kill it. The spill suppression tool is designed specifically to find those unwanted green hues on the edges of your subject and neutralize them, getting rid of that tell-tale "green screen look."
This kind of post-production work is becoming more common than ever. The green screen production kit market was valued at around $450 million USD in 2024 and is expected to balloon to $1.2 billion by 2033. This surge is all thanks to creators and businesses needing high-quality tools for their content. You can dig into more details on this growing market over at Verified Market Reports.
A good composite isn't just about removing green. It’s about tricking the viewer's eye into believing the subject and background were filmed in the same space, with the same camera, at the same time. The little details are everything.
Adding the Final Touches to Sell the Illusion
With a clean key, you're ready for the subtle adjustments that make the scene feel authentic. These are the steps that separate an okay composite from a truly professional one.
Feather Your Edges
Sometimes the outline of your subject can look a little too sharp, almost like a cardboard cutout. Adding a tiny bit of feathering—often just a single pixel is enough—can soften those hard edges and help your subject sit more naturally within the new scene.
Match Your Colors
This is a non-negotiable step. Use your editor’s color correction tools (like Lumetri Color in Premiere) to tweak the color balance, saturation, and contrast of your subject. The goal is to make it perfectly match the lighting and color of the background. If your background is a warm, golden-hour sunset, your subject can't have a cool, blueish tint from the studio lights.
Ground Your Subject
To keep your subject from looking like they're floating in space, you need to ground them. The easiest way is to add a very subtle drop shadow. This small detail creates a sense of place and depth, making it look like your subject is actually casting a shadow on whatever is behind them. It’s these final, thoughtful touches that make your video backgrounds for green screen truly pop.
Pro Tricks for a Flawless Green Screen Composite
Pulling a clean key is a huge win, but the real magic happens in the details. It's the subtle, pro-level techniques that sell the illusion, making your composite completely believable. This is where we move beyond the basics and learn how to make your video backgrounds for green screen truly fuse with your subject.
One of the easiest yet most effective tricks I've learned is to mimic a camera's natural depth of field. In any real shot, the background is almost always slightly softer than the subject. You can replicate this with a simple Gaussian blur on your background plate. Just a tiny amount is all it takes to create an instant sense of depth and guide the viewer's eye right where you want it.
Creating Interactive and Dynamic Lighting
To really sell the effect, your background environment needs to interact with your subject. This isn't just about matching the overall color and direction of light; it's about matching changes in light. Imagine your background is a city street at night. If a car's headlights sweep across the scene, that light needs to spill onto your subject for it to look real.
You can fake this by creating an animated, feathered light effect that moves across your foreground talent, timed perfectly with the action in the background. It’s definitely an advanced skill, but it's the kind of detail that separates good green screen work from truly great compositing.
For those who want ultimate creative freedom, you can even explore transforming static images into dynamic video to build custom backgrounds. This lets you design the entire environment, including all the interactive lighting elements, from the ground up.
The goal is always to create a unified scene where light behaves consistently. When a light source in the background realistically hits the foreground, the viewer's brain just accepts the shot as real.
Tackling Tricky Edges and Transparency
Let's be honest: fine hair, motion blur, and semi-transparent objects are the bane of every compositor's existence. Even the best keying software can leave a chunky, "cookie-cutter" look around these problem areas. The solution is to dive deep into your keyer's matte refinement tools.
Instead of just accepting the default key, start playing with the settings that let you soften, choke (shrink), or feather the edges of your matte. This is how you finesse those difficult spots without making things look overly processed or fake. Sometimes, especially for fine, wispy hair, you might even pull a second, much softer key just for those details and layer it on top of your main key.
Here’s how I approach a few common headaches:
- Frizzy Hair: A hard key is your enemy here. I use a combination of edge thinning and feathering to blend the hair more naturally into the new background.
- Motion Blur: If your subject moves fast, the edges of their body will be blurred. A clean, hard edge will look terrible. Your keyer should have settings to help the composite edge match that natural blur.
- Transparent Objects: Keying something like a glass of water is a classic challenge. You'll often need to stack multiple keys with different settings to preserve the transparency while still getting rid of all the green.
Mastering these skills takes time and a lot of practice, but each one adds another layer of realism that makes the final shot look like it was all captured in-camera on location.
Of course, even when you do everything right, questions and little roadblocks are bound to pop up. Let's walk through some of the most common issues people face when compositing video backgrounds and how to solve them.
"Why Does My Background Look So Fake?"
This is, without a doubt, the number one question I get. When a composite looks "off," it's almost always a disconnect between your subject and the background. The culprit is usually one of three things: lighting, perspective, or color.
First, look at the lighting. If the main light in your background video is coming from the left, but you lit your subject from the right, the human eye will immediately sense that something is wrong. The shadows just won't make sense. You have to match the direction of your key light to the dominant light source in the background plate.
Next, consider the camera angle and perspective. Was your subject filmed straight-on at eye level? If so, dropping in a background that was shot from a low angle, looking up, will create a bizarre, disjointed feeling. Always try to match the camera height and angle for a believable composite.
Finally, you'll need to do a little color correction. Your subject and background were shot with different cameras in different locations, so their colors won't match out of the box. Use your editor's color tools to tweak the saturation, contrast, and color temperature until both layers feel like they exist in the same world.
Pro Tip: One of the fastest ways to sell the effect is to add a very slight blur to the background. This simulates a camera's natural depth of field, which immediately makes the shot look more realistic and helps your subject pop.
Can I Just Use a Still Photo Instead of a Video?
Absolutely! Using a high-resolution photograph as a background is a fantastic option, especially for talking-head videos, interviews, or any shot where the camera is locked down. The technical process for keying and compositing is exactly the same.
The only thing to watch for is the "frozen background" effect. If your subject is moving naturally but the world behind them is perfectly static, it can feel a little strange. An easy fix is to apply a very slow, subtle zoom or pan to the background image. You might know this as the "Ken Burns effect," and it's just enough to give the scene a touch of life.
What's This Green Halo Around My Subject and How Do I Kill It?
Ah, the dreaded color spill. That faint green glow you see on your subject's hair or shoulders is caused by green light from the screen literally reflecting off them and into the camera lens.
Thankfully, you don't have to live with it. Just about every modern video editor has a feature called Spill Suppression or Despill built directly into its keying effect. This tool is designed specifically to identify and neutralize those unwanted green reflections around the edges of your subject.
You can usually adjust how strong the effect is. My advice is to be gentle. If you push it too far, it might start pulling green tones out of your subject's skin or clothing, which looks unnatural. Dial it in just enough to eliminate the green fringe while keeping all the intended colors intact.
What's the Best Video Format for My Background Plate?
When it comes to your background footage, quality is king. You want to use the highest quality format you can get your hands on.
Ideally, this means professional codecs like ProRes or DNxHD. If you're working with more common formats, at least make sure it's a high-bitrate MP4 (H.264).
Why does it matter so much? These better formats hold onto way more color data and detail. This makes the keying process cleaner and gives you much more latitude when you're color grading. Heavily compressed files often have blocky, muddy-looking artifacts, especially in shadows, which are nearly impossible to hide and can ruin an otherwise great composite.
Tired of the green screen setup altogether? VideoBGRemover uses AI to remove your video background automatically, no complex lighting or keying required. Create professional, studio-quality videos in minutes at https://videobgremover.com.
Tagged with
Ready to Remove Your Video Background?
See a free preview before you buy.
No credit card required • Free preview on every video