Remove Background from Video Free: Quick DIY Tips
Discover how to remove background from video free with simple AI tools, green screen tips, and quick editing tricks.
Yes, you can absolutely remove a video background for free. There are a few different ways to go about it, from automated AI tools and old-school manual editing to a simple DIY green screen setup. Each path offers a different mix of speed, precision, and effort, but the good news is that a professional look is within reach without spending a dime.
Let's walk through how to choose the right approach for your project.
Why Removing Video Backgrounds Is a Game Changer
Getting rid of a cluttered or distracting background is one of the fastest ways to make your video look more professional. It immediately puts the focus where it belongs: on your subject. Whether you're recording a presentation or showcasing a new product, a clean backdrop makes all the difference. What was once a trick reserved for big studios with expensive gear is now something anyone can do.
This isn't just a niche trick anymore, either. The demand for background removal tools is booming. The global market was valued at around USD 1.2 billion in 2023 and is expected to climb to USD 4.7 billion by 2033, all thanks to the explosion in digital content creation.
To figure out the best method for you, this decision tree breaks it down based on what matters most—speed, precision, or budget.
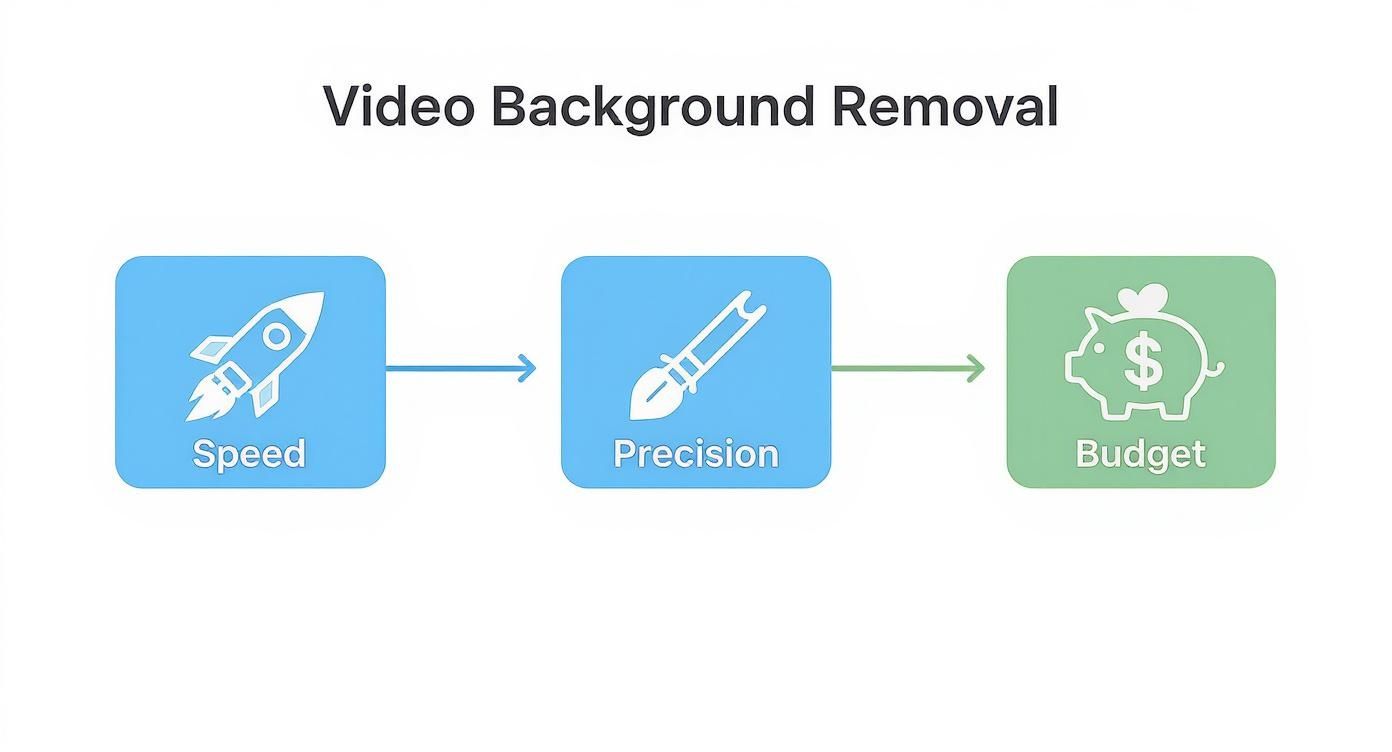
As you can see, AI tools are all about speed, manual methods give you ultimate precision, and a green screen is a fantastic budget-friendly option if you need consistent results over and over.
To make this even clearer, here’s a quick comparison of the free methods we'll be covering.
Free Video Background Removal Methods at a Glance
Choosing the right tool often comes down to balancing your time, the quality you need, and how much hands-on work you're willing to do. This table helps you compare the main free approaches side by side so you can pick the best fit for your next project.
| Method | Best For | Difficulty | Time Investment |
|---|---|---|---|
| AI-Powered Tools | Quick edits, social media content, talking head videos | Low | Very Low (minutes) |
| Manual Rotoscoping | Complex scenes, fine details, ultimate precision | High | Very High (hours) |
| Green Screen | Consistent, repeatable results, studio-like quality | Medium | Medium (setup + edit) |
Whether you need a quick fix for a TikTok video or pixel-perfect results for a commercial project, there's a free solution that can get the job done.
From Production to Publishing
Once you've got that perfect, clean footage, your workflow doesn't have to slow down. For creators who are pumping out a lot of content, you can even find ways of automating YouTube video uploads to keep things moving.
A polished background isn't just an aesthetic choice; it's a strategic one. It directly impacts viewer engagement and the clarity of your message by removing visual clutter that pulls focus away from what's important.
Transforming your raw footage this way opens up a ton of creative doors. You can drop your subject into a whole new environment, add dynamic branding, or just keep a consistent, clean look across your channel. In fact, swapping a boring background for a clean, engaging one is an easy way to create a great https://videobgremover.com/blog/background-video-for-website that grabs attention right away.
Using AI Tools to Remove Video Backgrounds Effortlessly
If you're looking for the path of least resistance, modern AI-powered web apps are your answer. They've made it possible to remove a background from a video for free, often in just a few seconds. These tools do all the heavy lifting, so you can skip the tedious manual masking and avoid shelling out for expensive software. It’s the perfect solution for creators who need to work fast.
A great example of this is VideoBGRemover. Its whole interface is built for speed—you just upload your clip, and the AI takes over from there.
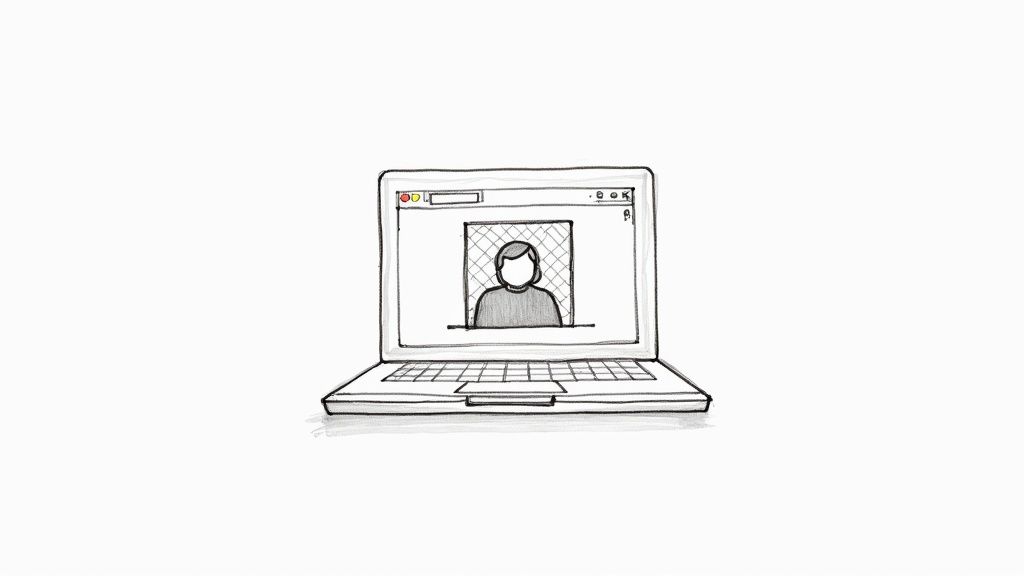
As you can see, you're greeted with a simple drag-and-drop box. There are no confusing menus or settings to dig through; you can get started right away.
The AI is trained to automatically spot the main subject—whether it's a person or an object—and cut it out with surprising precision. What you get back is a video with a clean, transparent background, ready to be dropped into a new scene or downloaded. This kind of accessibility is why the video background remover market, valued at around $10 million in 2025, is projected to explode to $723 million by 2033. You can dig into the numbers and trends behind this growth by reading the full market research on ArchiveMarketResearch.com.
Optimizing Your Footage for AI
To get the cleanest results from any AI tool, a little prep work on your original footage makes a huge difference. You're essentially giving the algorithm a better starting point.
- Good Lighting: Make sure your subject is well-lit and clearly visible. Try to avoid strong backlighting, as it can confuse the AI by hiding the edges of your subject.
- Clear Contrast: Filming against a background that contrasts with your subject is a game-changer. A person in a dark shirt against a plain, light-colored wall is far easier for an AI to isolate than someone standing in front of a cluttered, multicolored bookshelf.
- Minimize Clutter: The simpler the background, the better. A plain wall helps the AI focus on exactly what you want to keep.
Here’s a pro tip I always follow: trim your video clips before you upload them. Processing only the part you actually need dramatically cuts down the AI’s workload and gets your final video back in your hands much faster.
AI tools are brilliant for talking-head videos, social media content, and product demos where getting it done quickly is the priority. Just be aware that they can sometimes struggle with really tricky scenes, like those with fast motion or super fine details like wispy hair. If you're running into those issues or just want to see what else is out there, check out our guide on the https://videobgremover.com/blog/best-ai-tools-with-video-background-removal.
And while you're enhancing your visuals, don't forget that AI can also streamline your audio workflow. For instance, tools for AI-powered video transcription can quickly turn all the spoken words in your video into a text file, saving you a ton of time.
Going Manual: Precise Background Removal with Free Video Editors
Sometimes, an automated tool just doesn’t cut it. When you’re dealing with tricky details or need a flawless result, rolling up your sleeves in a free video editor gives you the control AI simply can’t match. While it takes more time, this hands-on approach is how you can remove background from video free and achieve a truly professional-grade separation.
This is where powerful, no-cost software like DaVinci Resolve or CapCut comes in. They have the advanced features needed for this kind of detailed work. The core technique is called rotoscoping, which is a fancy term for tracing your subject frame-by-frame to create a perfect cutout, or "mask." It's definitely meticulous, but the result is a clean, sharp edge that automated tools often miss, especially with fine hair, motion blur, or transparent objects.
This level of precision is non-negotiable in certain situations.
When Is Manual Masking Actually Worth It?
Let's be real—you don't need to do this for every single video. But for your most important content, the extra effort pays off. Here are a few times I’ve found it essential:
- Product Videos: Trying to isolate a new product being held in someone’s hand against a cluttered background? A precise, hand-drawn mask keeps every edge looking sharp, so the product can be placed cleanly into a new scene.
- Action-Packed Shots: If your subject is moving around a lot, AI tools can get confused by the motion blur. By manually adjusting the mask's position over time (a process called keyframing), you can ensure it follows the action perfectly without any weird glitches or flickering.
- Artistic Effects: For any video where a person needs to interact with graphics or text, a sloppy cutout will ruin the illusion. A manual mask creates a seamless composite, getting rid of those distracting "halos" that scream "bad green screen."
Here’s a pro tip for saving time with rotoscoping: you don’t have to adjust the mask on every single frame. Just create a keyframe at the start of a movement and another where the direction changes. The software is smart enough to fill in the gaps.
The good news is that many editors now blend the best of both worlds with AI-assisted masking. Tools like a "magic mask" can generate a pretty good starting point, and then you just jump in to clean up the problem areas. This speeds things up tremendously.
CapCut has some particularly easy-to-use masking features, but you can see a full breakdown of how CapCut compares to other background removal tools to find what works for your style. After you’ve perfected the mask, just export the video with a transparent background, and it’s ready to drop into your final project.
The DIY Green Screen: Your Secret Weapon for Pro Results
If you're after a really clean, professional look, nothing beats a green screen. And you don't need to spend a fortune on a fancy setup. A DIY green screen is surprisingly easy to put together and gives you the most precise way to remove the background from a video for free.
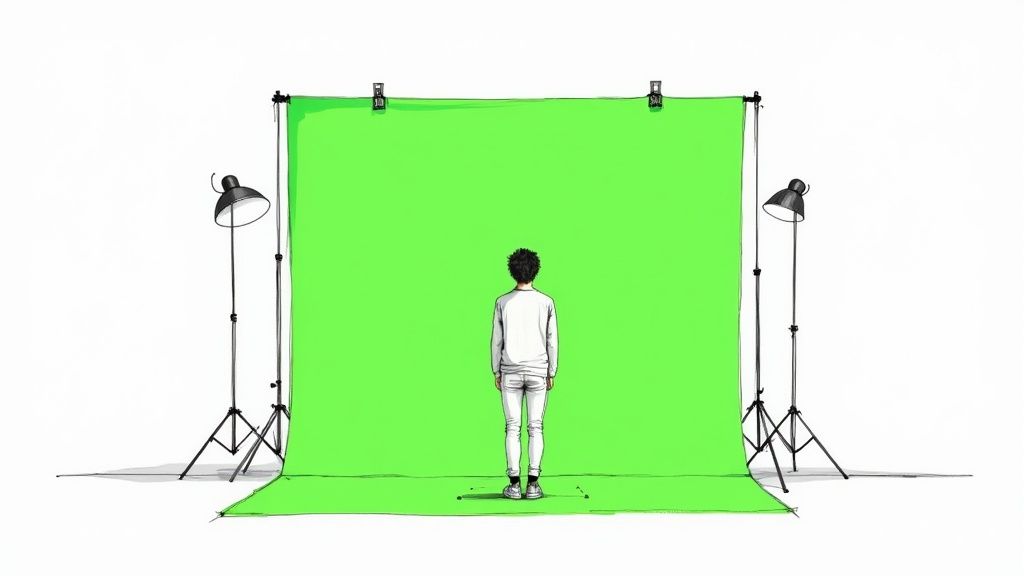
Honestly, any bright, solid-colored surface will do the trick. I've seen people use a lime green bedsheet, a big piece of poster board, or even just a wall painted the right shade. The most important thing is making sure the surface is as smooth and wrinkle-free as you can get it. Creases and shadows will only give you a headache in post-production.
Getting the Lighting Just Right
This is the part that makes or breaks your green screen footage. Seriously. Your goal is to light the backdrop evenly, getting rid of any shadows or bright "hotspots."
- Light the screen first: Grab a couple of household lamps and place one on each side of your green screen, pointing directly at it. This helps wash the backdrop in consistent, flat light.
- Then, light your subject: You'll need a separate light source for the person or object you're filming. Lighting your subject from the front not only makes them look good but also prevents "color spill"—that annoying green glow that can reflect from the screen onto your subject's edges.
- Mind the shadows: Have your subject stand far enough in front of the screen so they don't cast a shadow on it. This is a classic rookie mistake.
Once your video is shot, just pop it into one of the free editing tools we talked about. Every editor has a "chroma key" or "color key" tool. Use the eyedropper to select the green background, and poof—it'll disappear. From there, you can adjust the settings like tolerance and edge softness to get rid of any leftover green halo.
This hands-on method gives you incredible control. For something like a home studio tutorial or a product showcase video, a simple DIY green screen will always give you the cleanest edges and most reliable results.
It's no surprise that the demand for these kinds of tools is exploding. The video application part of the background removal market was valued at around USD 600 million in 2023 and is expected to climb to USD 1.5 billion by 2032. AI is a huge driver of this growth, making these techniques more accessible than ever. You can read more about this trend over on BusinessResearchInsights.com.
Avoiding Common Pitfalls for a Flawless Finish
https://www.youtube.com/embed/fAwVN9M4dm0
Even with the most powerful free tools, a few simple mistakes can completely derail your background removal efforts. Getting that clean, professional look isn't just about the software you pick—it's about sidestepping the common traps that lead to glitchy, amateur results.
One of the biggest culprits I see is bad lighting. When you have shadows dancing across your subject, it confuses the heck out of the AI. The algorithm struggles to define a consistent edge, leaving you with that wobbly, distracting outline that just screams "bad edit." The fix? Use more than one light source to create even, soft light. A simple key light and fill light setup can make a world of difference.
Another classic mistake is filming against a background that's too busy or doesn't have enough contrast. If your shirt is a similar color to the wall behind you, you're asking for trouble. The software simply can't tell where you end and the background begins. Always shoot against a backdrop that creates a sharp, clear separation from your subject.
Getting the Details Right
Some things are just plain tricky for automated tools. Think about fine, wispy hair, a see-through glass of water, or hands moving quickly across the screen. These are the elements that often get mangled or clipped.
When those details are non-negotiable, you might need to adjust your game plan.
- Handling Hair: For preserving individual strands, there's often no substitute for manual rotoscoping in an editor like DaVinci Resolve. It takes time, but the results are unmatched.
- Tracking Fast Motion: If you're dealing with quick movements, a simple DIY green screen will give you the cleanest possible key, making it far easier for any tool to track the action without creating weird visual artifacts.
- Complex Scenarios: Don't be afraid to mix and match. I'll often use an AI tool to handle 80% of a clip and then jump in to manually fix the handful of frames where it struggles.
Here's the bottom line: The quality of your source footage is responsible for 90% of your success. A little prep work on your lighting and background before you even press record will save you a massive headache later.
Got Questions? We’ve Got Answers.
When you're diving into free video editing tools, it's natural for a few questions to pop up. Let's clear up some of the most common ones so you can get the best results without any guesswork.
Can I Really Get Professional Quality for Free?
You absolutely can. Getting that polished, professional look without opening your wallet is totally doable. The final quality, however, really boils down to two key things: your original footage and the method you pick.
If you're after a flawless, pixel-perfect cutout, nothing beats a simple DIY green screen and the robust chroma key tools in a free editor like DaVinci Resolve. But if you need to get it done fast, AI tools can work wonders. Just make sure your video has decent lighting and a clear separation between your subject and what's behind them.
What's the Best Free Option for High-Action Videos?
Fast-moving subjects can sometimes throw AI-powered tools for a loop, causing flickering edges or weird visual glitches. For clips with a lot of action, your most reliable bet is getting hands-on with the masking features in a free video editor.
The trick is to use a hybrid approach. Let the AI do most of the initial work with an assisted mask, then jump in and manually fine-tune the mask on those specific frames where the AI gets a little confused. This gives you ultimate control for a smooth, natural-looking cutout from start to finish.
The best technique really depends on your specific clip. Don't be afraid to mix and match methods—use an AI tool for the straightforward parts and switch to manual editing for the tricky spots. You'll get that perfect result without losing your whole day to editing.
Do I Need a Beast of a Computer for This?
Not always. The great thing about web-based AI services is that they do all the heavy lifting on their own servers. As long as you have a decent internet connection, you can use them on just about any computer.
On the other hand, if you're going the manual route with downloadable software for masking or green screen keying, a more powerful machine will definitely make your life easier. For those tasks, a mid-range computer with at least 8GB–16GB of RAM, a decent processor, and a dedicated graphics card will give you a much smoother ride.
Ready to skip the complex software and get your background removed in seconds? Give VideoBGRemover a try and see just how easy it can be. Get started for free right here.
Tagged with
Ready to Remove Your Video Background?
See a free preview before you buy.
No credit card required • Free preview on every video