How to Use a Video Background Remover
Learn how to use a video background remover to create professional content. Get expert tips for flawless background removal and common issue fixes.
If you've ever needed to get rid of a distracting background in a video, you know the struggle. In the past, this meant wrestling with complex software or setting up a physical green screen. Now, all it takes is a few clicks in your browser. You simply upload your clip, and an AI-powered tool does the heavy lifting, isolating your subject and letting you replace the background with whatever you want.
Why Removing Video Backgrounds Is a Game Changer
Have you ever seen those super polished videos from creators and wondered how they do it? The secret isn't always a fancy studio. More often than not, it's a video background remover. This is the go-to technique for marketers, streamers, and anyone who wants a professional look without a perfect physical set.
This technology completely changes the game by erasing distracting or unprofessional environments. Think about a startup founder filming a slick product demo from their messy home office, or a marketing team adapting a single ad for different countries just by changing the background scene. It makes high-quality video production accessible to everyone.
Unlocking Professionalism and Creativity
Ultimately, it all comes down to control. You're no longer at the mercy of your physical surroundings. This is a massive advantage when you need to maintain consistent branding across all your video content, no matter where you filmed it.
Getting started is usually dead simple. Most modern tools have an interface that looks something like this.
The focus is on simplicity—just a straightforward upload button to get you going without any fuss.
The Rise of Video in Marketing
The importance of video for business isn't just a trend; it's a fundamental shift. Projections show that by 2025, a staggering 89% of businesses will be using video for marketing, with some dedicating up to 60% of their budgets to video ads. These numbers make it clear: if you're not producing high-quality video, you're falling behind.
Key Takeaway: Swapping out a video background is more than just a cool visual effect. It's a strategic decision that elevates your brand, clarifies your message, and can save a ton of money on production costs.
It wasn’t long ago that achieving this look required expensive gear and specialized know-how. You can learn more about the old-school green screen technique to appreciate just how much easier things have become. Thanks to AI, studio-level results are now within everyone's reach.
Setting Your Video Up for Success
Before you even think about uploading your clip, let’s talk about the raw material. The quality of your final, background-free video is only as good as the footage you start with. I've learned from experience that a few simple tweaks during filming can be the difference between a seamless result and a glitchy, frustrating edit.
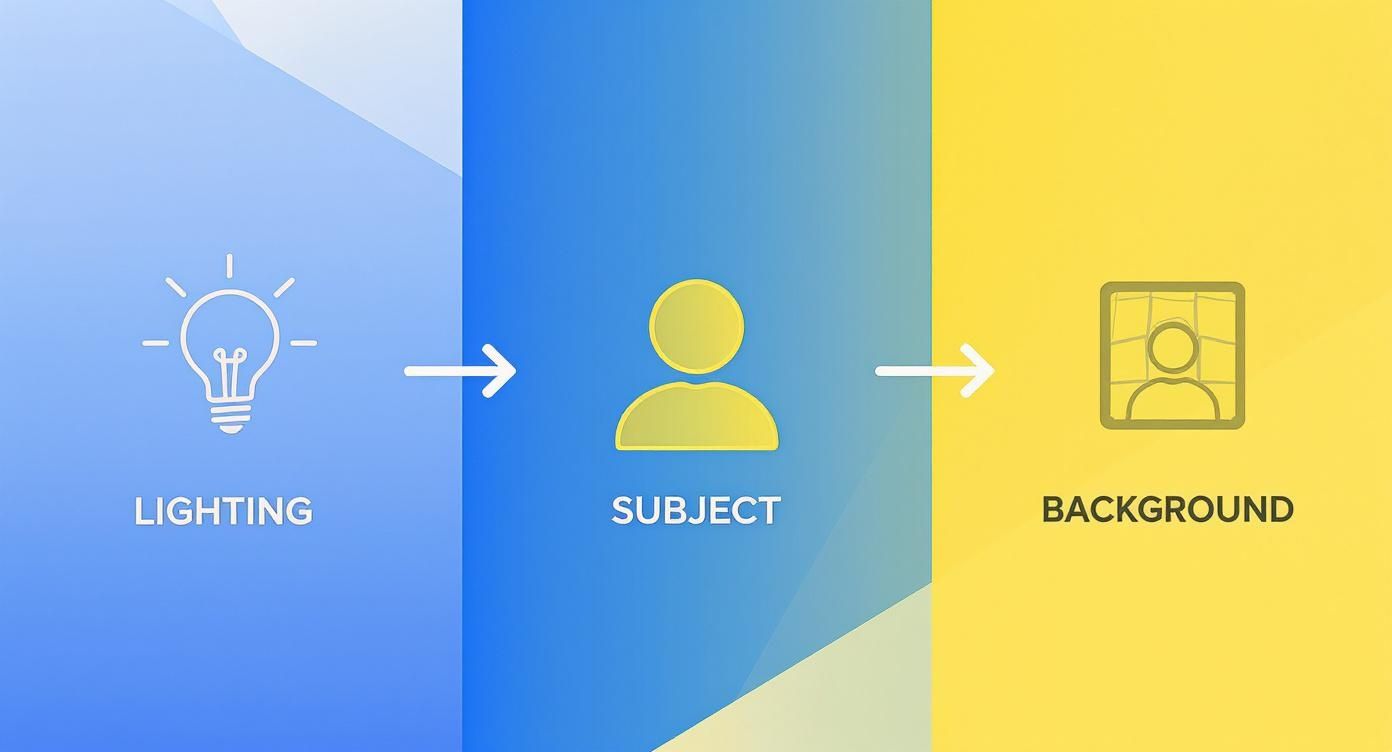
Think of it this way: you're giving the AI a clear roadmap. The more obvious the distinction is between your subject and whatever is behind them, the cleaner the final cutout will be. This all starts with the most important element of any video shoot: lighting.
Nail Your Lighting and Wardrobe
Good, even lighting is your secret weapon here. You need to illuminate your subject so they have sharp, defined edges. I've seen it time and time again—harsh shadows or dim, muddy light just confuses the AI, causing it to blur the lines between your subject and the background. A simple ring light or just facing a bright window can make a world of difference.
What you wear matters, too. Try to avoid clothes that are too close in color to your background. If you're standing in front of a blue wall, a blue shirt is a bad idea. It makes it much harder for the algorithm to do its job. Contrast is your friend.
Tweak Your Technical Settings
Beyond your physical setup, the technical specs of the video file itself are a big deal. To make sure your file plays nicely with online tools like VideoBGRemover, it's best to stick to the basics.
- Video Formats: You can't go wrong with MP4 or MOV. They're the most widely supported and reliable formats out there.
- Resolution: While 1080p is a solid standard, a 4K video gives the AI a lot more detail to work with. This usually means you'll get a much crisper, cleaner edge on your subject.
- Frame Rate: Stick with a standard 24 or 30 frames per second (fps). Anything higher can sometimes create motion blur, which just makes the background removal process more complicated than it needs to be.
Taking a minute to get these settings right from the start is the best way to prevent common upload errors and processing headaches later. It’s a small bit of prep that pays off with a much cleaner, more professional-looking final video. This is the foundation for getting a great result every time.
Getting Your Video Background Just Right
Alright, let's get down to the fun part—taking your raw footage and turning it into something polished and professional. Using a tool like VideoBGRemover is refreshingly simple; it's designed to take you from upload to finished video in a matter of minutes, all right from your web browser. No clunky software to install.
Your first move is to head to the site and upload your video. Once it's there, the AI kicks in. This is where the real magic happens. The algorithm meticulously scans every single frame, separating your subject from its background. You’ll get a preview almost instantly, so you can see exactly how it looks before you go any further.
Key Features of VideoBGRemover
To give you a clearer picture, here’s a quick rundown of what makes VideoBGRemover so effective for different kinds of projects.
| Feature | What It Does | Best For |
|---|---|---|
| AI-Powered Removal | Automatically detects and removes video backgrounds with high accuracy. | Content creators, marketers, and anyone needing a fast, no-fuss solution. |
| Custom Backgrounds | Replaces the original background with a solid color, image, or another video. | Branding videos, product demos, real estate virtual tours, and creative vlogging. |
| Browser-Based | The entire process happens online, with no software downloads required. | Users who need a quick edit on the go or don't want to install heavy software. |
| Multiple Export Options | Download the final video in formats like MP4 or MOV with transparency. | Social media sharing, professional video editing workflows, and website integration. |
This table should help you see at a glance how you can fit the tool into your specific workflow.
Picking a New Background
With the old background gone, you've got a clean slate. This is where you can really get creative and make the video your own. Here are a few common ways I've seen people approach this:
- Solid Colors: This is your go-to for a clean, branded look. I often suggest clients pick a color from their brand's palette for things like tutorials or corporate updates. It just looks sharp and consistent.
- Custom Images: Want to place yourself in a specific setting? Easy. Just upload an image. A real estate agent could stand in front of a gorgeous property, or you could showcase a product in an aspirational lifestyle shot.
- Another Video: For a truly dynamic effect, you can drop another video into the background. Imagine a travel vlogger talking about Paris with beautiful B-roll of the city playing behind them. It’s incredibly engaging.
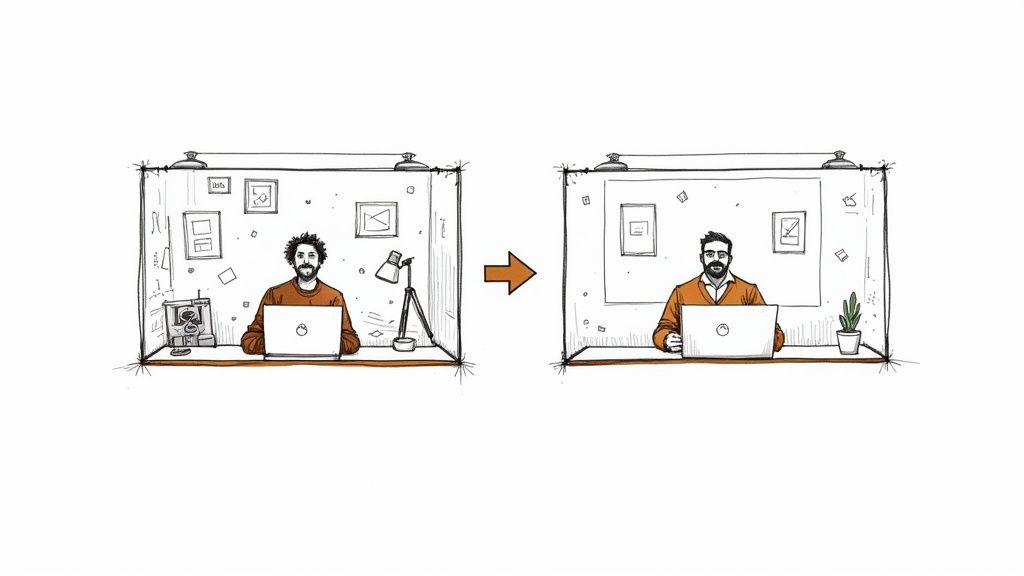
Getting a great result starts before you even hit the "remove background" button. This visual guide breaks down what to aim for when you’re shooting.
As you can see, things like good lighting and a clear separation between you and your background give the AI a huge head start, leading to a much cleaner final cut.
Fine-Tuning and Exporting Your Final Cut
After you've picked your new background, you might want to make a few final tweaks. While automated tools are fantastic, some complex shots with tricky edges might need a more hands-on approach. If you find yourself needing that extra bit of precision, you can learn more about advanced subject isolation with the Roto Brush tool for programs like After Effects.
Getting this right is more important than ever. By 2025, it's predicted that video will account for a massive 82% of all internet traffic. On top of that, nearly 92% of internet users are already watching online videos every month. This isn't just a trend; it's the primary way people consume content, making high-quality video essential. You can dig into more eye-opening video marketing statistics on Teleprompter.com.
Once you’re happy with how everything looks in the preview, it’s time to export. VideoBGRemover gives you options—you can grab a standard MP4 for easy sharing or a transparent MOV ProRes 4444 file if you're pulling it into a professional editing suite. This flexibility ensures your video is ready for whatever you have planned.
Pro Tips for a Flawless Final Cut
Once the AI has done its heavy lifting, it's time to roll up your sleeves and get into the real craft of editing. This is where you move beyond just clicking "export" and start making the subtle tweaks that separate an okay video from something that looks genuinely professional.
The goal is to make your new background feel like it was part of the original shot. It's all about seamless integration.

Fine-Tune Your Edges
Even the sharpest AI can leave a few rough spots. You might see a little shimmering around your subject or some pixelation on tricky areas like hair or fabric. This is where feathering becomes your best friend.
Feathering softens the very edge of your cutout, helping it melt into the new background instead of looking like a sticker slapped on top. Most editors have a simple slider for this. I find that applying just a tiny amount—think 1 or 2 pixels—is usually all it takes to lose that harsh "cut-out" vibe and make the whole thing feel more natural.
My Go-To Trick: Every now and then, you'll see a weird artifact or glitch that only lasts for a few frames. Instead of re-processing the whole clip, I just export that tiny section as a PNG sequence. Then I can open those specific frames in Photoshop, clean them up by hand, and drop them back into my timeline. It’s a lifesaver.
Get the Lighting and Perspective Right
This is the number one mistake I see people make. They'll drop in a background that completely clashes with the original footage, and it immediately shatters the illusion.
If the light in your original shot is coming from the left, but your new background shows the sun on the right, it's going to look fake. No way around it.
- Study the Shadows: Are the shadows on your subject hard and sharp, or are they soft and diffused? Find a background plate that has similar lighting qualities.
- Match the Angles: A low-angle shot of a person placed against a high-angle drone shot of a city will never look right. Make sure the camera perspective feels consistent.
- Color is Everything: Your final step should always be color correction. Use your editor's color grading tools to tweak the temperature, tint, and saturation of your subject so it fits perfectly within the new scene's color palette.
For more deep dives into techniques like this, the Clipbot blog for advanced video editing tips is a fantastic resource to keep in your back pocket. Getting great results from a background remover really comes down to sweating these small, but crucial, details.
What to Do When Background Removal Goes Wrong
https://www.youtube.com/embed/Fbii0Mf6MGI
Even with a powerful tool like VideoBGRemover, you might occasionally see some weird results. Let's be honest, AI isn't perfect. If you're getting blurry edges, flickering artifacts, or that dreaded "halo" glow around your subject, take a breath. The fix is usually straightforward and almost always points back to the original footage you used.
Before you hit that "process" button again, take a hard look at your source video. The most common troublemakers are busy, cluttered backgrounds and poor, low-contrast lighting. The AI needs a clean, obvious line between your subject and what's behind them to do its job well. Fast, jerky movements can also cause motion blur, which just confuses the algorithm.
A Quick Sanity Check
If the output looks a bit off, run through this quick checklist before you do anything else. More often than not, one of these is the culprit:
- Bad Lighting: Is your subject well-lit? Are they clearly standing out from the background? Dim lighting and harsh shadows are notorious for causing problems.
- Low-Quality Video: A fuzzy, low-resolution video just doesn't have enough pixel data for a clean, crisp cutout. You should always start with the best quality source file you have.
- Spotty Internet: The magic happens in the cloud, so a shaky internet connection can sometimes mess with the upload or the processing itself.
Working through these simple points solves the vast majority of issues. If you're still stuck, we've put together a more in-depth guide on 8 common video background issues and how to fix them.
It's fascinating to see where people are watching video. Even with all the streaming options, by 2025, good old-fashioned linear TV is still expected to account for 57% of global viewing time. This really underscores how important high-quality video is, no matter where it's being shown. You can find more stats like this over at the global digital trends report from DataReportal.
Got Questions? I've Got Answers
Even when a tool is easy to use, you're bound to run into a few specific questions as you get started. Let's tackle some of the most common ones I hear from people using a video background remover for the first time. Getting these sorted out quickly will help you keep your creative momentum going.
Think of this as your quick-reference guide. I've kept the answers short and to the point so you can find what you need and get back to your project.
What Are the Best Video Formats to Use?
For the smoothest experience, you really can't go wrong with MP4 and MOV files. They're pretty much the universal standard for a reason. These formats give you a great blend of high quality and manageable file size, which is exactly what you want when you're uploading to an online tool.
While you might get other formats to work, sticking with MP4 or MOV is your best bet to avoid any frustrating upload errors or compatibility issues.
How Can I Fix Blurry Edges Around My Subject?
Ah, the fuzzy edge problem. This usually happens when the AI gets a bit confused trying to separate your subject from what's behind them.
The best solution is to think ahead when you're filming. Make sure your subject has good, even lighting and stands out clearly from the background. High contrast is your friend here. If the footage is already shot, look for an "edge feathering" or "refine edge" setting in your tool. A little softening can help blend those rough edges and make the final result look much more natural.
A little piece of advice I always give: The AI's output is a direct reflection of your input. A sharp, high-resolution video shot against a simple, uncluttered background will give you a crisp, clean cutout almost every time.
Is It Possible to Use Another Video as My Background?
Absolutely! This is where you can get really creative. Once the original background is gone, you can upload a completely different video to take its place.
This technique is perfect for all sorts of scenarios. Imagine a travel vlogger talking about Paris with beautiful footage of the city playing behind them, or a trainer demonstrating an exercise in front of a dynamic, moving graphic. It’s a powerful way to make your content much more engaging.
Ready to create some stunning, professional-looking videos in just a few minutes? Give VideoBGRemover a try and see for yourself how simple it is to swap out your background. You can get started right now at https://videobgremover.com.
Tagged with
Ready to Remove Your Video Background?
See a free preview before you buy.
No credit card required • Free preview on every video