A Creator's Guide to Convert QuickTime to MPEG Seamlessly
Learn how to convert QuickTime to MPEG with our creator-focused guide. We cover free tools, advanced workflows, and tips for perfect MOV to MP4 conversions.
So, you've got a QuickTime video and need to make sure it plays on just about anything? The answer is almost always to convert that MOV file into a more universal MPEG format, like MP4. It’s a simple move that solves a ton of compatibility headaches, especially when you're trying to share your work outside of the Apple world.
This quick fix smooths out playback issues on non-Apple devices and gets your content ready for any web platform or social media feed you can think of.
Why You’ll Probably Need to Convert QuickTime to MPEG
Ever shot a great video on your iPhone, then tried to send it to a friend on a Windows PC, only for them to say it won't open? That’s the classic QuickTime MOV problem in a nutshell.
While MOV was a game-changer when it first appeared, its roots in the Apple ecosystem can create real barriers in our multi-device world. Converting to an MPEG format isn't just a technical tweak; it's about making sure your hard work can actually be seen by everyone.
The Headaches of Sticking with MOV Files
For most creators, the issues with MOV files usually fall into a few frustrating categories. These are the exact reasons why converting to MPEG-4 (MP4) has become such a standard part of the video workflow.
- Spotty Platform Support: The biggest issue by far is that MOV files just aren't universally supported once you leave Apple's walled garden. Plenty of Windows media players, older smart TVs, and even some web platforms will stumble over them without special codecs.
- Massive File Sizes: If you're working with high-quality codecs like Apple ProRes, your MOV files can be absolutely huge. That not only chews through your storage but also makes uploading to sites like YouTube or Vimeo a painfully slow process.
- Web and Social Media Aren't Fans: While many platforms technically accept MOV files now, MP4 is still the gold standard for web streaming. Converting your video ensures it's optimized for smooth, reliable playback on Instagram, TikTok, and anywhere else you share your work.
The Bottom Line: Converting from MOV to an MPEG format like MP4 is less about changing a file type and more about future-proofing your content. It ensures your video just works—for every viewer, on any device, no questions asked.
To help you see why MP4 has become the go-to format for sharing video, here's a quick breakdown of how it stacks up against the MOV container.
QuickTime (MOV) vs MPEG-4 (MP4) At a Glance
| Feature | QuickTime (MOV) | MPEG-4 (MP4) |
|---|---|---|
| Primary Use Case | Native Apple format, professional editing workflows (e.g., ProRes) | Universal standard for web streaming, social media, and cross-platform playback |
| Compatibility | Excellent within the Apple ecosystem; can be problematic on Windows and Android | Outstanding. Plays natively on virtually all modern devices and platforms |
| Compression | Flexible; can be uncompressed or use various codecs, often leading to larger files | Highly efficient compression; excellent balance of quality and small file size |
| Best For... | High-quality video editing and mastering on macOS | Sharing, streaming, and ensuring your video plays everywhere without a hitch |
Ultimately, while MOV is a powerful container for production, MP4 is the undisputed champion for distribution.
From a Pioneer to the Universal Standard
When QuickTime launched way back in 1991, it was a true innovator, providing a framework for multimedia when digital video was just getting started. It was so influential, in fact, that its file structure became the very foundation for the MPEG-4 standard we all rely on today.
By 2002, QuickTime 6.0 had fully embraced MPEG-4, but the legacy of its proprietary origins stuck around. This history helps explain why a simple conversion is often the essential bridge between Apple's powerful creation tools and the rest of the digital world. If you want to dig deeper into the technical side, you can learn more about how the MOV container works in our comprehensive guide on MOV file formats.
Choosing the Right Video Conversion Tool for Your Project
Figuring out the best way to convert a QuickTime file to MPEG really comes down to two things: what you're trying to do and how comfortable you are with the tech. There’s no single "best" tool. The right choice for a quick, one-off conversion is completely different from what a professional video editor would use for an automated workflow.
If you just need to convert a single MOV file and move on, a free tool with a simple graphical interface (GUI) is your best bet. These are designed to be visual and straightforward—you click a few buttons without needing a deep dive into video codecs.
Free and Accessible GUI Converters
For most people, tools like HandBrake and VLC Media Player are the perfect starting point. HandBrake, in particular, is a crowd favorite because it strikes a fantastic balance between being easy to use and offering powerful controls if you need them. You can literally drag your file in, pick a preset like “Fast 1080p30,” and get a high-quality MP4 file without any guesswork.
Of course, these tools have their limitations. They're great for handling one file at a time, but their batch processing features can feel a bit clunky if you’re trying to convert a whole folder with hundreds of clips. You also have to be a little careful with the settings, as it's easy to accidentally compress your video too much and lose quality.
Sometimes, you might not even need to convert the file at all. This little decision tree can help you figure it out.
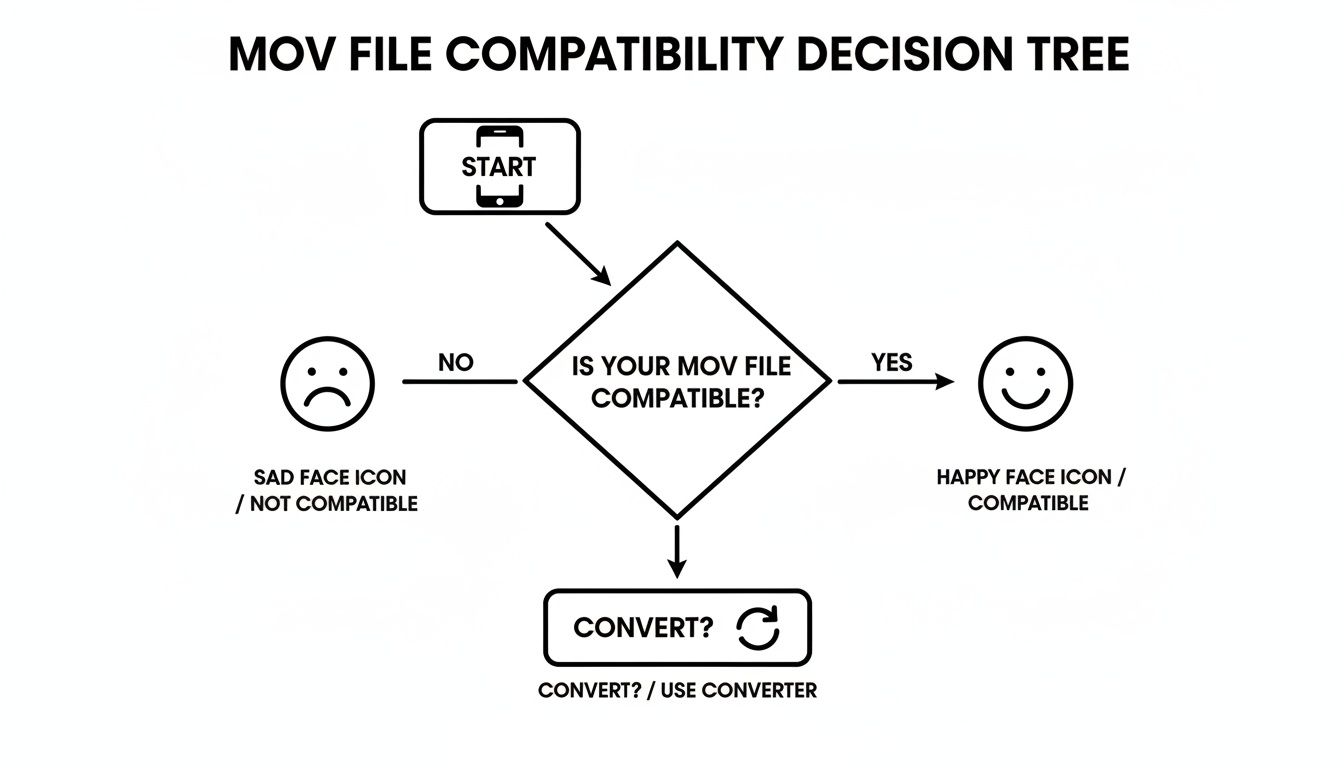
As you can see, the main reason for conversion is simple incompatibility—a classic problem when you’re trying to get a video from your iPhone to play nicely on a Windows PC or an Android device.
For Power Users and Automation: FFmpeg
When you need serious firepower, especially for scripting and automation, the command-line tool FFmpeg is the undisputed king. It’s the powerful engine that actually runs under the hood of many of the GUI tools you might already be using. It gives you precise, granular control over every single aspect of the conversion.
For developers, video pros, or anyone who needs to process videos in bulk, FFmpeg is a game-changer. You can write a simple script to process an entire directory of files, ensuring every single video is converted with the exact same settings. It saves an incredible amount of time and guarantees consistency.
The demand for tools like this skyrocketed after 1998 when MPEG-4 was standardized—ironically, based on Apple’s own QuickTime format. By the 2000s, MPEG's universal compatibility, playing on over 95% of devices, cemented it as the industry standard and fueled a massive need for reliable conversion tools.
Modern AI Tools for Creative Workflows
For today’s content creators, converting a file is rarely the final step. It's usually just one part of a much bigger creative process. Modern AI-powered platforms get this, bundling conversion with other tasks you need to get done. For a deeper look, see our guide on the differences between MP4 and MPEG formats.
Think about it: you could upload a QuickTime video, have an AI tool automatically remove the background, and then export it as a perfectly optimized MPEG-4 file, all in one go. This kind of integrated workflow turns a tedious technical task into a creative one, helping you produce polished, professional-looking content in a fraction of the time.
A Practical Walkthrough of HandBrake for Easy Conversions
When you need a solid, reliable way to turn a QuickTime file into an MPEG, HandBrake is my go-to recommendation. It’s a fantastic free tool that gives you professional-level control without the steep learning curve of command-line encoding. It's the perfect middle ground for creators who need more than a basic online converter can offer.
Let's walk through a typical conversion, from start to finish.
Once you’ve installed and opened HandBrake, the first thing to do is get your video loaded. You can simply drag and drop your MOV file right into the main window or click the "File" button to browse for it. It's a refreshingly straightforward start.
Navigating the Key Settings for a Great Result
After your video loads, you'll see a small preview and a bunch of settings. Don't let it overwhelm you. HandBrake's built-in presets are your best friend here, and for most web video, the Fast 1080p30 preset under the "General" category is a brilliant starting point. It strikes an excellent balance between quality and file size, making it ideal for platforms like YouTube.
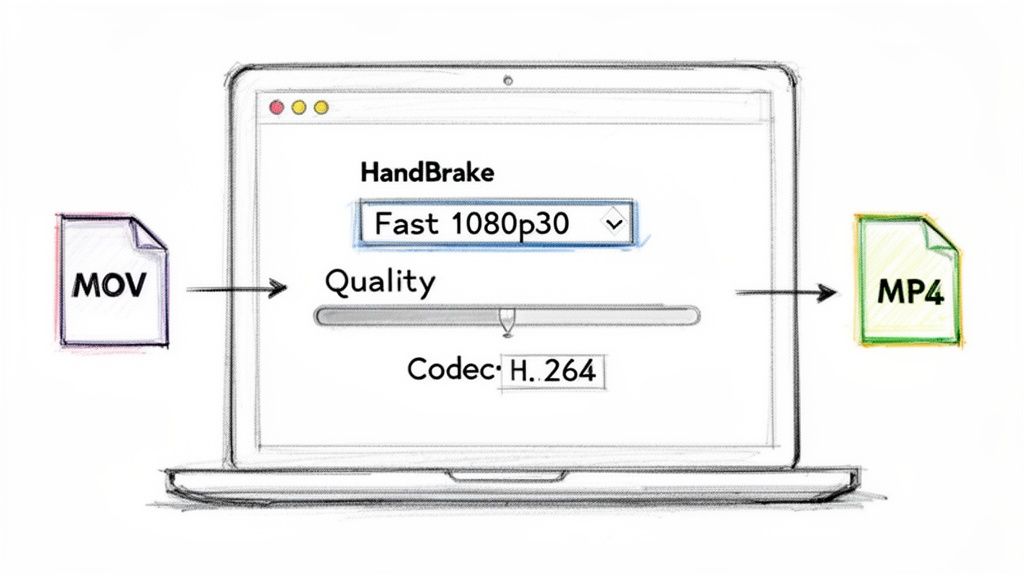
This view shows just how simple it is to get started—your source video is on the left, presets are on the right, and the main tabs for customization are right there in the center.
Now, let's dial in the output. The three tabs you'll live in are "Summary," "Video," and "Audio."
- Summary Tab: First, double-check that the "Format" is set to MP4. This is the container that will hold your MPEG-4 video and ensure it plays on just about anything.
- Video Tab: This is where the real work gets done. The H.264 (x264) encoder is the default for a reason—it offers the best compatibility, so stick with that.
- Audio Tab: HandBrake is pretty smart about grabbing the main audio track. Just give it a quick look and confirm the codec is set to AAC, the standard for MP4 files.
Finding the Quality Sweet Spot
Head back to the "Video" tab and look for the "Quality" slider. This is your most powerful control, known as the Constant Quality Rate Factor (RF). It directly impacts the final look and size of your video. A lower number means higher quality and a bigger file, while a higher number adds more compression, shrinking the file at the expense of some visual detail.
From my experience, an RF value between 20 and 23 is the sweet spot for most HD video. It keeps the image crisp without creating a massive file that’s a pain to upload or store. If you want to dive deeper, our guide on how to convert MOV files to MP4 has some great tips for perfecting this balance.
The need to convert QuickTime MOV to MPEG has been a core part of video workflows for decades, mainly because of huge differences in compression and device support. I’ve personally seen an old 720x480 DV MOV file get its file size slashed by 80-90% just by running it through HandBrake to create a modern H.264 MP4, all with almost no noticeable drop in quality. There's a great breakdown of this exact conversion scenario over on helgeklein.com if you're curious.
Once you’re happy with the settings, all that’s left is to choose a destination for your new file at the bottom of the window and hit the big green "Start Encode" button. HandBrake will take it from there, and in a few moments, you'll have a universally compatible MPEG-4 file ready to go.
Unlocking Advanced Control with FFmpeg Commands
For video editors, developers, or anyone who needs surgical precision, FFmpeg is the ultimate tool. While GUI apps are great for straightforward tasks, this command-line powerhouse gives you complete control over every pixel and audio wave. It’s actually the engine running behind many of the converters you might already use, and learning a few commands can seriously speed up your workflow.
Getting started is simpler than you might think. Once you have FFmpeg installed, you can convert a QuickTime video to a universally compatible MPEG-4 file with just a single line in your Terminal or Command Prompt. Think of it as a mechanic working directly on an engine instead of just using the dashboard controls.
Your First FFmpeg Conversion
The most basic command is incredibly direct. First, navigate to the folder containing your video file. Then, just run this:
ffmpeg -i your-video.mov output-video.mp4
This simple line tells FFmpeg to take your input file and re-encode it into an MP4 container, automatically picking sensible settings for the video and audio. Honestly, for a quick and dirty job, this is often all you need.
But the real magic of FFmpeg is in the details—adding specific "flags" to fine-tune the output. This is how you tell it exactly which video codec to use, ensuring your file plays back perfectly on any device you throw at it.
Taking Control of Quality and Speed
Let's build on that basic command. To make sure you’re using the highly compatible H.264 codec and have direct control over the final look, you can add a couple of key flags. This lets you dial in the perfect balance between file size and visual fidelity.
A more refined command might look like this:
ffmpeg -i your-video.mov -c:v libx264 -crf 22 -c:a copy output-video.mp4
So, what’s going on here? Let's break it down:
-c:v libx264: This flag specifies the video codec. We're telling FFmpeg to use the excellent libx264 encoder, which creates MPEG-4 Part 10 (H.264) video.-crf 22: This sets the Constant Rate Factor, a quality setting where lower numbers mean higher quality (and bigger files). A value of 22 is a fantastic starting point for high-quality web video.-c:a copy: This one is a huge time-saver. It tells FFmpeg to just copy the audio track without re-encoding it. This is much faster and preserves the original audio quality perfectly.
Using these flags lets you convert quicktime to mpeg formats with a level of precision that GUI tools often hide behind vague presets. It gives you full creative and technical authority over the final product.
The true game-changer, especially for anyone dealing with lots of files, is automation. Instead of converting files one by one, a simple script can process an entire folder for you. A loop in a batch script can find every MOV file and convert it, saving you hours of tedious, repetitive clicking. This is where FFmpeg truly leaves its GUI counterparts in the dust for any kind of high-volume work.
As a creator, you know that converting a file is never the end of the story. It's just one small step in a much bigger process of crafting polished, attention-grabbing content for platforms like TikTok, YouTube, and Instagram. The purely technical job of changing a file from MOV to MP4 has to fit neatly into a creative workflow that moves at the speed of social media.
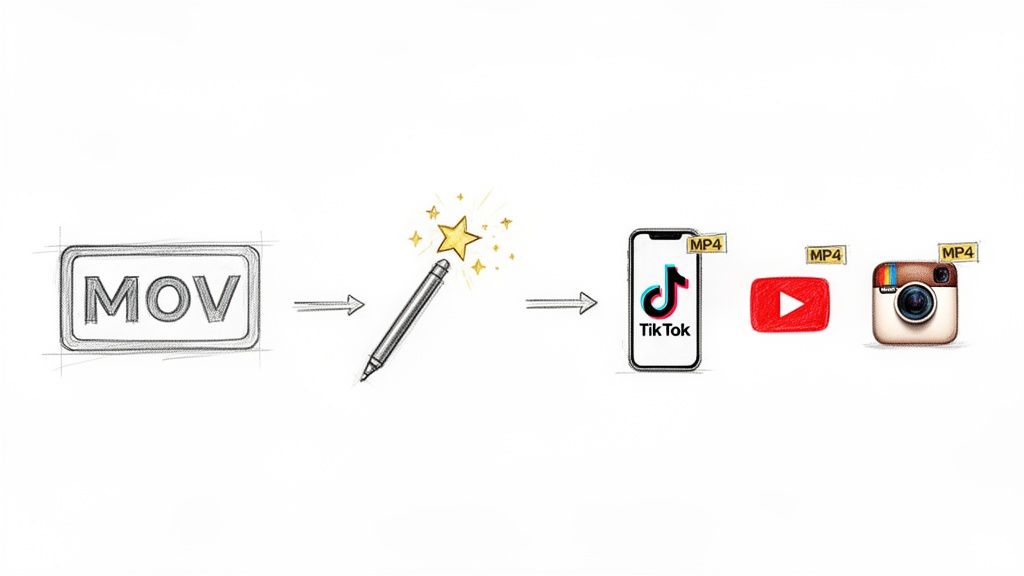
This is where the new generation of production tools, particularly those with AI baked in, really shines. They take what used to be a series of separate, clunky steps and combine them into one fluid motion. You’re no longer juggling different apps for different tasks; you get a single solution that respects your most precious resource—your time.
From Technical Chore to Creative Shortcut
Think about a typical situation. You just filmed a great clip—maybe some user-generated content—and it’s a QuickTime MOV file. The old-school way of handling this was a pain and involved a few different programs.
First, you’d have to convert the MOV to an MP4 using something like HandBrake just to make sure it would play everywhere. Then, you'd pull that new file into your video editor for trimming and color correction. If you needed to remove the background? That meant a third step, importing the clip into yet another piece of software to deal with green screen keying. It was slow and disjointed.
Now, AI-driven platforms like VideoBGRemover have completely changed the game. They merge all those steps into one. You can upload your original MOV, let the AI cleanly remove the background (no green screen needed), and then download a perfectly optimized MP4 with a slick new backdrop. It all happens in one place.
This evolution turns a tedious technical chore into a massive creative shortcut. A process that once required three different apps and a chunk of your afternoon can now be done in minutes, right from your browser.
The table below breaks down just how much the workflow has changed.
Modern Workflow Steps From MOV to Polished Content
| Step | Traditional Workflow | AI-Powered Workflow (e.g., VideoBGRemover) |
|---|---|---|
| 1. File Ingest | Manually import MOV file into a dedicated converter tool. | Upload original MOV file directly to the web platform. |
| 2. Conversion | Convert to a compatible format like MP4 (H.264). | Conversion is handled automatically in the background. |
| 3. Background Removal | Import the new MP4 into an editor for manual green screen keying. | AI analyzes the video and removes the background instantly. |
| 4. Compositing | Add a new background layer in the editing software and re-render. | Choose a new background or image directly on the platform. |
| 5. Final Export | Export the final composite video as an MP4 for social media. | Download a ready-to-post MP4 in a single click. |
This side-by-side comparison makes it clear: what was once a multi-stage, technical headache is now a simple, creative process focused on the final look, not the intermediate steps.
Why Transparency is a Game-Changer in Professional Workflows
Beyond just swapping out backgrounds, the ability to work with transparency during conversion is critical for anyone doing motion graphics or serious video editing. When you're creating assets like animated logos, lower thirds, or character animations, you absolutely need a see-through background. This lets you layer your graphic on top of any video footage.
This is where standard MP4 files hit a wall. The common H.264 codec, which is what most MP4s use, simply doesn't support transparency (often called an alpha channel). If you take a transparent MOV file—say, one encoded with Apple ProRes 4444—and convert it to a standard MP4, all those transparent areas will turn solid black. The asset becomes completely useless for layering.
To get around this, a modern workflow needs to handle formats that keep that alpha channel intact.
- For the web: The best choice is often converting to WebM (VP9). It gives you great quality and full alpha channel support in a file size that's friendly for websites.
- For professional editing: Sticking with MOV (ProRes 4444) or exporting your animation as a PNG sequence are the go-to methods. Both perfectly preserve transparency for use in high-end editors like After Effects or Premiere Pro.
Having these options means you can build complex, layered visuals without being hamstrung by the technical limits of old file formats.
Common Questions About Converting Video Files
Diving into video formats can feel like swimming in alphabet soup, and a few questions always seem to surface. If you're wondering about quality loss or trying to make sense of the technical jargon, you're not alone. Let's clear up some of the most common hurdles people hit when they need to convert QuickTime to MPEG.
One of the biggest anxieties is that converting a video automatically means ruining its quality. It’s a valid concern, but the reality is more nuanced. While re-encoding does re-compress the video data, any quality loss is something you can manage—it’s not a guaranteed downgrade.
Here's a pro tip for critical projects: test your settings on a short, 10-second clip first. This is my go-to sanity check. It lets you see exactly how the final video will look before you commit to a potentially long render, saving you from a world of frustration later on.
Will I Lose Video Quality When I Convert?
Technically, some data is lost during compression, but whether you can actually see a difference is entirely up to the settings you choose. To keep your video looking sharp, the secret is to use a high bitrate or, even better, a quality-based encoding setting.
For example, when I’m using a tool like FFmpeg, I almost always rely on the Constant Rate Factor (CRF). A CRF value between 18 and 22 is the sweet spot for creating a high-quality file that’s visually identical to the original for most people. If you're using a GUI app like HandBrake, their built-in presets are already dialed in to find this balance for you.
What Is the Difference Between MPEG-2 and MPEG-4?
Think of it this way: MPEG-2 is the old-school, reliable format built for physical media. It was the king of DVDs and standard-definition broadcast television. It works and delivers solid quality, but the files it produces are massive by today's standards.
MPEG-4 is the modern, highly efficient successor. It was designed for the internet age, offering much better compression. That means you get a file that's significantly smaller than an MPEG-2 file, often with even better visual quality. For just about anything you’d do online today—from uploading to YouTube to posting on Instagram—you’ll want to convert your video to MPEG-4, usually inside an MP4 container.
The bottom line is simple: MPEG-2 is for discs and legacy broadcasts. MPEG-4 is the undisputed champion for streaming, sharing, and storing video on any modern device.
Can I Keep a Transparent Background?
This is a huge one for motion designers and video editors. The short answer is that a standard MP4 file, which nearly always uses the H.264 codec, does not support transparency. It simply doesn't have an alpha channel.
If you convert a MOV file with transparency (like one encoded with Apple ProRes 4444) to a standard MP4, all those transparent areas will turn solid black. It’s a common pitfall. To keep that alpha channel for use on the web, you need to convert to a format like WebM (with the VP9 codec). If you're staying within a professional editing workflow, you’d stick with a format that supports it natively, like Apple ProRes 4444.
Ready to streamline your creative process? With VideoBGRemover, you can remove your video's background and export a perfectly optimized MP4 or a transparent WebM file in just a few clicks. Transform your footage without the technical headaches at https://videobgremover.com.
Tagged with
Ready to Remove Your Video Background?
See a free preview before you buy.
No credit card required • Free preview on every video