A Guide to Convert AVI to QuickTime Like a Pro
Struggling to play AVI files on your Mac? Learn how to convert AVI to QuickTime (MOV) using free tools and advanced methods for a seamless creative workflow.
Ever tried to play an old AVI video on your Mac, only to be met with an error message? It’s a common frustration. The simplest fix is to convert AVI to QuickTime, which uses the native MOV format that plays nice with all things Apple.
Making that quick conversion ensures your video files will work seamlessly across your devices and in modern editing software.
Why Your AVI Files Need a Modern Makeover
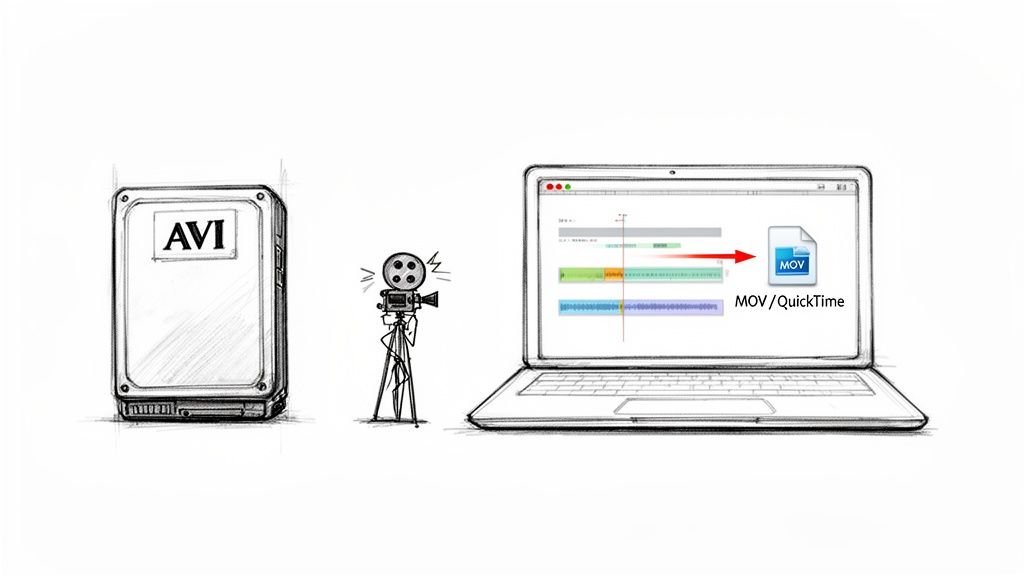
If you’ve stumbled upon old AVI videos from a dusty hard drive, you’ve probably discovered they just don’t play on a Mac. You’re not alone. The Audio Video Interleave (AVI) format, created by Microsoft way back when, was a staple for digital video. But today, it’s mostly a relic.
The main problem lies in its outdated container design. Think of an AVI file like an old, clunky suitcase—it holds your video and audio, but it doesn't use the space very efficiently. This leads to some real headaches for anyone working with video today.
The Problem with an Outdated Container
The most glaring issue with AVI is its massive file size. It lacks the modern compression that we take for granted now, so these files hog an unnecessary amount of storage. Imagine a filmmaker trying to mix archival AVI footage into a Final Cut Pro project—they'd be fighting with bloated files that bog down the entire editing timeline.
On top of that, AVI’s compatibility within the Apple ecosystem is notoriously poor. QuickTime Player, iMovie, and Final Cut Pro are all built around the MOV container, which supports efficient, high-quality video codecs. When you try to import an AVI, you’re often greeted with errors, choppy playback, or an outright refusal from the software. You can get a deeper dive into the technical details in our guide on MOV file formats.
The real reason to convert is simple: efficiency. Modern MOV files using codecs like H.264 are smaller, faster to work with, and universally compatible. They get the technical roadblocks out of your way so you can focus on creating.
To understand why this change is so necessary, let's look at a quick comparison between the two formats.
AVI vs QuickTime (MOV) At a Glance
This table breaks down the key differences and shows why MOV has become the modern standard.
| Feature | AVI (Audio Video Interleave) | QuickTime (MOV) |
|---|---|---|
| Primary Developer | Microsoft | Apple |
| Compression | Less efficient; often uses older codecs like DivX. | Highly efficient; supports modern codecs like H.264 and HEVC. |
| File Size | Typically very large for the given quality. | Significantly smaller with little to no visible quality loss. |
| Compatibility | Limited on macOS and iOS devices without extra software. | Native and seamless across all Apple devices and software. |
| Advanced Features | Lacks support for features like transparency or metadata. | Supports advanced features like alpha channels and subtitles. |
The differences in the real world are striking.
Back in the day, AVI was king. But by 2023, modern containers like MOV and MP4 had captured 60-70% of the professional video market. The numbers speak for themselves: a 539 MB AVI clip can shrink down to just 158 MB as a MOV file—that's a 70% reduction without any noticeable loss in quality. Professionals who make the switch often report workflow efficiency boosts of 20-25% just from better software integration alone.
Converting your old AVI files isn't just about making them playable. It's an essential upgrade that brings your media library into the modern era.
Simple Conversions with Everyday Free Tools
You don't always need to hunt for specialized software to convert an AVI to a QuickTime MOV. Often, the tools you already have on your computer for watching videos are more than capable of handling the job, saving you both time and a bit of cash. Let's start with the most direct route for anyone on a Mac.
The QuickTime Player "Hack"
It sounds a bit strange, I know—using QuickTime Player to fix a file that QuickTime won't play. But the reality is that an AVI file is just a container, and what really matters are the video and audio codecs tucked inside. If QuickTime happens to recognize those codecs, you're golden.
Give it a shot: just try opening your AVI file directly in QuickTime Player. If it opens without throwing up an error message, you’ve just bypassed the hardest part.
From there, all you have to do is go to File > Export As and pick a resolution like 1080p or 720p. This simple action forces QuickTime to re-package everything into a modern, universally accepted MOV file.
This trick is perfect for those one-off conversions when you just need to get a file into iMovie or Final Cut Pro without the hassle of installing something new. It’s surprisingly effective.
From my own experience, this simple export can do wonders for file size. I've seen it slash file sizes by a whopping 65-70% with no obvious drop in visual quality. For instance, a clunky 539 MB AVI file can slim down to a much more manageable 158 MB MOV. This "open and export" technique can turn a problem file into a usable asset in moments. You can read more about these AVI to QuickTime conversion findings to see just how well it works.
Of course, if QuickTime greets you with that dreaded incompatibility error, it's time to bring in the big guns.
Your Go-To Tool: VLC Media Player
Pretty much everyone has VLC Media Player installed. It’s the Swiss Army knife of media players, but what many don't realize is that it has a powerful conversion engine built right in. If QuickTime stumbles, VLC can almost always pick up the slack, and it works the same on Mac, Windows, or Linux.
Here’s how you do it:
- Open up VLC.
- Head to File > Convert / Stream in the menu bar.
- A new window will pop up. Just drag your AVI file and drop it right in.
Now, you just need to tell VLC what to create. Under the ‘Choose Profile’ section, you’ll see a list of presets. Look for one like Video - H.264 + MP3 (MP4). Don't let the "(MP4)" part confuse you; this profile creates a file that works perfectly as a MOV in the Apple ecosystem. It’s my default choice for maximum compatibility.
Pro Tip: Need more control? Click the 'Customize' button next to the profile dropdown. This is where the real power is. You can manually select the MOV/MP4 encapsulation, tweak the video codec to H.264, and set the audio to AAC to get the exact output you need for professional editing.
Once your profile is set, click 'Save as File', pick a name and location for your new video, and hit 'Save'. VLC will get to work, and in a few moments, you'll have a clean MOV file ready for anything. This method is incredibly reliable and has saved me from countless file-format headaches over the years.
When you hit the limits of a basic file converter, it’s time to bring in the heavy hitters: HandBrake and FFmpeg. These aren't your average drag-and-drop tools. They offer the kind of granular control that professionals rely on to nail the perfect balance between video quality and file size.
Advanced Control with HandBrake
Think of HandBrake as the perfect middle ground—it's a powerful, open-source transcoder wrapped in a reasonably friendly interface. It's my go-to when I need to convert AVI to QuickTime with very specific settings or, more commonly, when I have to tackle an entire folder of old videos at once.
Let's say you just unearthed a hard drive filled with ancient AVI home movies. Converting them one by one would be a nightmare. This is where HandBrake shines. Its batch processing feature is a genuine time-saver. You just point it to the folder, dial in your settings a single time, and let it churn through the whole collection while you do something else. For a much deeper dive, this HandBrake tutorial is a great resource for getting to grips with its more advanced options.
This little decision tree can help you figure out the best free tool for the job.
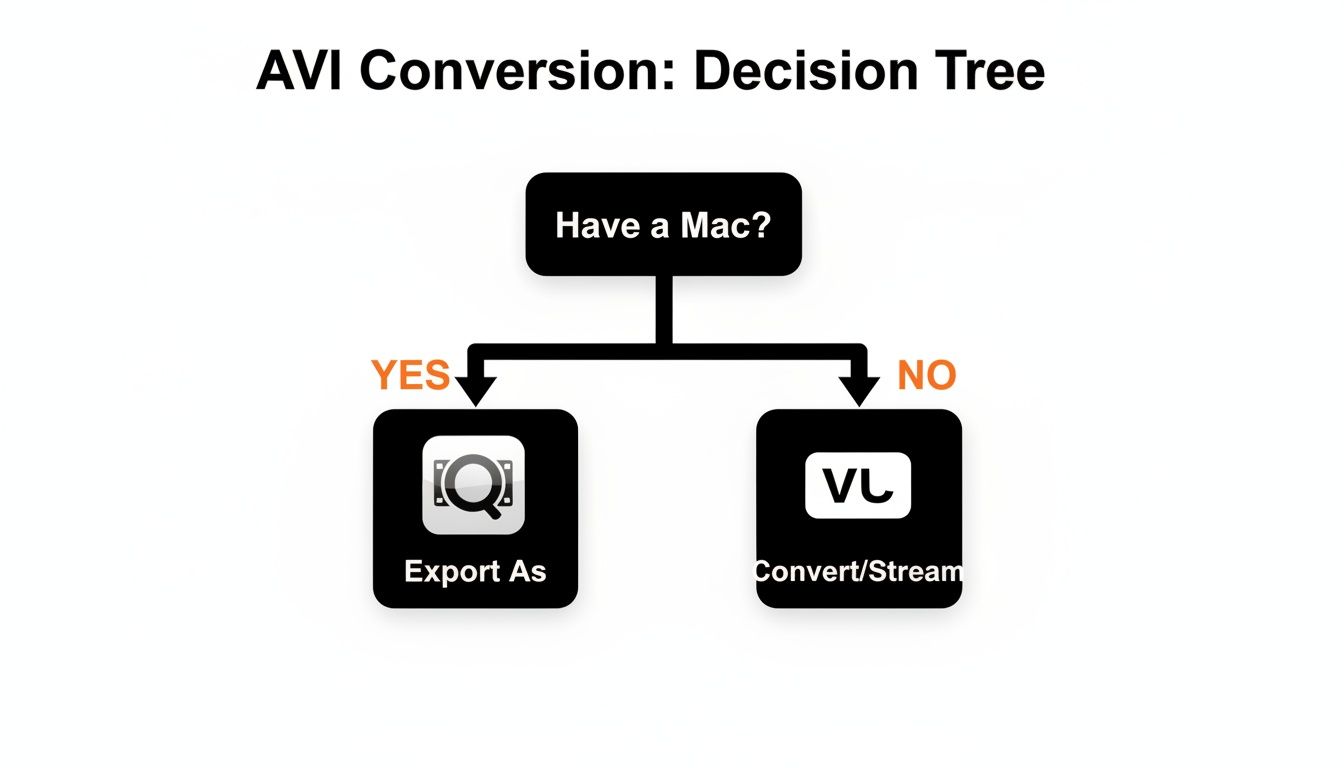
As you can see, if you're on a Mac and the AVI is compatible, QuickTime's built-in "Export As" is the quickest path. For pretty much everyone else, VLC is a solid, universal option.
But what truly sets HandBrake apart is its precise quality control. Instead of vague presets like "High Quality," you get to adjust the Constant Rate Factor (CRF). Here’s how I think about it:
- For Archiving: I use a lower CRF, typically around 18-20. This creates a larger file but keeps the quality incredibly high, which is perfect for master copies.
- For Web Sharing: I'll slide the CRF up to 23-25. The file size drops significantly with a slight, often unnoticeable, quality dip. It's ideal for uploading.
This kind of precision means you’re always in control, tailoring every single conversion for its intended use.
Precision with FFmpeg Commands
Now, if you're comfortable with the command line, FFmpeg is the absolute king. It’s the raw engine that powers countless video apps, and using it directly gives you surgical control over every possible parameter. It's not pretty, but it's incredibly powerful.
Here are a few practical, copy-and-paste commands that I use all the time.
1. The Standard Conversion
This is your workhorse command. It takes an AVI file and converts it into a universally compatible MOV with H.264 video and AAC audio.
ffmpeg -i input.avi -c:v libx264 -c:a aac output.mov
2. High-Quality ProRes for Editing
Planning to edit the video in something like Final Cut Pro or DaVinci Resolve? You’ll want an intermediate codec like ProRes to preserve as much quality as possible.
ffmpeg -i input.avi -c:v prores_ks -profile:v 3 -c:a pcm_s16le output.mov
A Quick Tip from the Trenches: That
-profile:v 3flag is specifying ProRes 422 (HQ), a widely used standard in professional post-production. The file will be huge, but you won't lose any detail, which is crucial for color grading and applying effects.
3. Remuxing (The Smart Way)
Sometimes, the video and audio streams inside the AVI container are already in a format QuickTime can read (like H.264). Re-encoding it would be pointless, time-consuming, and would actually degrade the quality. Instead, we can just "remux" it—change the container from AVI to MOV without re-encoding anything.
ffmpeg -i input.avi -c:v copy -c:a copy output.mov
This "stream copy" process is lightning-fast—we're talking seconds, not minutes—and guarantees absolutely zero quality loss. It’s the most efficient method possible when the codecs are already compatible.
Navigating Online Converters Safely and Effectively
Online converters feel like a magic bullet when you need to convert AVI to QuickTime and don't want to install any new software. For a single, small file, they’re incredibly convenient. You just drag, drop, and download. When you're in a pinch and the video isn't sensitive, the whole process can be over in minutes.
But that convenience often comes with some serious strings attached. As soon as you hit "upload," you're sending your video to someone else's server. This is a huge red flag if your file contains anything personal, confidential, or proprietary.
Beyond the obvious privacy risks, most free online services have built-in limitations to nudge you toward a paid subscription. Be on the lookout for:
- Strict File Size Limits: Free tiers often cap uploads at a few hundred megabytes, which won't work for high-quality or lengthy videos.
- Intrusive Watermarks: Some services will plaster their logo all over your converted file, making it completely unprofessional.
- Noticeable Quality Loss: To save on server costs, free tools often compress your video heavily, which can make it look blocky or blurry.
Vetting a Trustworthy Online Tool
If you absolutely must use an online tool, take a moment to do some due diligence before uploading anything. When you're looking around at different platforms, you'll find that many, like services with saucial.app's upload functionality, are built around direct file handling.
Before you trust any of them with your video, check for a few basic security markers. First, look for HTTPS encryption in the address bar (the little padlock icon). This is non-negotiable, as it secures your file during the upload.
Next, hunt down their privacy policy. A trustworthy service will be upfront about what they do with your data.
A good rule of thumb is to look for a policy that explicitly states files are deleted from their servers within a specific timeframe, usually a few hours. If you can't find this information easily, it's a major red flag.
Finally, do a quick search for user reviews on a third-party site. See what other people's experiences have been with the tool’s reliability, speed, and any hidden catches they ran into.
When to Use Online vs. Desktop Tools
So, when does it actually make sense to use an online converter? They’re perfect for low-stakes, non-sensitive conversions where speed is the only thing that matters. Quickly converting a short, non-confidential clip to text a friend is a great example.
For literally everything else—especially if you're processing multiple files, working with large videos, or handling anything with personal data—stick with desktop software like HandBrake or FFmpeg. You get far more control, you can preserve quality much better, and most importantly, your files never leave your computer. This keeps your data private and gives you the final say on every single setting.
Navigating Common Conversion Errors and Headaches
There’s nothing worse than running a conversion, waiting patiently for it to finish, and then discovering the final MOV file is a complete mess. When you’re trying to convert AVI to QuickTime, a few common gremlins tend to show up. The good news? They're almost always fixable with a little know-how.
One of the most maddening issues is audio that drifts out of sync with the video. This usually happens when the original AVI file used a variable audio bitrate, which can throw some converters for a loop. Your best bet is to force a constant bitrate (CBR) for the audio track in your conversion tool. In an app like HandBrake, this simple tweak almost always gets the audio back in line.
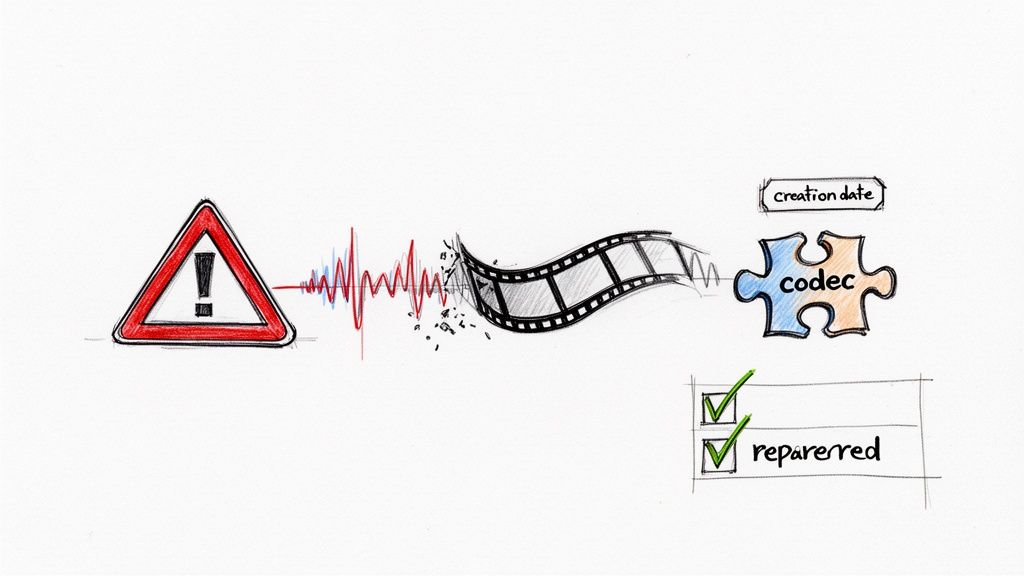
Then there's the classic "codec not supported" error. This is just a fancy way of saying QuickTime doesn't speak the same language as the video or audio stream tucked inside your AVI file.
Fixing Codec and Compatibility Problems
When you run into a codec wall, the fastest way through it is to re-encode everything into a format that everything understands. During your conversion setup, you'll want to choose these bulletproof options:
- Video Codec: Stick with H.264 (also known as AVC). It’s the undisputed champion of compatibility and works on pretty much any device or software you can throw at it.
- Audio Codec: Choose AAC (Advanced Audio Coding). This is the gold standard for audio in MOV and MP4 files, ensuring your sound will play without a hitch.
Sometimes, the resulting MOV file can be massive. If you need to shrink it down without turning your video into a pixelated mess, check out our guide on how to reduce MOV file size for some practical tips.
Using these settings is the closest thing to a guarantee you'll get for creating a MOV file that plays perfectly on any Mac, iPhone, or in any editing suite.
Keeping Your Original File Metadata Intact
Here’s a sneaky problem that catches a lot of people by surprise: losing the original creation date. Imagine converting a whole folder of old family videos, only to find they're all stamped with today's date, completely ruining your chronological archive.
This became a huge headache for Mac users around 2018 when macOS dropped support for older 32-bit AVI files, forcing people to batch convert entire libraries. Many discovered that tools like HandBrake and VLC would strip the original metadata, with some folks reporting they had to manually fix dates on over 100 files. You can still find forum threads filled with this exact frustration, like in this discussion on Apple's forums.
Pro Tip: To sidestep this nightmare, you need a tool that can copy metadata streams. If you're comfortable with the command line, FFmpeg is your best friend. The command
-map_metadata 0explicitly tells it to lift all the original data—including that precious creation date—and transfer it to the new file.
By getting ahead of these common issues—audio sync, codec failures, and metadata loss—you can set up your workflow to produce a perfect, problem-free MOV file every single time.
Common Questions About Converting AVI to QuickTime
Jumping into file conversions can feel a bit like opening a can of worms—you're bound to have questions. Let's tackle some of the most common ones that pop up when you're trying to get AVI files to play nicely as QuickTime videos.
Will I Lose Video Quality When I Convert AVI to QuickTime?
It's a valid concern, but the good news is: not if you do it right. The final quality is entirely up to the settings you choose.
If you're after archival-level perfection and don't want to lose a single pixel of data, converting to a "lossless" format like Apple ProRes is the way to go. The files will be huge, but the quality will be identical to the original.
For everyday use, a well-configured "lossy" codec like H.264 can give you a result that's visually indistinguishable from the source, just with a much smaller file size. The trick is to avoid over-compressing it.
A great rule of thumb in a tool like HandBrake is to use a Constant Rate Factor (CRF) between 18 and 22 for H.264 video. This usually hits the sweet spot between great quality and a reasonable file size. If the video stream inside your AVI is already compatible, the absolute best way to preserve quality is an FFmpeg stream copy (
-c copy).
What Is the Best Format to Convert AVI to for a Mac?
"Best" really depends on what you're doing next. Your format and codec choice should always serve your end goal.
- For General Use & Sharing: You can't go wrong with an MOV file using the H.264 video codec and AAC audio. This is the gold standard for Apple devices. It’ll play back perfectly everywhere, from your iPhone to iMovie.
- For Professional Editing: If you're bringing the footage into Final Cut Pro or Adobe Premiere Pro, you'll want to convert it to an MOV using Apple ProRes 422. These files are massive, but they hold onto all the crucial image information you need for heavy-duty work like color grading.
Can I Convert a Bunch of AVI Files to MOV at Once?
Of course. Nobody has time to convert files one by one, and that’s where batch processing comes in.
HandBrake is fantastic for this. You can just drag an entire folder of AVIs into the queue, pick your settings once, and let it churn through the whole batch. If you're comfortable with the command line, FFmpeg can do the same thing with a simple for loop, which is an incredibly powerful way to update an entire library of old videos.
Help! My Converted MOV File Has No Sound.
This is probably the most common headache, and it's almost always an audio codec problem. The original AVI file likely used an old-school audio format that didn't get properly translated into something QuickTime can read.
The fix is to manually set the audio codec during conversion. Make sure you explicitly choose AAC. In VLC or HandBrake, you'll find this setting in the 'Audio' tab. For FFmpeg users, just add the -c:a aac flag to your command. This forces the audio to be re-encoded correctly, and your silent movie problem should disappear.
At VideoBGRemover, we're all about making video work easier. Once your files are converted, our AI tool can help you remove or swap out the background in just a few clicks—no green screen required. It’s a great way to create polished content for your ads, tutorials, or social media channels. Try it for free on videobgremover.com.
Tagged with
Ready to Remove Your Video Background?
See a free preview before you buy.
No credit card required • Free preview on every video