How to Edit MP4 Videos: how to edit mp4 videos Made Simple
Discover how to edit mp4 videos with practical steps, the right tools, and export tips to finish pro-quality videos.
Editing an MP4 video is more than just clicking a few buttons. It's a blend of technical know-how and creative storytelling—trimming clips, polishing the audio, correcting color, and adding those final visual touches that make your work stand out.
Choosing Your MP4 Video Editing Toolkit
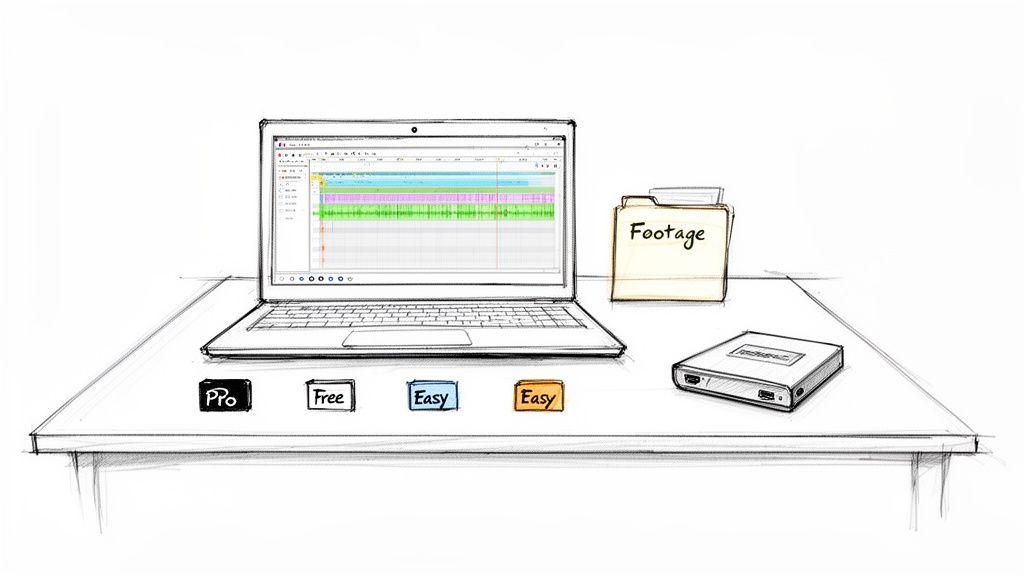
Before you can start piecing together your masterpiece, you need to get your toolkit in order. Diving into how to edit MP4 videos really begins with picking the right software and making sure your hardware can keep up. There are a ton of options out there, but don't get overwhelmed. It’s all about matching the tools to your project and your budget.
The MP4 format is everywhere for a good reason. It strikes that perfect balance between solid video quality and manageable file sizes, which is why it’s the go-to for nearly every camera, smartphone, and social platform.
Software: The Heart Of Your Workflow
Your editing software is where all the magic happens. Think of it as your digital workshop. The choices run the gamut from free, surprisingly powerful programs to the heavy-hitters the pros use.
Professional Suites: For those who need maximum control, tools like Adobe Premiere Pro and Apple's Final Cut Pro are the industry benchmarks. They have a bit of a learning curve and a price tag, but their depth and integration are unmatched.
Powerful Free Editors: You can't talk about free editors without mentioning DaVinci Resolve. Its free version includes professional-grade color correction tools that are legendary in the industry, making it a favorite for serious creators on a budget.
Beginner-Friendly Options: Just getting your feet wet? There are plenty of intuitive editors designed to get you started without the steep learning curve. If you're looking for the perfect entry point, we have a whole guide to help you find the right fit at https://videobgremover.com/blog/video-editing-software-for-beginners.
The best software for you isn't always the one with the most features. It's the one that feels intuitive and lets you get your ideas out of your head and onto the screen without a fight. Whether you’re cutting a quick clip for TikTok or a detailed YouTube tutorial, a smooth workflow is everything.
To give you a clearer picture, here’s a quick comparison of some of the top contenders when it comes to choosing video editing software for social media and other projects.
Comparing Popular MP4 Video Editing Software
A quick comparison of leading video editors based on user level, key features, and pricing to help you choose the right tool for your needs.
| Software | Best For | Key Features | Pricing Model |
|---|---|---|---|
| Adobe Premiere Pro | Professionals & Content Creators | Advanced timeline editing, motion graphics integration, vast effects library | Subscription |
| Final Cut Pro | Mac Users & Professionals | Magnetic timeline, strong performance on Apple hardware, 360-degree video | One-time Purchase |
| DaVinci Resolve | Colorists & All-in-One Editors | Industry-leading color grading, Fusion for VFX, Fairlight for audio | Free & Paid Studio Version |
| CapCut | Beginners & Social Media | User-friendly interface, trendy effects, auto-captions, mobile-first design | Free & Pro Subscription |
This table just scratches the surface, but it should give you a good starting point for finding a tool that matches your ambition and budget.
Hardware: The Engine Behind Your Edits
Great software is one thing, but it’s useless without a machine that can run it properly. A sluggish computer can kill your creative momentum faster than anything else.
Your computer’s CPU (Central Processing Unit) does the heavy lifting, especially when it comes to rendering your final video. A processor with multiple cores will make a world of difference. Next up is RAM (Random Access Memory); think of it as your computer's short-term workspace. For 1080p video, 16GB is a solid baseline, but if you’re working with 4K footage or a lot of effects, you’ll be much happier with 32GB or more.
Don't forget about storage. A fast Solid-State Drive (SSD) is a game-changer for editing. It allows your software to access video files instantly, which means a smoother, more responsive timeline. A common pro setup is to use an internal SSD for the operating system and software, plus a large external drive (or another SSD) to store all the raw footage and project files. This setup helps avoid frustrating bottlenecks and lets you stay in the creative zone.
Building Your Story, from Cuts to Color
With all your footage neatly organized, it's time to roll up your sleeves and get into the real craft of editing. This is where you stop being a file manager and start being a storyteller, transforming a collection of clips into a single, compelling narrative.
Think of yourself as a sculptor. The first pass is just about knocking off the big, obvious chunks—the shaky camera starts, the flubbed lines, the moments where nothing is happening. Don't chase perfection here. The goal is to get a rough assembly of your best takes onto the timeline, creating a basic skeleton for your story. This is your "rough cut," and it's the foundation for everything that follows.
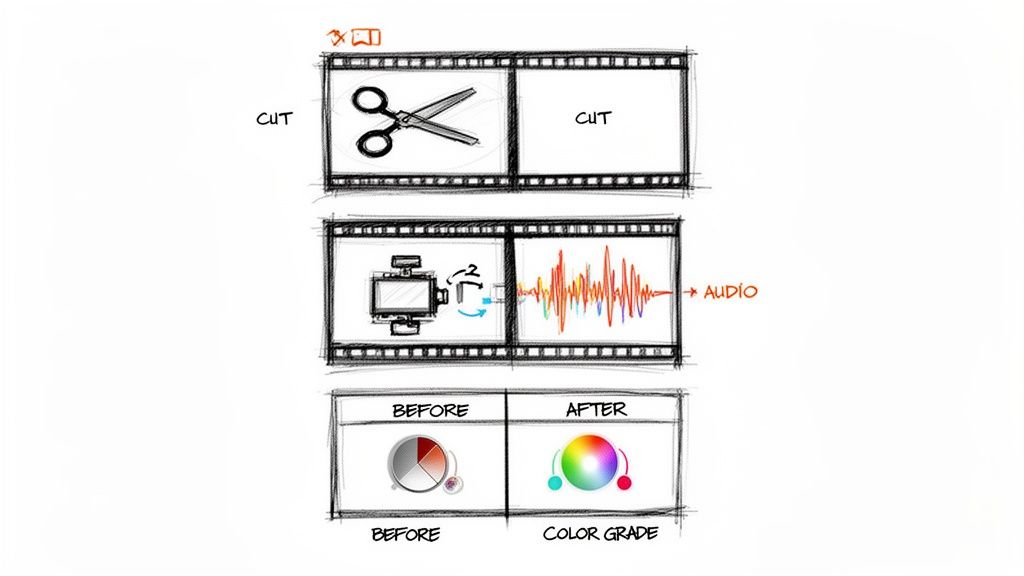
The Art of the Cut and Trim
Knowing when to cut is probably the single most important skill when you edit MP4 videos. Every snip of the virtual razor blade shapes the rhythm and energy of your piece. A flurry of quick cuts can ramp up excitement for a product launch, while letting a shot breathe can build tension or give an emotional moment the space it needs to land.
Trimming is where you get surgical, shaving individual frames off the beginning or end of a clip to make your edits feel invisible. This is what separates amateur work from a professional-looking final product.
For example, when cutting between two people talking, try using a "J-cut" or an "L-cut." A J-cut brings in the audio from the next clip just before you see the video, pulling the audience into the next shot. An L-cut does the opposite, letting the audio from the first clip linger over the start of the second. These simple techniques make conversations feel incredibly natural and smooth.
A great edit is invisible. The goal is for the audience to be so absorbed in the story that they don't even notice the cuts. Each transition should feel natural and purposeful, guiding the viewer's attention exactly where you want it.
Polishing Your Raw Footage
Even the steadiest hand can result in a little camera shake. Luckily, most editing software has powerful stabilization tools built right in. Applying an effect like a warp stabilizer can analyze the clip and smooth out those distracting jitters, giving your footage a more cinematic feel. A word of caution: use it judiciously. Pushing it too far can create an unnatural, "floaty" effect.
Next, focus on your audio. Bad audio will make viewers click away faster than anything else. People will tolerate slightly grainy video, but they have zero patience for muffled, distorted, or noisy sound.
Here are the essential audio fixes to tackle first:
- Kill the Noise: Use built-in filters to eliminate distracting background hums from air conditioners, refrigerators, or computer fans. The best tools let you capture a "noise print" from a silent part of your recording to remove the unwanted sound more accurately.
- Level Your Volume: Nobody wants to be constantly reaching for the volume knob. Your audio levels need to be consistent from clip to clip. Use gain or normalization tools to bring dialogue into a clear, standard range, typically peaking between -6dB and -12dB.
- Add Ambiance: A well-chosen music track can do wonders for setting the mood. Just make sure to "duck" the music—automatically lowering its volume—anytime someone is speaking so the dialogue remains front and center.
Bringing Your Video to Life with Color
Color is an incredibly potent storytelling tool. The final creative layer is color correction and color grading, and while the terms are often used interchangeably, they're two very different things.
Color Correction is the technical part. It’s about fixing problems and making your footage look clean, consistent, and natural. This means:
- Setting the White Balance: This ensures that something white in your shot actually looks white on screen, removing any weird color casts from the lighting.
- Adjusting Exposure: Here, you’re fixing shots that are too dark or too bright, aiming for a perfectly balanced image.
- Balancing Saturation: This step is all about making colors look true-to-life—not washed out, but not cartoonishly vibrant either.
Once all your clips are corrected and match one another, you can move on to the fun part: Color Grading. This is where the artistry comes in. Grading is about applying a specific look to evoke a feeling. Think of the cold, sterile blues of a sci-fi thriller or the warm, nostalgic golds of a travel vlog. A consistent grade across your entire video ties everything together, giving it a polished, professional identity.
Adding Professional Polish with Graphics and Overlays
With your core story cut together and your audio sounding crisp, it’s time for the fun part: adding the layers that make your video look truly professional. This is where you transform a simple MP4 edit into a branded, polished piece of content that guides your audience and reinforces your message.
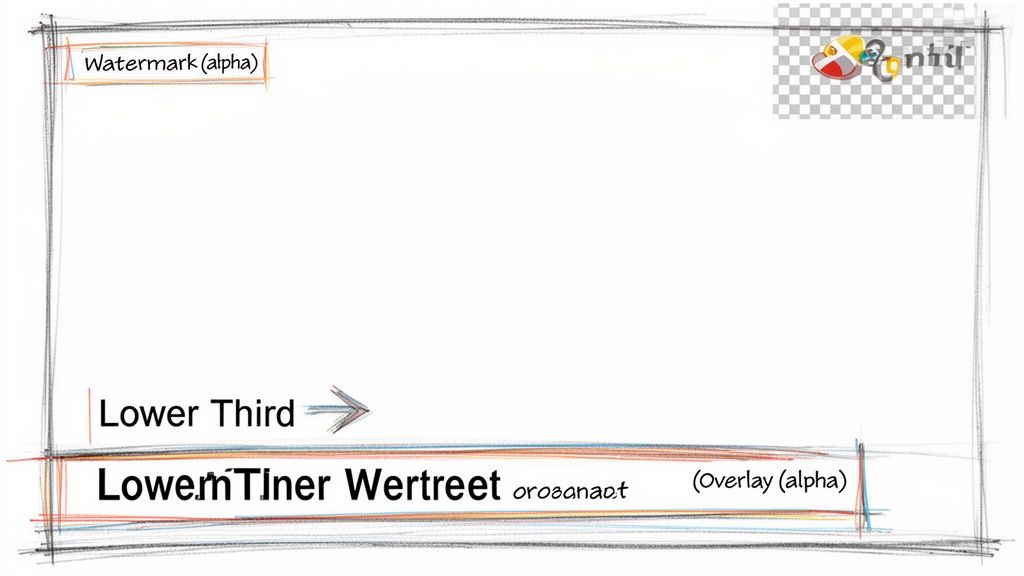
Think of graphics and overlays as the visual signposts in your video. A well-placed title card can set the mood, a lower third can introduce a speaker, and a subtle watermark keeps your brand front and center. These aren't just cosmetic additions; they're powerful tools that boost viewer engagement and comprehension.
Designing Effective Text Overlays
The quickest way to add a layer of polish is with text. This can be anything from a bold, cinematic title to a simple caption that highlights a key statistic. When you edit MP4 videos, the goal is to make text readable and complementary—it should never be a distraction.
Imagine you're editing a cooking tutorial. As the chef adds flour, a clean text overlay pops up listing the exact measurement. That’s immediate value for the viewer, saving them the hassle of rewinding or hunting for the recipe in the description. The keys here are clarity and consistency.
Here are a few practical tips I've learned for making text work:
- Font Choice Matters: Stick to clean, legible fonts. A simple sans-serif like Helvetica or Open Sans is almost always a safe bet, especially for lower thirds.
- Contrast is King: Your text must stand out from the video behind it. If the background is busy, try adding a subtle drop shadow or a semi-transparent box behind the text to make it pop.
- Keep it Concise: On-screen text should be short and punchy. Use it to emphasize keywords or data, not to write full paragraphs.
The best overlays feel like an integral part of the video, not an afterthought. They should provide context or highlight information at the exact moment the viewer needs it, making the entire experience more intuitive and engaging.
Using Motion Graphics to Guide the Viewer
Static text is good, but adding a bit of animation is even better for grabbing—and keeping—attention. You don't need to be a motion graphics wizard to add simple, effective animations that can turn a boring title into a dynamic intro.
Most modern video editors, from CapCut to DaVinci Resolve, have built-in tools or templates for basic motion graphics. A simple "fade in" for a lower third or a "slide in" for a call-to-action makes a huge difference. In a product demo, for instance, an animated arrow pointing to a specific feature directs the viewer's gaze exactly where you want it.
Understanding Transparency and Alpha Channels
If you want to overlay logos or other graphics on your footage without a clunky background, you need to get familiar with transparency. This is where the alpha channel comes into play. Think of an alpha channel as an extra layer of information in an image or video file that tells the editing software which parts of the graphic should be see-through.
Ever tried to drop a company logo with a white background onto your video? You get that ugly white box around it. But if the logo is saved as a PNG with a transparent background (or a video file with an alpha channel), only the logo itself will appear, floating seamlessly over your footage.
This is the secret sauce behind creating:
- Branded Watermarks: A semi-transparent logo sitting in the corner of the screen.
- Animated Pop-ups: Graphics that appear to highlight a discount or new feature.
- Sophisticated Transitions: Custom animations that wipe across the screen to reveal the next scene.
Getting comfortable with files that support transparency is a fundamental step in learning how to edit MP4 videos professionally. It opens the door to building complex, multi-layered visuals that look clean and intentional.
Swapping Out Your Background with AI
Let's be honest, a professional-looking backdrop can make or break a video. But not everyone has the space or budget for a dedicated studio setup or a cumbersome green screen. Luckily, you don't need one anymore. Modern AI tools can now slice out your video background with incredible precision, a job that used to take hours of tedious manual editing.
This technology has completely changed the game for anyone learning how to edit MP4 videos. Forget the old-school methods of rotoscoping or chroma keying. Now, you can just upload your file and let an algorithm handle the complex work. This unlocks a ton of creative freedom, letting you drop yourself into literally any setting you can dream up.
The demand for efficient tools is skyrocketing, with the global video editing market expected to hit USD 3.75 billion by 2026. AI-powered background removal is a huge part of that. It lets creators quickly turn a standard MP4 clip into a transparent asset, which is perfect for overlays or more complex professional work. With 75% of internet users watching videos every week, having an engaging background is a simple but powerful way to stand out.
How Automated Background Removal Actually Works
The process is surprisingly simple from the user's end. You just drag and drop your MP4 file into a tool like VideoBGRemover. From there, the AI takes over. It scans every single frame, figuring out exactly where your subject ends and the background begins. It’s smart enough to handle the tricky stuff, too—think fine details like wisps of hair, motion blur, or even see-through objects.
After the AI has worked its magic, you're left with a perfect cutout of your subject. At this point, you have a few options:
- Go Transparent: Export the video with a completely transparent background. This is a must-have for things like a facecam overlay on a gaming stream or creating reusable assets for motion graphics.
- Add a Solid Color: Sometimes, a simple, clean background is all you need. A solid color gets rid of any distractions and keeps the focus entirely on you, which is great for corporate videos or tutorials.
- Use a Custom Image or Video: This is where you can get really creative. Drop yourself into a sleek office, in front of a busy cityscape, or against a custom-branded graphic.
Most of these tools have a super clean interface, designed to do one thing and do it well.
As you can see, it's all about a simple call-to-action—upload your video and go. No confusing menus or technical jargon.
The real magic of AI background removal is that it brings professional video effects to everyone. What used to demand expensive software and specialized skills can now be done in minutes, right from your web browser.
Real-World Uses for AI Background Replacement
This technology is more than just a cool trick; it solves real problems for creators every single day. The power to instantly swap out your environment gives you incredible flexibility and can seriously boost your production value without much effort.
Think about an online coach recording lessons from their cluttered home office. With an AI tool, they can instantly replace that messy background with a clean, professional setting or a branded graphic with their logo. That one small change makes their content feel more authoritative and helps build trust with their audience. You can learn more about the specifics of how to change a video background without a green screen to really master this.
Here’s another great example: a social media manager creating a product demo. Instead of being stuck in one location, they can film the product and then use AI to place it in different settings that make sense—a sparkling kitchen for a new gadget, or a beautiful hiking trail for outdoor gear. This makes the video way more engaging and helps viewers picture themselves actually using the product. The final result is a polished, studio-quality video made on a shoestring budget.
Exporting Your MP4 for Any Platform
You’ve done all the hard work. The cuts are clean, the audio is crisp, and the color looks perfect. Now comes the final, crucial step: exporting. This is where you package up your masterpiece to send out into the world, and getting it wrong can undo all your effort, leaving you with a pixelated, stuttering mess.
Think of it this way: your export settings are the final instructions for how your video should look and feel. The key players here are the codec (like the popular H.264), which is the method used to compress the video, and the bitrate, which dictates how much data is used per second. A higher bitrate generally means better quality but a bigger file. Your container, in this case, is the trusty MP4.
Nailing the Settings for Social Media
Every platform, from YouTube to TikTok, has its own way of re-compressing your video the moment you upload it. To get the best results, your job is to give their algorithms a pristine file that’s already close to their ideal specs. A widescreen tutorial for YouTube has very different needs than a vertical clip for an Instagram Reel.
This isn't just a technical detail; it's a market necessity. With around 43 million paid users of video editing software worldwide, the pressure to produce polished content is immense. That number is expected to climb to over 63 million by 2030 as the market value nearly doubles from $4.52 billion in 2023 to $9.47 billion. Creators are all vying for attention, and a clean, high-quality export is table stakes.
Here's a quick cheat sheet to get you started. These are solid starting points, but always double-check the platform's latest recommendations, as they can change.
Recommended MP4 Export Settings for Social Platforms
| Platform | Resolution | Frame Rate (FPS) | Recommended Bitrate |
|---|---|---|---|
| YouTube | 1080p (1920x1080) | 24, 30, or 60 | 8-12 Mbps (SDR), 10-15 Mbps (HDR) |
| 1080p (1080x1920) | 24 or 30 | 3.5-5 Mbps | |
| TikTok | 1080p (1080x1920) | 24 or 30 | 5-8 Mbps |
| 1080p (1920x1080) | 24 or 30 | 6-10 Mbps |
These settings give the platform's compression algorithm a high-quality file to work with, minimizing the ugly artifacts that can appear when a file is squashed too much.
Going Beyond the Basics: Exports with Transparency
What if you need to create an asset you can reuse, like an animated logo or a lower-third graphic that you can place over other videos? For that, you need a transparent background, and a standard MP4 just won't cut it.
MP4 files don't support what’s called an alpha channel—the extra layer of data that tells the video player which parts are transparent. To get that, you need to use a different kind of file.
- ProRes 4444: This is the go-to for many professionals. It delivers incredible quality and perfect transparency, but the tradeoff is massive file sizes. It’s ideal for master files and internal production work.
- WebM (with VP9 codec): A fantastic, web-friendly option. It supports transparency and provides a great balance of quality and smaller file size, making it perfect for online use.
Mastering transparent exports is a huge step up in your editing game, opening the door to more complex motion graphics and professional branding. Thankfully, modern AI tools have made this once-tricky process incredibly simple.
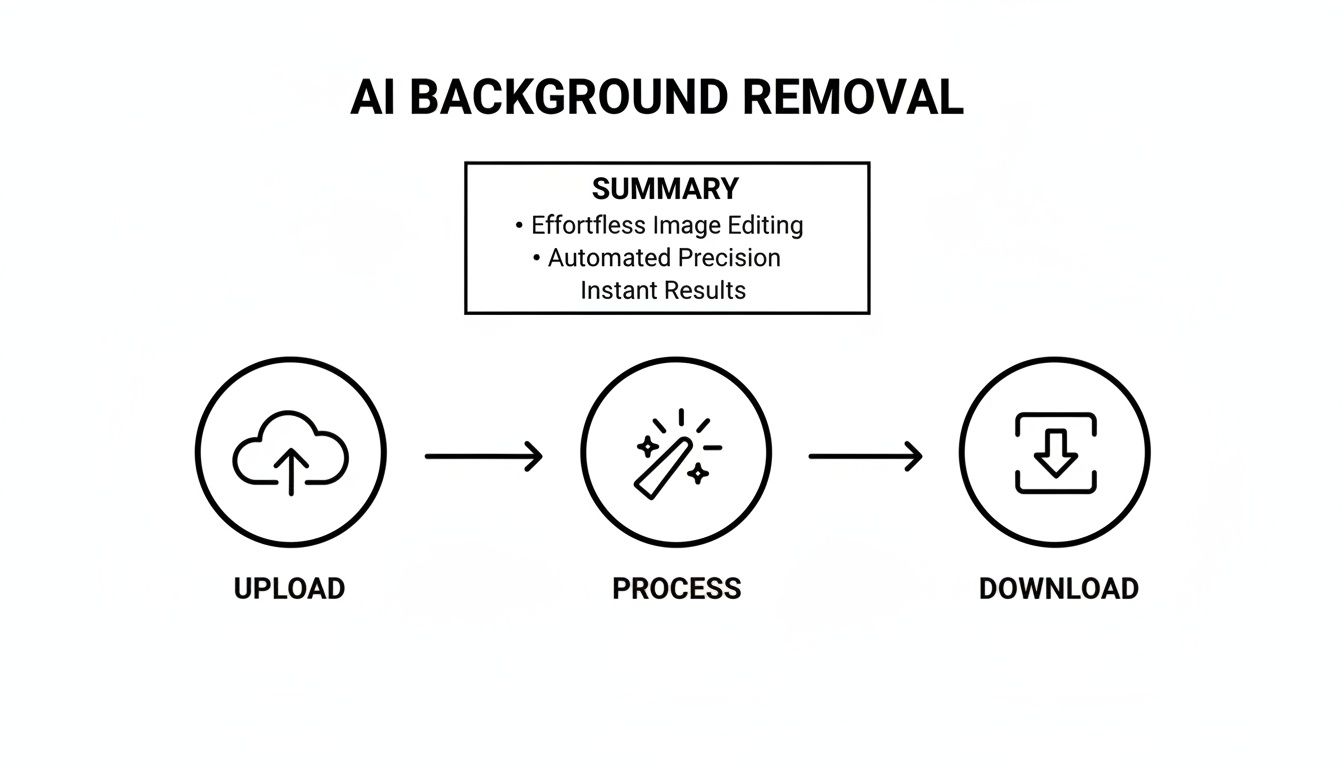
As you can see, what used to require meticulous masking and technical know-how is now a simple three-step flow: upload, process, and download. Tools like this democratize advanced techniques, letting you focus on the creative outcome instead of getting bogged down in the process. Of course, even with AI, managing those outputs is key. If you're creating a lot of clips, you might want to look into using an MP4 file compressor to keep things speedy.
The perfect export isn't about choosing the absolute highest quality settings. It's about finding the optimal balance between visual fidelity, file size, and the specific requirements of the platform where your audience will be watching.
Got Questions About Editing MP4s? I've Got Answers.
Even with the best workflow, you're bound to hit a few snags when editing MP4 files. It’s just part of the process. I’ve been there, and over the years, I’ve seen the same questions pop up time and time again.
Let's tackle some of the most common challenges creators face. Getting a handle on these issues is often what takes an edit from just "good" to truly great.
What's the Best Free Software to Edit MP4s?
This is easily the question I hear most. The great news is, you're absolutely spoiled for choice these days. You don't need to spend a dime to get professional power.
For anyone serious about learning the craft, my top recommendation is always DaVinci Resolve. Its color correction and grading tools are genuinely industry-leading. Yes, there's a learning curve, but it's a powerhouse that can grow with you from your first project to a feature film.
On the other hand, if your goal is to create content for social media quickly and efficiently, you can't beat CapCut. It's built for the speed of platforms like TikTok and Instagram, packed with trendy effects, killer auto-captioning, and an interface so simple you'll be editing in minutes. It works beautifully on both desktop and mobile, which is a huge plus.
The "best" editor really comes down to what you're trying to accomplish. DaVinci Resolve is for cinematic depth, while CapCut is all about speed and social-readiness. Don't be afraid to download both and see which one feels right for you.
How Can I Make My MP4 File Smaller Without It Looking Awful?
Ah, the classic balancing act. We've all been there: a massive file that needs to be smaller, but you don't want it to look like it was filmed on a potato.
The key is to get comfortable with your export settings, specifically the video's bitrate. Think of bitrate as the amount of data dedicated to each second of your video. Lowering it shrinks the file size, but if you go too far, you'll start seeing nasty compression artifacts like blockiness and blur.
Here’s a practical trick: take a 10-second, action-packed clip from your video and export it at a few different bitrates. Compare them side-by-side. You'll quickly find the sweet spot where the quality is still sharp, but the file size is much more manageable.
A couple of other things can make a huge difference:
- Use a Modern Codec: If you can, export using H.265 (HEVC) instead of the old-school H.264 (AVC). You can get a file that's up to 50% smaller at the exact same visual quality. Just be aware that very old devices might struggle to play it.
- Check Your Resolution: Don't export in 4K if you're just uploading to an Instagram Story that will be viewed on a small screen. Match your export resolution to where your video will actually be seen.
Why Does My Crystal-Clear Video Look Blurry on Social Media?
This one is incredibly frustrating. You export a beautiful, sharp MP4, upload it, and it suddenly looks soft and pixelated. What gives?
The culprit is almost always the social media platform itself. Every single video uploaded to YouTube, Instagram, or TikTok gets re-compressed by their servers. They do this to save storage space and make sure videos play smoothly for everyone, even on slow connections. If your original file was already heavily compressed, this second round of compression can completely wreck it.
To get ahead of this, always export your video using the platform's recommended settings, and don't be afraid to use a slightly higher bitrate than you think you need. Giving their compression algorithm more data to work with from the start leads to a much cleaner final result. Also, make sure your project settings (resolution and frame rate) perfectly match your export settings to avoid any weird scaling issues that soften the image.
Can I Actually Edit a Decent MP4 Video on My Phone?
Not just decent—you can edit fantastic videos entirely on your phone. Mobile editing isn't a gimmick anymore; it's a powerful and legitimate workflow.
Apps like CapCut, InShot, and Adobe Premiere Rush have become incredibly capable. You can easily do all the essentials—trimming clips, adding music, creating text overlays—but you can also tackle more advanced stuff like keyframing animations and even removing backgrounds.
These apps are designed for a touch-first world and are ridiculously efficient for creating vertical video. I know tons of successful creators who now have a mobile-first process. They shoot on their phone, do 90% of the edit in an app, and maybe only jump to a desktop for the final, most demanding tweaks. For the fast-paced world of content creation, it’s a perfect fit.
Ready to create studio-quality videos without the studio? VideoBGRemover uses powerful AI to remove or replace your video background in minutes. Upload any MP4, preview for free, and export a polished, professional video with a transparent or custom background. Start creating for free at https://videobgremover.com.
Ready to Remove Your Video Background?
See a free preview before you buy.
No credit card required • Free preview on every video