How to Blur Background Like a Pro in Photos and Video
Learn how to blur background in any photo or video. Our guide covers smartphones, Photoshop, and online tools for a perfect, professional look.
Blurring your background is one of the fastest ways to make your subject the hero of the shot. It’s a technique that immediately elevates an image from a simple snapshot to something more professional and intentional.
This effect, which photographers call bokeh, is all about creating a shallow depth of field. You can achieve it in-camera by using a wide aperture or by simply putting more space between your subject and whatever is behind them. Of course, you can also create the effect later with software. Once you get the hang of it, you’ll find it adds a beautiful, storytelling quality to your work.
Why Blurring Your Background Makes Your Images Pop
A blurred background isn't just a stylistic choice; it's a powerful compositional tool. When you intentionally soften distracting elements in the frame, you're guiding the viewer's eye exactly where you want it to go—right to your subject. This simple trick can take a cluttered, busy scene and turn it into a clean, captivating image.
This isn't just some modern digital fad, either. Photographers have been using selective focus for over a century. The technique has roots in the Pictorialist movement of the late 19th century, where artists used soft focus to give their photographs a dreamy, painterly feel. It’s a timeless approach that proves just how effective a little blur can be. You can dive deeper into the history of fine art photography and blur on Wikiwand.com.
Directing the Viewer's Attention
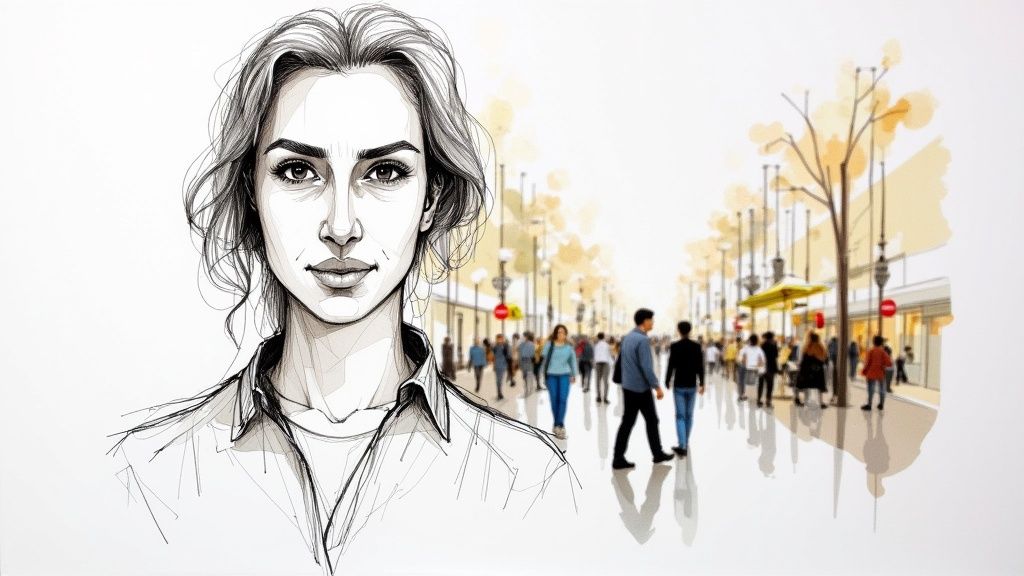
At its core, blurring the background is about cutting through the noise. Think about shooting a portrait on a busy city street. Without that blur, the viewer’s eye gets pulled in a dozen different directions—passing cars, street signs, other people.
But with a soft, creamy background, the person in your photo becomes the undeniable focal point. There’s a reason portrait and product photographers lean on this technique so heavily; it just works.
A blurred background simplifies the visual narrative. It tells the audience, "This is what matters," creating an immediate connection between the viewer and the subject.
Creating Depth and Dimension
A flat, two-dimensional image can feel a bit lifeless. By blurring the background, you create a sense of three-dimensional space that makes your subject feel like they're popping right off the screen.
This separation creates distinct layers in your photo, giving it a much more dynamic and engaging quality. In a way, it mimics how our own eyes naturally perceive depth, which makes the final image feel more immersive.
The key benefits really stack up:
- Subject Isolation: Your main subject stands out with crisp clarity.
- Professional Polish: It’s a shortcut to giving photos and videos that high-end, cinematic look.
- Enhanced Storytelling: By stripping away distractions, you help focus the story and emotion.
- Artistic Expression: It can turn distant light sources into beautiful orbs of light, adding a dreamy, aesthetic touch.
Get Pro-Level Blur Right from Your Smartphone
You don't need a bulky DSLR camera anymore to get that gorgeous, creamy background blur in your photos. Honestly, the powerful little computer in your pocket is more than up to the task. Thanks to some clever computational photography, features like Portrait Mode on iPhones or Live Focus on Android devices make this professional look incredibly easy to achieve.
These modes are pretty smart. They use a combination of software and, on most phones, multiple lenses to map out what's your subject and what's the background. From there, it digitally applies a soft-focus effect to everything behind your main subject, perfectly mimicking the shallow depth of field you'd get from a pricey camera lens.
This tech isn't a novelty anymore; it's a standard feature. In fact, by 2023, market research showed that over 80% of new smartphones sold worldwide came with some form of portrait mode. You can dive deeper into the history of photography on misterlocation.com to see how far we've come. This evolution has put some serious creative power right into our hands.
Mastering Your Phone’s Portrait Mode
Just flipping on Portrait Mode is a good start, but the real control comes from tweaking the intensity of the blur. Most modern phones give you an option to adjust the simulated aperture, which you'll usually see as an f-stop number (like f/1.4 or f/16). A lower f-stop number means a more intense, blurrier background, while a higher number keeps more of the background sharp.
Let's say you're taking a photo of a friend in a bustling café. You want them to be the clear focus, but you also want to capture a little bit of that coffee shop vibe.
- For maximum pop: Slide that f-stop all the way down to its lowest setting, maybe f/1.8. This will practically melt the background away, erasing any distracting elements and putting all the attention on your friend.
- For a more natural feel: A mid-range setting, like f/4.0, is often the sweet spot. It softens the background just enough to guide the viewer's eye but leaves enough detail to give the photo context and atmosphere.
Play around with this slider before you snap the picture. What's even better is that many phones, iPhones included, let you go back and change the f-stop after the photo is already taken. This gives you amazing flexibility to fine-tune the look later on.
Pro Tip: Resist the urge to always crank the blur to its maximum setting. A subtle blur often looks more authentic and professional than an aggressive effect that completely nukes the background. The goal is to find the right balance for your specific shot.
Smartphone Portrait Mode Features at a Glance
Navigating the different terms and features across smartphone brands can be a little confusing. Whether you're on an iPhone, Pixel, or Samsung, the core idea is the same, but the controls and capabilities can vary slightly. This table breaks down what to expect from the major players.
| Feature | Apple iPhone (Portrait Mode) | Google Pixel (Portrait Mode) | Samsung Android (Live Focus/Portrait) |
|---|---|---|---|
| Blur Adjustment | Yes, via "Depth Control" slider (f/1.4 to f/16). Can be adjusted before and after the shot. | Yes, via "Blur" slider. Can be adjusted in Google Photos after the shot. | Yes, with a "Blur strength" slider. Newer models allow post-shot adjustments. |
| Lighting Effects | Includes several studio lighting effects like Natural, Studio, Contour, Stage, and High-Key Mono. | Offers "Portrait Light" feature in Google Photos to add or adjust a light source on the subject's face after the fact. | Includes various blur styles and effects, such as "Big Circle," "Spin," and "Zoom." |
| Best For | Users who want intuitive controls and a variety of creative, built-in lighting effects. | Photographers who prioritize natural-looking blur and powerful post-editing AI features. | Users who enjoy experimenting with different artistic blur styles and effects. |
Ultimately, they all do a fantastic job. The best way to learn is to simply open your camera app and start experimenting with the settings your phone offers.
Tips for Flawless Smartphone Portraits
As good as the AI is in our phones, it can sometimes get tripped up by tricky edges—think of fine wisps of hair or the thin arms of eyeglasses. You can give your phone a helping hand by setting up the shot for success.
First off, distance matters. I've found the sweet spot is usually when your subject is between two and eight feet away. It's also a huge help to create as much separation as you can between your subject and whatever is behind them. The farther away the background, the creamier and more natural that blur will look.
Second, light is your best friend. A well-lit subject with a clean, clear outline makes it much easier for the phone's software to do its job. Soft, even lighting is ideal because it prevents harsh shadows that can confuse the AI, leading to a much cleaner separation and a more believable blur.
Blurring Backgrounds with Desktop Software
When you need absolute precision and creative freedom, nothing beats dedicated desktop software for blurring a background. Tools like Adobe Photoshop and Lightroom are the heavyweights, offering a powerful suite of features that go way beyond the simple one-tap filters on your phone.
Moving your editing to a desktop just unlocks a whole new level of control. You can make incredibly detailed, pixel-perfect selections, create gradual blurs that realistically mimic what a professional camera lens can do, and fine-tune every little detail of the effect. This is the only way to go when you're working on high-resolution images for professional headshots, product shots, or portfolio pieces where every pixel matters.
Achieving a Flawless Blur in Photoshop
Photoshop is the industry standard for good reason. It gives you multiple ways to get that perfect background blur, but the most effective technique almost always involves separating your subject from the background using layers. This is a non-destructive method, which means you can tweak the blur as much as you want without ever damaging your original photo.
It all starts with getting a clean selection of your subject. Thankfully, Photoshop's modern AI-powered tools have made this part a breeze. The Select Subject feature can often isolate a person or object with just a single click, giving you a fantastic starting point. From there, you can jump into the Select and Mask workspace to clean up tricky edges—especially around hair or fur—to ensure a clean, believable final result.
Once your subject is safely on its own layer, you can apply a blur to the background layer sitting underneath it.
- Gaussian Blur: This is your classic, go-to filter for a simple, uniform blur. It softens the background evenly and is incredibly easy to use.
- Lens Blur: If you’re aiming for a more realistic look, this filter is your best friend. It mimics the beautiful bokeh produced by a real camera lens and even lets you control the shape of the highlights.
- Field Blur & Tilt-Shift: These are more advanced filters that let you get really creative. You can set different blur amounts for different parts of the image, creating a gradual depth effect or simulating the popular miniature look of a tilt-shift lens.
Here’s a pro tip: the quality of your selection is what makes or breaks the final image. Spending an extra couple of minutes refining the mask around your subject will make all the difference between an edit that looks amateur and one that's completely seamless.
Streamlined Blurring with Adobe Lightroom
For photographers who live and breathe in a more photo-centric workflow, Adobe Lightroom has rolled out some powerful new features that bring Photoshop-level blurring right into its interface. The star of the show here is the Lens Blur tool. It uses AI to automatically detect your subject and apply a beautiful, adjustable background blur.
The best part is that this tool is entirely non-destructive. You can dial the blur intensity up or down anytime, choose a specific bokeh style (like a circle or hexagon), and even refine the depth map to tell Lightroom exactly which areas should be in or out of focus. It's an incredibly efficient way to how to blur background across an entire series of photos consistently.
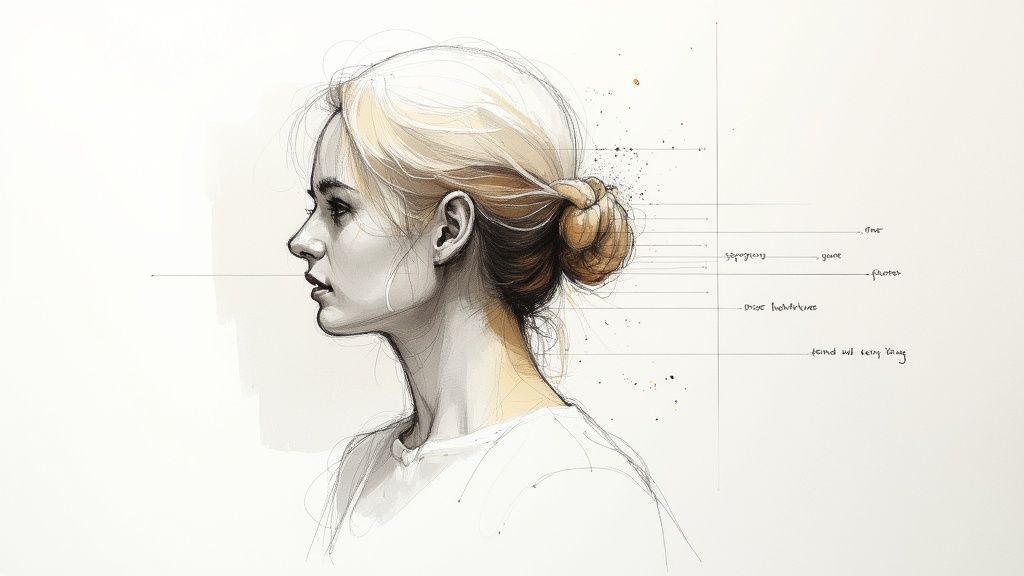
While the process on a desktop is more involved, creating a subtle blur on a smartphone is much simpler, as this visual guide illustrates.

This simple three-step flow—frame, tap, and adjust—is essentially what desktop tools expand upon, giving you granular control over every single stage of the process.
Powerful Free Alternatives
You absolutely do not need an expensive subscription to get professional results. Free and open-source software like GIMP (GNU Image Manipulation Program) offers a surprisingly robust set of features that can go toe-to-toe with paid options. GIMP has all the essentials: selection tools, layer masks, and a variety of blur filters, including Gaussian Blur, allowing you to follow a workflow very similar to Photoshop's.
The interface might have a bit of a learning curve if you're coming from other software, but the core principles are identical: select your subject, put it on its own layer, and blur the background. For creators on a budget, GIMP is a fantastic, powerful choice that doesn't compromise on capability.
While these tools are all fantastic for still images, you'll need a different toolkit if you're working with video. For that, you might want to explore the best video editing software for content creators to get that professional blurred background effect in your moving shots.
When you need a great-looking photo now, you don't always have time to wrestle with clunky desktop software. That's where online tools and mobile apps come in clutch. They offer a surprisingly powerful and simple way to get that beautiful background blur in just a few clicks, making them my go-to for quick social media posts, new profile pictures, or last-minute marketing graphics.
What I love about these platforms is that most of them use smart AI to figure out what your main subject is. This means you get to skip the painstaking process of manually tracing around a person or object. The AI handles the heavy lifting, and frankly, it's gotten incredibly accurate over the years. This saves a ton of time and still gives you a polished, professional result.
My Favorite Online Tools for a Quick Background Blur
A few platforms have really nailed the process of making background blurring easy. Each has its own vibe, so the one you pick might depend on whether you're just doing a quick edit or working on a bigger design.
- Canva: Everyone knows Canva as a design powerhouse, and its background blur feature is just as solid. You'll need a Pro account for the "Background Remover," but once you use it to isolate your subject, you can drop a blurred version of the original photo right behind it. It's a clean and effective workflow.
- Fotor: This is a more dedicated photo editor, and it has a tool specifically called "Blur Background." It does an excellent job of automatically finding your subject and applying a natural-looking blur. You can then fine-tune the intensity with a simple slider.
- Kapwing: While it's famous for video editing, Kapwing’s photo tools are top-notch. The process is a little different here—you upload your image, use the "Erase" tool to remove the background, and then layer the original image back in with a blur filter. It's a clever workaround that gives you great control.
Honestly, speed is the name of the game with these tools. For a standard headshot or product photo, you can usually upload it, apply the blur, and have a finished image downloaded in less than two minutes.
Comparing Top Online Background Blur Tools
To help you decide which tool fits your workflow, here’s a quick breakdown of my top picks. I've found that each one has its own strengths, whether you're a casual user or a professional on a deadline.
| Tool Name | Key Feature | Pricing Model | Best For |
|---|---|---|---|
| Canva | Integrated design suite | Freemium (Blur requires Pro) | All-in-one social media and marketing design |
| Fotor | One-click AI blur tool | Freemium (with Pro features) | Quick, dedicated photo edits without extra frills |
| Kapwing | Powerful multi-layer editor | Freemium (with Pro features) | Users who need more control over video and image layers |
This table should give you a starting point. I always recommend trying the free versions first to see which interface feels most natural to you before committing to a paid plan.
The Basic Workflow: How It Usually Works
No matter which platform you end up using, the core steps are pretty much the same. It's an intuitive process.
You'll start by uploading your picture straight from your computer. From there, look for a menu option called something like "Effects," "Edit Image," or a dedicated "Blur" button.
Most modern editors will instantly identify the main subject. You'll then get a slider to dial in the blur intensity. You can go for a subtle, soft-focus look or push it for that dramatic, creamy bokeh effect you see in professional portraits. Having that control is what makes the final image feel intentional.
The real game-changer with these online tools is their sheer accessibility. You can create a polished image from any device with an internet connection—no installations, no big software updates.
And if you're looking to apply this same effect to video clips? The technology is there. The process is similar, but you’ll need a tool built for moving footage. You can actually find a great video background changer online for free that uses the same kind of AI smarts.
At the end of the day, online editors have leveled the playing field. They give anyone the ability to create high-quality, professional-looking images without the steep learning curve or high cost of traditional software.
Blurring Your Background in Video Calls and Recordings
https://www.youtube.com/embed/WPckYhbeUFw
In today's world of back-to-back remote meetings, your background says a lot about you. A messy room or a distracting environment can easily divert attention from what you're trying to say. Thankfully, you don't need a fancy setup to look professional—learning how to blur background on your favorite video conferencing app is a game-changer.
These tools use some clever AI to pick you out from your surroundings and apply a soft-focus effect to everything behind you. It’s like having a digital green screen, giving you a clean, professional look instantly. The best part? It's usually just a click away in the video settings.
Getting the Blur Right on Different Platforms
Toggling this feature on is pretty straightforward, whether you're about to jump into a call or you're already in one. While each platform puts the button in a slightly different spot, they all work the same way.
Here’s a quick rundown for the big three:
- Zoom: Before a call starts, head into Settings > Backgrounds & Effects. You’ll find the Blur option right there. If you're already in a meeting, just click the little upward arrow next to the Stop Video icon and select Blur My Background.
- Microsoft Teams: As you're setting up your camera and mic before joining, look for Background filters. The Blur option is usually the first one you see. In a live meeting, hit the More actions button (the three dots) and navigate to Apply background effects.
- Google Meet: On the preview screen before you join, click the Apply visual effects icon. If the meeting is already live, click the three-dot menu, choose Apply visual effects, and pick one of the blur options.
I've noticed a lot of people struggle with a blurry halo effect, especially around their hair or when they move their hands. This is almost always a lighting problem. Make sure you have a good light source in front of you; it helps the software separate you from what's behind you much more accurately.
What About Blurring Pre-Recorded Videos?
The need for a polished background isn't just for live calls. If you're creating content like tutorials, online courses, or marketing videos, you’ll want that same clean look. Applying a blur effect after you've recorded gives you much more creative control over the final result.
This is where dedicated video editing software comes in handy. Tools like Camtasia or Descript have features that can track you as you move and apply a consistent blur to the background. It takes a bit more effort than a simple toggle, but the professional, almost cinematic, quality you get is well worth it.
A great first step is to learn how to use a video background remover, which lets you completely isolate yourself from the background for more advanced editing. This technique is especially crucial for creating top-notch training videos where you need the viewer’s full attention.
Pro Tips for a Natural-Looking Background Blur
Anyone can smash a button and get a blurry background. But making it look like it was shot that way with a pro-level camera? That's the real magic. The goal isn't just to soften what's behind your subject; it's about convincingly faking a sense of depth that draws the viewer's eye exactly where you want it.
The secret is ditching that flat, uniform blur that just screams "digital filter." A real camera lens creates a gradient effect—things closer to the subject are less blurry than things way off in the distance. Mimicking that is the key to an authentic edit.
Build Layers of Depth
The most common rookie mistake is applying one level of blur to the entire background. This instantly creates a fake, "cutout" look because everything behind your subject is equally out of focus. A professional photographer understands that depth of field isn't an on/off switch; it’s a smooth transition.
To pull this off in post-production, you have to think in layers. Imagine the scene has a foreground, a mid-ground, and a far background. Powerful editing tools like Photoshop's Field Blur or Lens Blur give you the power to apply different blur strengths to different areas.
- Go Lightly: Apply a very subtle blur to objects just a few feet behind your subject.
- Increase the Haze: Kick up the intensity for elements further back in the scene.
- Go All Out: Use the strongest blur effect for the most distant parts of the background, like the horizon.
This layering technique adds a convincing three-dimensional quality that makes your subject pop in a much more believable way. You're essentially tricking the viewer's brain into seeing real distance in a 2D image.
Nail the Edges
Nothing gives away a fake blur faster than a harsh, clumsy edge around your subject. This is especially true when you're dealing with tricky details like hair, fur, or semi-transparent fabrics. A sloppy selection creates a tell-tale "halo" effect that just looks wrong.
This is where you need to invest a little extra time. You have to meticulously refine your selection mask. I spend most of my time in Photoshop's Select and Mask workspace, using its tools to softly feather the edges. Getting into the nitty-gritty of individual strands of hair might feel tedious, but it’s what sells the illusion and makes the final image look seamless.
A great blur is invisible. The viewer shouldn't notice the effect; they should only notice the subject. The best edits are the ones that don't look edited at all.
Add a Touch of Bokeh
Okay, here’s the final touch for a truly professional look: bokeh. That’s the term for those soft, circular orbs of light you see when points of light in the background go out of focus. Many high-end editing tools can simulate this gorgeous effect.
When adding bokeh, remember that less is almost always more. You're not trying to cover the background in polka dots. A few subtle, well-placed light orbs can add a magical, authentic feel. Dig into your software’s blur filters for settings like "Specular Highlights" or "Bokeh." You can usually tweak the brightness and even the shape to perfectly match the lighting in your original photo. This small detail elevates the entire image, turning a simple blur into a beautiful, artistic statement.
Got Questions About Blurring Your Background?
If you're still wondering about the finer points of getting that perfect background blur, you're in the right place. Let's tackle some of the most common questions that pop up.
Is Bokeh the Same Thing as Background Blur?
It’s easy to mix these two up, but there’s a subtle difference that photographers care a lot about. Think of it this way: background blur is the general effect—any part of your image that’s simply not in focus.
Bokeh, however, is all about the quality and aesthetic of that blur. It’s the term we use to describe the pleasing, creamy look of the out-of-focus areas, especially how points of light render as soft, circular orbs. Good bokeh is smooth and beautiful; bad bokeh can look busy or harsh.
Why Does My Phone's Portrait Mode Make Hair Look So Weird?
Ah, the dreaded "halo effect" around the hair. This is one of the biggest giveaways of a software-generated blur and a common headache for smartphone photographers. The AI in your phone is essentially trying to create a digital cutout of your subject, but it struggles with incredibly fine details.
Individual strands of hair, wisps of fur, or even the space between your arm and body can confuse the algorithm. It can't quite tell what's you and what's the background, resulting in those messy, blurry edges. For a cleaner result, try shooting against a less busy background and make sure your subject is well-lit—good contrast gives the AI a fighting chance.
At its core, this is an edge detection problem. The better the AI can trace the outline of your subject, the more natural the final blur will look.
Can I Add a Blur to a Photo I've Already Taken?
You absolutely can! That’s one of the best things about modern photo editing. You don't need to capture the perfect blur in-camera. Using anything from powerful desktop software like Adobe Photoshop to simple online tools like Canva, you can add a blur to nearly any image after the fact.
The basic workflow is almost always the same, no matter what tool you use:
- First, you select the main subject you want to keep sharp.
- Then, you invert that selection and apply a blur filter to everything else.
The secret to a professional-looking result almost always comes down to the quality of your selection. The cleaner the edge, the more believable the blur.
Ready to create stunning videos with a perfectly blurred background? With VideoBGRemover, you can remove or replace your video background in minutes, no green screen needed. Upload your footage and get studio-quality results instantly. Try it today at VideoBGRemover.com.
Ready to Remove Your Video Background?
See a free preview before you buy.
No credit card required • Free preview on every video