how to make product demo videos that convert
Learn how to make product demo videos that convert. Master scripting, recording, editing, and distribution to boost conversions.
Look, a killer product demo really boils down to three things: telling a great problem-solving story, getting clean footage, and then editing it all into something that’s sharp and compelling. The best ones aren't about features; they're about the viewer's pain points and showing how your product is the obvious, easy fix.
Crafting the Story Before You Hit Record
Before a camera or mic even enters the picture, your demo's fate is sealed right here in the planning stage. This is where you graduate from a boring feature list to a story that actually resonates with your audience. Remember, great demos persuade, they don't just instruct.
The bedrock of this whole thing is knowing your ideal viewer inside and out. I'm not talking about generic stuff like job titles. What are their real-world, day-to-day frustrations? What clunky processes are eating up their time? A powerful demo speaks directly to that reality, making the viewer nod along from the very first second.
Define Your One Core Message
Every single great product demo has one powerful takeaway. If your viewer walks away remembering only one thing, what do you want it to be? This isn't the time to rattle off every bell and whistle. It's about boiling down your core value into a single, sticky message.
For instance, your core message might be:
- "Our software gets your weekly reporting done in under five minutes."
- "This tool spots website errors before your customers ever see them."
- "You can design pro-level social media graphics with zero design skills."
Once you nail that core message, every single choice you make—from the script's opening hook to the final call-to-action—has to back it up. If it doesn't, cut it.
The Problem-Solution Scripting Framework
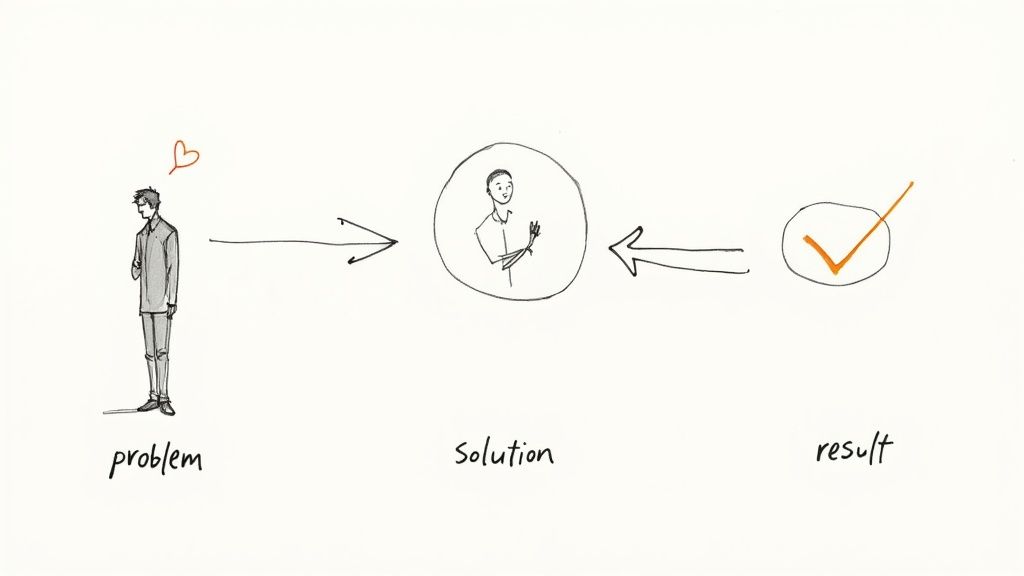
The most effective demos almost always follow a classic story arc: Problem, Solution, and Outcome. It’s a simple structure, but it works because it gives your video a logical flow that keeps people hooked and clearly shows why your product matters.
Here’s how you can map it out:
- Introduce the Problem: Kick things off by setting up a relatable challenge your audience knows all too well. Use their own language to show you get it. You could, for example, show the nightmare of manually building invoices from scratch.
- Present Your Product as the Solution: Now, bring in your product as the hero. But don't just list features. Show exactly how those features solve the specific problem you just laid out. Walk them through the exact workflow that makes their life better.
- Showcase the Positive Outcome: Finally, give them the "after" picture. What's the payoff for using your product? We're talking tangible benefits: more time back in their day, more revenue, less stress, better team collaboration. Make it a result they can't help but want.
This approach is so much more powerful than a dry feature tour. While it shares some DNA with ad creation, it’s a different beast. When you learn how to create video ads, you’re often focused on grabbing attention with faster cuts and bigger emotional plays. Here, it’s about building a clear, logical case.
The biggest mistake I see is people trying to show everything their product can do. Don't. Focus on the 2-3 "magic moments" that will make your ideal customer think, "I need that." A tight demo that solves one big problem is always better than a rambling one that tries to do it all.
By building your demo around a clear story that centers on your customer's pain, you create something that doesn't just explain what your product does, but why it’s essential. That’s how you turn viewers into buyers.
Your Guide to a Professional Home Studio Setup
Once your story is locked in, it’s time to bring it to life on screen. This is where a lot of creators get intimidated, assuming they need a Hollywood budget to get professional-looking results. That’s just not true. You can absolutely create a high-quality product demo video right from your desk, using gear you probably already have or can get without breaking the bank.
The real secret isn’t expensive cameras; it’s mastering the fundamentals of light, sound, and composition. Honestly, a well-lit video shot on your phone with crisp audio will always look better than a grainy DSLR recording with terrible, echoey sound.
Let’s get your home studio dialed in.
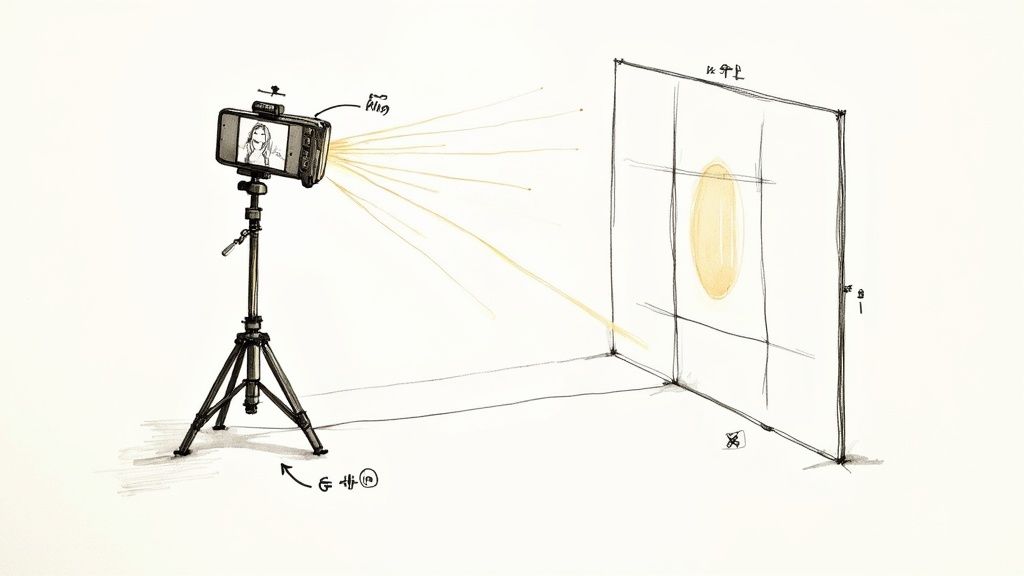
Master Your Lighting Setup
Great lighting is non-negotiable. It’s the single fastest way to make your video look clean, sharp, and professional. You can go one of two ways here: natural or artificial light. Both work great if you know how to use them.
Working with Natural Light:
- Find a good window: Your best light source is often a large window. Just make sure you’re facing it, so the light falls evenly across your face.
- Never shoot with your back to the window: This is a classic mistake. It throws you into a silhouette and makes your camera struggle, blowing out the background and leaving you in the dark.
- Timing is everything: The soft, diffused light of the morning or late afternoon is way more flattering than the harsh overhead sun at noon.
Using Artificial Light:
If you don't have access to good natural light, a simple three-point lighting setup is the industry standard. But you don't even need all three points to start.
A single ring light is a fantastic, budget-friendly option that provides even, direct light and gets rid of harsh shadows on your face.
Get Crystal Clear Audio
Here’s a hard truth I’ve learned over the years: viewers will forgive so-so video quality, but they will never tolerate bad audio. If people have to strain to hear you over hiss, echo, or background noise, they’re gone. Clean sound instantly signals quality and helps your message land.
Please, do not rely on your laptop's built-in microphone. It's designed to pick up everything in the room, which means it will capture your voice right alongside the air conditioner, your dog barking, and every other distracting sound.
An investment in a simple, dedicated microphone is the single most impactful upgrade you can make. A $20 lavalier mic will sound infinitely better than the internal mic on a $2,000 camera.
For a massive audio boost, check out these options:
- USB Microphone: A desk mic like the Blue Yeti is perfect for these kinds of videos. It captures rich, clear audio and is as simple as plugging it into your computer.
- Lavalier (Lapel) Mic: This is the tiny mic you clip onto your shirt. It keeps the microphone close to your mouth, which dramatically reduces room echo and keeps your audio levels consistent, even when you move your head.
Create a Clean and Simple Background
Your background sets the entire mood. A cluttered, messy space pulls focus from what you're actually trying to say. The goal is a clean, intentional background that looks professional without feeling cold or sterile.
You don’t need a perfectly decorated home office. A simple, solid-colored wall works just fine. If you want a bit more personality, a tidy bookshelf or a plant in the corner can add a nice touch. Just look at what's in your frame and remove anything that doesn't belong.
If your physical space just isn't working, a green screen is your best friend. It lets you completely swap out your background during the edit for a branded graphic, a solid color, or even a screen recording of your software. You can learn more about how to use a green screen and unlock a ton of creative options, giving you total control over the final look.
Capturing Your Screen and On-Camera Performance
Alright, your script is polished and your setup is ready to go. Now for the fun part: turning all that prep work into the raw footage for your product demo. Trying to capture a flawless screen recording while delivering a killer on-camera performance at the same time can feel like you’re juggling chainsaws. The trick is to have a smart workflow.
Think of it as two separate performances, even if you’re recording them simultaneously. First, put all your focus into nailing the product demonstration on-screen. Once you’re comfortable with that, you can shift your energy to your delivery for the camera.
Choosing Your Screen Recording Tools
The software you use to record your screen can make or break your workflow. You don't need something overly complex—just a reliable tool that captures a high-resolution feed without turning your computer into a slideshow.
Here are a few tools I've used and can vouch for:
- Loom: This is my go-to for quick and easy recordings. If you need to create a simple demo and share it fast, Loom’s super-intuitive interface is a lifesaver.
- OBS Studio: It's free, it's powerful, and it's what the pros use. OBS gives you total control over every aspect of your recording, but be warned: it has a bit of a learning curve.
- Camtasia: A fantastic all-in-one option. Camtasia bundles a solid screen recorder with a surprisingly robust video editor, which really simplifies the whole process from capture to final cut.
No matter which tool you pick, always record in the highest resolution you can, like 1920x1080 or even 4K. Aim for a smooth frame rate of at least 30 FPS. You want your product to look absolutely pristine.
For those creating really in-depth demos with a lot of web-based features, learning how to automate high-fidelity web page screenshots can also be a massive timesaver.
A Proven Recording Workflow
Don't try to get a perfect, one-take recording. It’s a recipe for frustration. A much better approach is to break it down into manageable pieces. This gives your future self—the editor—a lot more to work with.
First, do a full, non-recorded run-through. Just walk through the entire script and all the on-screen actions. This "dress rehearsal" is where you’ll catch any awkward phrasing or clunky transitions before the pressure is on.
Then, record your demo in smaller, logical chunks. Think introduction, feature #1, feature #2, and so on. It’s so much easier to nail a 30-second segment than a 5-minute monolith.
And here’s a pro tip: use the "clap and pause" technique. If you mess up a line, don't stop the recording! Just pause for a second, clap your hands loudly right near the mic, and restart the sentence. That clap creates a huge spike in the audio waveform, making it incredibly easy to spot and cut the mistake during editing.
My best advice? Always record about five seconds of silence before you start talking and after you finish each segment. This clean "padding" is a lifesaver in the editing room, giving you breathing room for transitions and cuts.
Staying Confident and Energetic On Camera
Your on-camera presence is just as critical as the screen share. People buy from people, and your energy can make or break whether a viewer sticks around. It's totally normal to feel a bit stiff at first, but a few simple tricks can help.
Before you even start a take, smile. It instantly warms up your tone of voice. Try to speak just a little slower than you would in a casual conversation; this ensures your points land clearly.
Most importantly, don’t be a statue! Use hand gestures to emphasize points and let your vocal inflection rise and fall naturally. A dynamic presentation keeps people engaged.
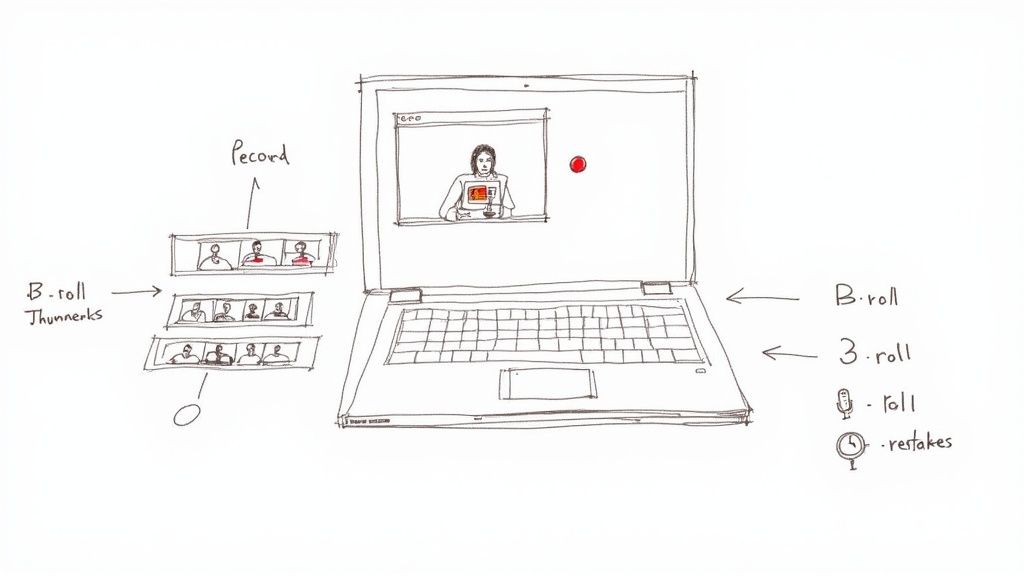
Finally, always grab some extra B-roll footage. These are just supplementary shots you can layer over your main recording to keep things visually interesting. Think simple: your hands typing, a close-up of your mouse clicking a key button, or even just a shot of you nodding thoughtfully. This is the stuff that separates amateur demos from professional-grade content.
Transforming Raw Footage into a Compelling Demo
You’ve got all the raw materials—your screen recordings are crisp and your on-camera takes have great energy. Now for the fun part: weaving it all together into a story that sells. This is where the real magic happens, turning a pile of clips into a polished marketing asset.
Editing isn't just about snipping out the "ums" and "ahs." It's about shaping the narrative. You're in the director's seat, guiding your viewer's attention, emphasizing the "aha!" moments of your product, and building trust with a clean, professional presentation.
Assembling Your Story and Trimming the Fat
First things first, get your clips onto the timeline. Drag your main screen recording and your best on-camera take into your editing software. Your immediate job is to be a ruthless editor.
I mean it—cut everything that doesn’t absolutely need to be there. Long pauses where you're thinking? Gone. Moments where your mouse is just drifting around the screen? Snip. The goal is to create a tight, punchy narrative that moves at a good pace. If a clip or a moment doesn't directly serve the story you’re telling, it's just slowing things down. Respect your viewer's time, and they'll stick around.
Enhancing Engagement with Visuals and B-Roll
With your core story in place, it’s time to add some layers to keep things interesting. A static screen recording can get boring fast, so you need to sprinkle in some visual spice.
Here are a few things I always add:
- Text Callouts: Simple text pop-ups are perfect for reinforcing a key benefit right as you mention it. They also make your video scannable for people watching on mute.
- B-Roll Footage: Remember those extra close-ups you filmed? Now's the time to use them. Cut to a shot of your hands on the keyboard or a close-up of a button being clicked. It breaks the monotony beautifully.
- Simple Graphics and Zooms: Don't be afraid to punch in on a specific part of the screen. A quick, subtle zoom is a powerful way to say, "Hey, look at this specific thing."
This is what a typical editing timeline looks like when you start layering these elements together.
You can see how different video clips, text, and audio tracks are stacked on top of each other to build the final video.
The Game-Changer: Background Removal and Replacement
One of the best ways to level up your demo is to put yourself inside the product, floating over the screen recording. In the past, this meant dealing with a clunky green screen and fiddly lighting. Not anymore.
AI-powered tools like VideoBGRemover have completely changed the game. You just upload your on-camera footage, and the AI strips out your messy home office background in seconds, leaving you with a clean, transparent video of just yourself.
This one trick instantly elevates your video from a basic screen share to a high-end, professional presentation. It feels like you're personally walking the viewer through the software, creating a much stronger connection.
Once you have that transparent video, the possibilities are wide open:
- Overlay on Your Product: Pop your video in the corner of the screen recording. It’s the classic, effective look.
- Add a Branded Background: Drop a custom background behind you with your company's logo or brand colors.
- Export for Versatile Use: A transparent video file (like a MOV ProRes 4444) is a super flexible asset you can reuse in other videos, on your website, or in social media posts.
If you’re new to all this, don't sweat it. There are tons of great guides on video editing for beginners that break down the basics.
Polishing with Audio and Color Correction
We're in the home stretch! These final touches are what separate the amateurs from the pros. Start with your audio. Find some royalty-free background music and drop it in at a very low volume—just enough to add some energy without being distracting. Then, go through and make sure your voiceover audio is clear and at a consistent level.
Next, give your video a quick color pass. You don't need to be a Hollywood colorist. Most editing software has simple sliders for brightness, contrast, and saturation. Your goal is just to make sure everything looks clean and consistent. A little color correction can make your product's UI look sharp and give your on-camera presence a more polished feel. It's this final 10% of effort that really makes a demo shine and get results. And the demand for these skills is no joke; the global product demo video production services market is projected to reach $2,500 million by 2025. You can find more details about this growing market on datainsightsmarket.com.
Getting Your Product Demo Seen by the Right People
https://www.youtube.com/embed/s6uxWPgcaSc
You've poured hours into creating the perfect product demo video. It’s polished, compelling, and ready to go. But let's be honest—hitting "export" is only half the battle. A fantastic video is completely useless if the right people never lay eyes on it.
Smart distribution is what separates a demo that just sits on your website from one that actively generates leads and sales. This isn't just about uploading it to your homepage and calling it a day. We need a multi-channel strategy that meets potential customers where they are, whether that’s on YouTube or endlessly scrolling through TikTok.
Repurpose Your Demo for Short-Form Video
The way we consume content has radically changed. Vertical video is king, and attention spans are shorter than ever. This is why 83% of video marketers are prioritizing short-form videos under 60 seconds. They know they have just a few moments to grab someone's attention.
Your full, in-depth demo isn't going to cut it on Instagram Reels or YouTube Shorts. The trick is to repurpose, not just repost.
Find that single, game-changing "aha!" moment from your main video—that one feature that solves a massive headache for your customer. Isolate it, and turn that clip into a punchy, 15-30 second vertical video.
Here’s how to make it work:
- Lead with the hook. You have maybe three seconds to stop the scroll. Forget a slow intro; start immediately with the problem you solve or the incredible outcome your product delivers.
- Use big, bold captions. Most people watch these videos with the sound off. Your on-screen text needs to be clear, concise, and easy to read.
- Stick to one idea. Each short clip should have a single, clear takeaway. Don't try to cram every feature into one 30-second video.
Optimize for Search on YouTube and Your Website
While social media gives you a quick hit of visibility, optimizing for search is your long-term play. This is how you attract high-intent prospects who are actively looking for a solution just like yours. Think of your YouTube channel and website as invaluable assets for capturing that search traffic.
Getting started is straightforward if you focus on the right things:
- Write compelling titles. Instead of something generic like "Product X Demo," try "How to Automate Invoicing in 60 Seconds with Product X." Be specific, focus on the benefit, and use keywords people are actually searching for.
- Craft detailed descriptions. YouTube uses the description box to understand what your video is about. Use it to expand on the content, add helpful links, and include relevant keywords naturally.
- Design a custom thumbnail. Your thumbnail is the billboard for your video. A bright, high-contrast image with a human face and a few words of bold text will always get more clicks than a random, auto-generated freeze-frame.
The infographic below really nails down the process of refining a video to make it truly effective and shareable.

It’s a great reminder that success comes from trimming the fluff, amplifying the core message, and polishing the final product for each specific platform.
To help with that, here's a quick cheat sheet for formatting your videos for today's most popular platforms.
Platform-Specific Video Formatting Guide
| Platform | Recommended Length | Aspect Ratio | Key Optimization Tip |
|---|---|---|---|
| Instagram Reels | 15 - 60 seconds | 9:16 | Use trending audio and interactive stickers to boost engagement. |
| TikTok | 15 - 60 seconds | 9:16 | Start with a strong visual hook in the first 2-3 seconds. |
| YouTube Shorts | Under 60 seconds | 9:16 | Create a loopable video to increase watch time as viewers re-watch. |
| YouTube (Standard) | 2 - 5 minutes | 16:9 | Focus on a keyword-rich title and a compelling custom thumbnail. |
| Website/Landing Page | 90 seconds - 3 minutes | 16:9 | Add a clear call-to-action (CTA) button directly below the video. |
This table should give you a solid starting point for adapting your content. A little bit of platform-specific tailoring goes a long way.
Measure What Actually Matters for Your Demo
Views are nice for the ego, but they don't pay the bills. To understand if your demo is actually driving business, you need to look past the vanity metrics and dig into data that reflects real engagement and action.
Don't get caught up in view counts. A video with 1,000 views from the right people that drives 50 trial sign-ups is infinitely more valuable than one with 100,000 views and zero conversions.
Zero in on these two metrics above all else:
- Audience Retention: This graph is your best friend. It shows you precisely where people are dropping off. See a huge dip in the first 10 seconds? Your hook isn't working. Notice people bailing in the middle? You might have a section that's confusing or boring.
- Click-Through Rate (CTR): This tells you how many people who see your video's thumbnail actually click to watch it. If your CTR is low, it’s almost always a problem with your title or your thumbnail.
By analyzing this data, you're no longer guessing. You're making informed decisions to improve your next video. To make sure your hard work translates into real growth, it’s worth diving into some proven conversion rate optimization best practices.
Take Your Demos to the Next Level with Interactive Features
A sharp, well-edited video is a great starting point, but what if you could turn people who are just watching into active participants? That’s really where product demos are heading. It's about moving past a simple, linear presentation and building an experience where your audience can click around, explore, and pretty much sell themselves on your product.
This shift from "watching" to "doing" isn't just a gimmick. The numbers back it up: people are 58% more likely to buy from businesses that use this kind of next-gen video content. It’s a clear sign that viewers want to be in the driver's seat. In fact, almost a third of marketers (28%) are already planning to add interactive elements to their videos this year. You can dig into more of these insights on this shift toward interactive content on Vidico.com.
Build a "Choose-Your-Own-Adventure" Demo
The whole point of an interactive demo is to put the viewer in control. Instead of forcing everyone to watch the same generic video, you can create branching paths that let people explore the features that actually matter to them. This instantly makes your product feel more personal and relevant.
Think about a demo for a project management tool. Right at the start, you could ask the viewer:
- "Are you a freelancer managing different clients?"
- "Are you a team lead coordinating a big project?"
- "Are you an executive who needs a high-level progress report?"
Based on their answer, they're taken down a specific path showing them only the workflows and features that solve their problems. It’s a super-targeted approach that keeps people hooked way longer than a standard walkthrough.
When you let users guide their own journey, you turn a monologue into a genuine conversation. They aren't just being shown a product; they're actively discovering how it fits into their world. That's a much more powerful way to sell.
Weave in Hotspots and Chapters to Drive Action
You don't have to build a complex, branching story to make your video interactive. Sometimes, simpler touches can be just as effective for keeping people engaged and getting them to take the next step.
Clickable Calls-to-Action (CTAs): Don't just mention your free trial at the end of the video. Embed a clickable button right inside the player that sends them straight to the sign-up page. This small change removes a step and captures their interest right when it's at its peak.
Chapter Markers: For longer, more in-depth demos, chapter markers are a game-changer. They break down your video into digestible sections—like "Setting Up Your First Project," "Inviting Team Members," or "Generating Reports." This lets viewers skip straight to the parts they care about, which shows you respect their time and makes for a much better experience.
Use AI to Personalize Demos at Scale
The ultimate dream is to make every single viewer feel like the demo was made just for them. Thanks to AI, this is becoming a reality without you having to manually create thousands of different video versions.
New platforms are emerging that can dynamically add personal touches to a core video template. It could be something as simple as dropping the viewer's company logo onto your product's dashboard or using their name in an on-screen text overlay. These little details make the demo feel custom-made, which builds a stronger connection and shows you really understand who they are. This is how you create product demos that don't just explain, but actually convert.
Ready to create stunning, professional product demos without the hassle of a green screen? With VideoBGRemover, you can remove your video background in minutes using AI. Upload your footage, get a clean transparent video, and overlay it on your product showcase for a polished look that stands out. Try it for free at https://videobgremover.com.
Tagged with
Ready to Remove Your Video Background?
See a free preview before you buy.
No credit card required • Free preview on every video