How to Compress an MOV File: Easy Tips & Tools
Learn how to compress an MOV file quickly with free tools and online options. Reduce file size without quality loss—perfect for easier sharing!
The quickest and most effective way to shrink a MOV file is to use a free tool like HandBrake to convert it into an MP4 file using the H.264 codec. This approach delivers a massive reduction in file size but hangs on to impressive visual quality, making it a go-to solution for sharing, uploading, or just saving space.
Why MOV Files Are So Big in the First Place
Ever tried to email a video from your iPhone, only to get that dreaded "file too large" error? Or maybe you've watched your hard drive fill up at an alarming rate after importing footage from a high-end camera. These are classic problems, and more often than not, the MOV file format is the reason.
MOV, a container format developed by Apple, is a workhorse in professional video production. It's designed to hold high-quality video streams, often encoded with codecs like Apple ProRes that preserve incredible detail. While this quality-first approach is perfect for the editing suite, it creates files that are simply too bulky for practical sharing and storage.
The Balancing Act: Quality vs. Convenience
At its core, this is a classic tradeoff. Uncompressed video looks fantastic, but it's completely impractical for most real-world uses. Compressing that MOV file is the necessary step that makes it usable.
By converting it to a more efficient format, you make your video:
- Shareable through email, messaging apps, and social media.
- Quick to upload to platforms like YouTube and Vimeo.
- Storage-friendly, freeing up precious space on your computer or hard drives.
Consider this real-world example: a 10-minute video shot in ProRes MOV can easily top 10 GB. After compressing it to a high-quality H.264 MP4, that same video might be less than 1 GB. This huge difference highlights just how crucial compression is.
If you're interested in the principles behind shrinking video files in general, not just MOVs, check out a general guide on how to compress video.
MOV Compression Methods at a Glance
Choosing the right tool depends on what you need to do. Are you looking for the best quality, the fastest conversion, or just a simple online tool for a one-off task? This table breaks down the most common methods.
| Method | Best For | Pros | Cons |
|---|---|---|---|
| Desktop Software (e.g., HandBrake) | High-quality results & batch processing | Total control over settings; excellent quality retention | Requires software installation; can have a learning curve |
| Built-in OS Tools (e.g., QuickTime) | Quick, simple compressions on Mac | No extra software needed; very easy to use | Limited options; not ideal for advanced control |
| Online Converters | Convenience & one-off conversions | Fast for small files; no installation required | File size limits; potential privacy concerns; ads |
| Professional NLEs (e.g., Premiere Pro) | Editors needing specific export settings | Integrates directly into the workflow; maximum control | Expensive; overkill for simple compression tasks |
Ultimately, for most people, desktop software like HandBrake offers the best balance of power, quality, and cost (it's free!). But for a quick and dirty compression, the other options can definitely get the job done.
Understanding the Language of Video Compression
Jumping into video compression can feel a bit technical at first, but you only need to get a handle on a few key concepts to take control. Think of these as the main dials you can turn to find that perfect balance between a small file size and great visual quality for your MOV file.
The engine behind any compression is the codec (which stands for coder-decoder). This is simply the technology that cleverly figures out how to shrink your video data. The most common one you'll run into is H.264—it's the industry workhorse for a reason, offering a fantastic mix of quality and file size. Its newer cousin, HEVC (H.265), is even better at squeezing down files, especially 4K video, but isn't as universally supported on older devices just yet.
Finding the Sweet Spot with Key Settings
After the codec, the next most important setting is bitrate. This is all about how much data is dedicated to each second of your video, usually measured in kilobits or megabits per second (kbps or Mbps). A higher bitrate equals higher quality and a bigger file. Dropping the bitrate is the fastest way to shrink a video, but if you go too low, you’ll start seeing ugly pixelation and artifacts.
It's a straightforward process: pick your codec, then start tweaking the settings to hit your target file size without wrecking the quality.
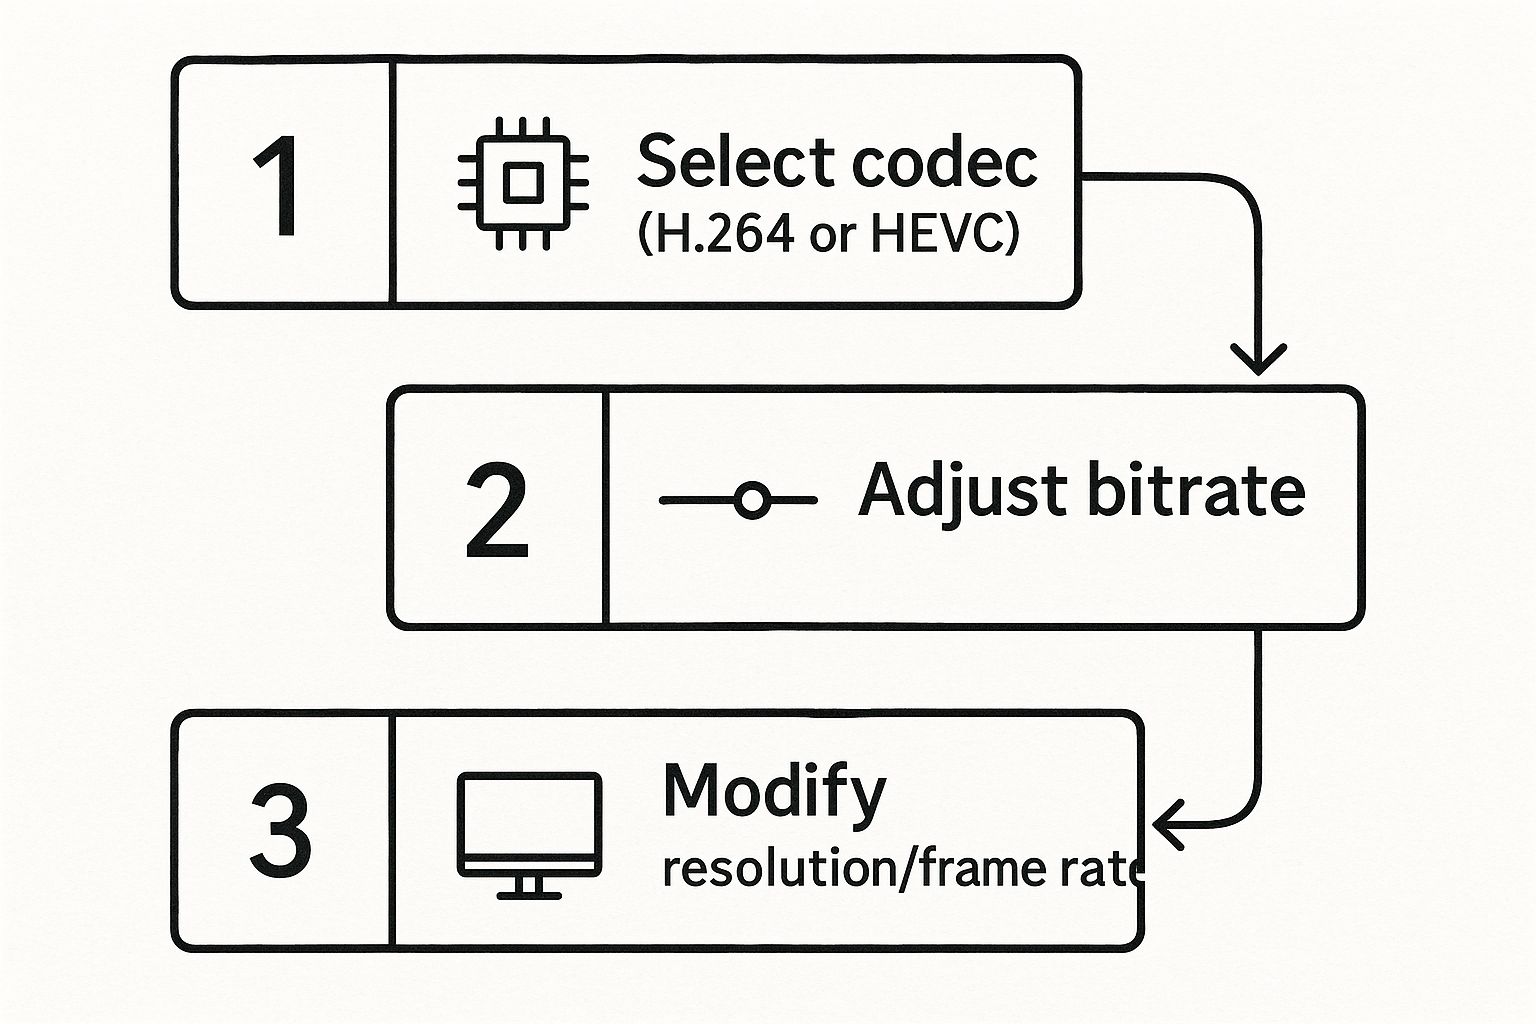
As you can see, it all comes down to a few core decisions. Once you choose a codec, adjusting the bitrate and resolution gives you direct control over the final product.
Finally, you have resolution and frame rate to play with.
- Resolution: This is a big one. Dropping a video from 4K (3840x2160) down to a more standard 1080p (1920x1080) dramatically reduces the amount of pixel data that needs to be processed, making your file much, much smaller.
- Frame Rate: You can also reduce the frame rate, say from 60 frames per second (fps) to 30 fps. This helps, but it’s a change best reserved for videos that don't have a lot of fast-paced action, otherwise the motion might look a little choppy.
To make sense of how these settings interact, here's a quick cheat sheet.
Key Compression Settings and Their Impact
| Setting | What It Controls | Impact on File Size | Impact on Quality |
|---|---|---|---|
| Codec | The compression algorithm (e.g., H.264, HEVC) | High. Newer codecs like HEVC create smaller files. | Varies. HEVC offers better quality at lower bitrates. |
| Bitrate | Data per second of video (e.g., Mbps, kbps) | Very High. Lowering this is the most direct way to shrink files. | Very High. Too low and you'll see artifacts and blur. |
| Resolution | The video's dimensions (e.g., 1080p, 720p) | High. Fewer pixels mean a significantly smaller file. | High. Lowering resolution reduces sharpness and detail. |
| Frame Rate | Frames per second (fps) (e.g., 30, 24) | Medium. Fewer frames reduce file size, but can make motion choppy. | Medium. Can impact motion smoothness, especially in action scenes. |
Understanding this table helps you make smarter trade-offs instead of just guessing.
Once you get a feel for these three elements—codec, bitrate, and resolution—you can make confident, informed choices with any compression software. You're no longer just hitting "compress"; you're actively shaping the final video to fit your exact needs.
For a deeper dive into this topic, you can find more expert tips and techniques in other guides on video compression.
Compressing MOV Files with Free Desktop Software
When you need reliable compression without uploading sensitive footage to the cloud, free desktop software is the way to go. These tools give you total control over the process, keeping your files private while offering robust features to strike that perfect balance between file size and quality.
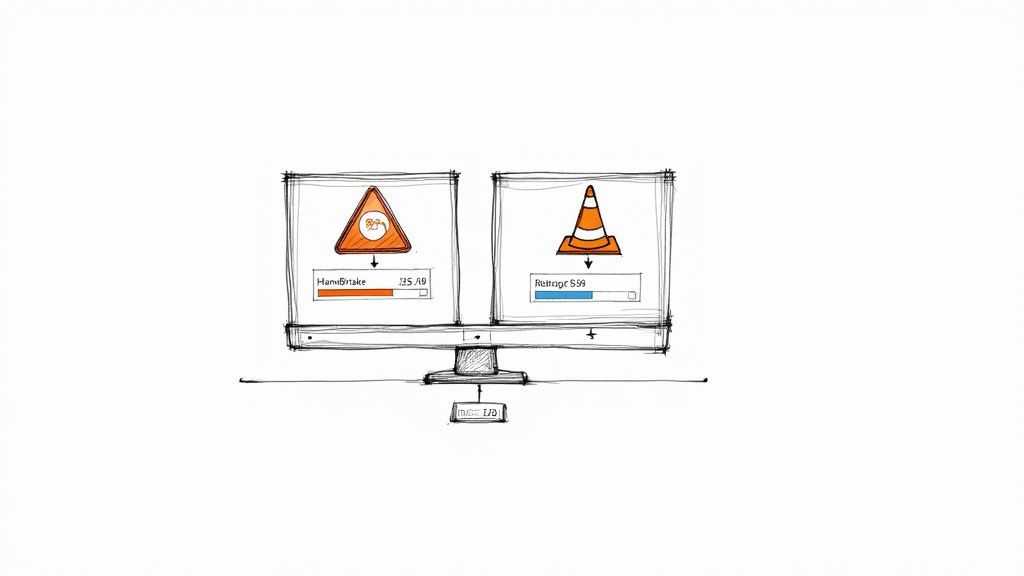
Let’s walk through how to shrink an MOV file using two of the best free options out there: HandBrake and VLC Media Player.
Using HandBrake for Precise Control
HandBrake is a fantastic open-source tool, a real favorite among video pros and hobbyists for its sheer depth of features. It might look a little intimidating at first glance, but its preset system makes compressing your MOV file surprisingly straightforward.
Once you open HandBrake, you'll start by loading your source MOV file. From there, the easiest path to a great result is to lean on one of the built-in presets.
- For General Use: The "Fast 1080p30" preset is an excellent starting point. It converts your video to a highly compatible MP4 with the H.264 codec, which is perfect for web uploads and sharing.
- For Higher Quality: If you need to hang onto more detail, try the "HQ 1080p30 Surround" preset instead.
This screenshot shows the main HandBrake interface. You can see the preset panel on the right-hand side, ready for you to pick an option after loading your video.
The presets automatically handle dozens of settings, so you get a reliable result without needing a degree in video compression. If you feel like tinkering, head over to the "Video" tab to adjust the quality slider for a more custom balance.
Quick Conversions with VLC Media Player
Most people just think of VLC as a media player, but it has a surprisingly powerful video conversion tool built right in. It's not as complex as HandBrake, which makes it perfect for when you just need to compress an MOV file quickly and without any fuss.
The evolution of video codecs is why tools like this are so effective. For instance, the H.264 codec really changed the game by finding a sweet spot between quality and file size that was previously unheard of. This means your original MOV, which might contain a huge, high-quality stream, can be converted to an H.264-encoded file that's dramatically smaller and easier to share.
To get started, just go to Media > Convert / Save. Add your MOV file, click the "Convert / Save" button, and then pick a profile from the dropdown menu.
A great all-around choice is the "Video - H.264 + MP3 (MP4)" profile. It creates a universally compatible file that's significantly smaller than the original MOV.
Once you set a destination for your new file and hit "Start," VLC gets to work. While it doesn't offer HandBrake's granular control, its simplicity is a huge plus for fast turnarounds. For those just starting out, getting comfortable with these tools is a great stepping stone toward exploring some of the best video editing software for beginners, which often have similar export features built in.
Using Online Compressors for Quick Results
https://www.youtube.com/embed/3Gih91mUB4k
Sometimes you just need to shrink a video file right now. You don't want to download and install a new program just for one small task. This is where online video compressors really shine.
These browser-based tools are my go-to for quick jobs. Say you need to get a social media clip under the upload limit, or maybe you're sending a quick video preview to a client. For these scenarios, an online tool is often the fastest path from A to B.
The process is usually dead simple: drag your MOV file onto the website, pick a compression level (often presented as simple choices like "Low," "Medium," or "High Quality"), and hit the compress button. A few moments later, you'll have a link to download your smaller file.
Important Considerations and Trade-Offs
While the speed is fantastic, you're making a few trade-offs when you use a free online service. I always run through this mental checklist before uploading anything.
- Privacy Concerns: Remember, you're uploading your video to someone else's server. I would never use an online tool for sensitive client work or personal videos I wouldn't want out in the wild.
- File Size Limits: Most of these free services have a ceiling on what you can upload. It's often around 500 MB or 1 GB, so they aren't built for shrinking long, high-resolution footage.
- Watermarks: This is a big one. Many free tools will stamp their logo on your final video. That’s a deal-breaker for anything professional, but it might be fine for a quick, casual share.
The bottom line is that online tools are best for non-sensitive, smaller files where convenience trumps everything else. For bigger projects or anything confidential, a desktop application gives you far more security and control.
You'll also find that many online tools convert your MOV into the more universally compatible MP4 format during compression. If you often work with that file type, our guide on choosing an MP 4 file compressor has some great tips and tool recommendations.
Advanced Strategies for Optimal Compression
Once you've got the basics down, it's time to dive into some of the techniques the pros use. Moving beyond the default presets gives you much more control, letting you find that perfect balance between a small file size and great visual quality.
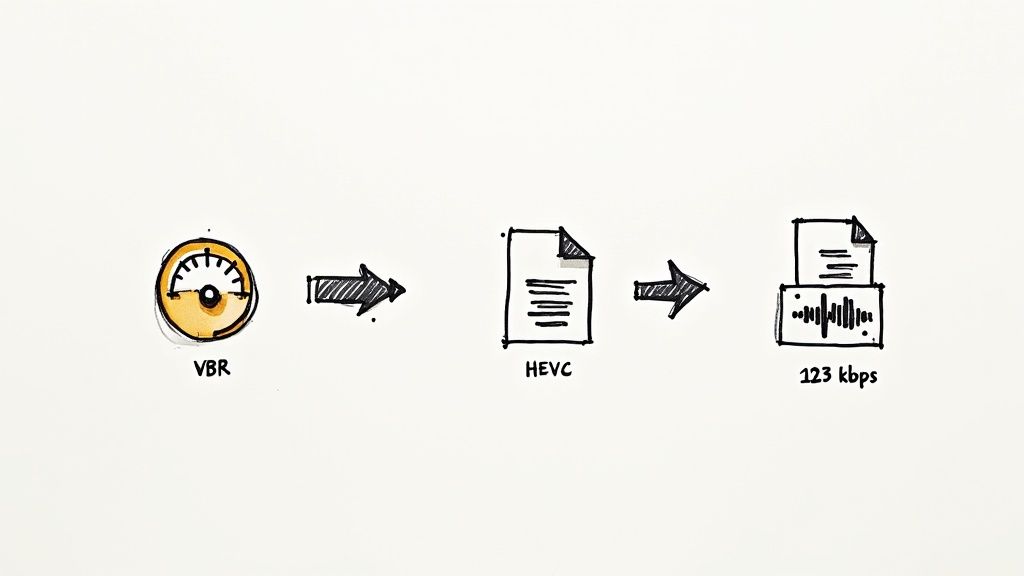
One of the biggest levers you can pull is your bitrate encoding method. While Constant Bitrate (CBR) is simple and reliable, Variable Bitrate (VBR) is far more intelligent. VBR is dynamic; it devotes more data to complex, action-packed scenes and less to static shots, like someone talking against a plain background. The end result is a much better-looking video compared to a CBR file of the exact same size.
Adopting Modern Codecs
Here’s another pro tip: consider using the HEVC (H.265) codec, especially if you're working with high-resolution footage. While H.264 is the old standard, HEVC is a powerhouse, offering up to 50% better compression. This is a game-changer for 4K and 8K video. Its compatibility isn't quite as universal as H.264 yet, but for archiving or specific platforms that support it, HEVC is the way to go.
Don't forget the audio! This is a trick I see people miss all the time. Dropping the audio bitrate from a hefty 320 kbps down to a more-than-acceptable 128 kbps can shave off a surprising amount of data. For most web videos, viewers will never notice the difference.
Thinking about where your video will live is also crucial. If you’re making content for TikTok or Instagram Reels, you should optimize for vertical viewing before you compress. Checking a guide to vertical video dimensions can save you a lot of headaches and ensure your video looks sharp and properly framed on those platforms.
Answering Your Top MOV Compression Questions
When you first start compressing video, a few questions pop up right away. Let's tackle them head-on, so you can shrink those MOV files without any guesswork.
The biggest fear is always quality loss. Will compressing my video make it look terrible? Not necessarily. While it's true that most compression is "lossy" (it has to discard some data to get smaller), modern tools are incredibly smart about it.
Using a good codec like H.264 allows for a massive drop in file size, often with a visual quality difference that's practically invisible to the naked eye. The trick is to compress intelligently, not just to crush the file down as small as it can go.
What's the Best Format to Convert to?
If you're compressing a MOV file, what should you turn it into? For universal playback—we're talking social media, web browsers, and just about any device you can think of—MP4 is the undisputed champion.
An MP4 file paired with the H.264 codec is the gold standard. It’s a reliable combination that will play back smoothly almost anywhere you put it.
Need to compress a massive 4K video? The HEVC (H.265) codec, also in an MP4 container, is even more efficient. Just a heads-up: some older devices might struggle to play it back, so know your audience.
Can I Compress MOV Files on My Phone?
Absolutely. You don't always need a desktop computer to get the job done. While your phone's photo gallery probably doesn't have a big "Compress" button, there are a couple of clever workarounds.
- Try a dedicated app: Tools like Video Compress are built specifically for this and make the process simple.
- Use your video editor: Here’s a pro tip—just open your MOV file in a mobile editor like iMovie or CapCut. When you export it, choose a lower resolution. Saving a 4K video as a 1080p file is a super effective way to compress it on the fly.
Want to create pro-level videos without messing with a green screen? VideoBGRemover uses AI to instantly cut out your video background. Just upload your MOV or MP4, get a free preview, and export a perfect clip with a transparent or new background. Give it a try at https://videobgremover.com.
Ready to Remove Your Video Background?
See a free preview before you buy.
No credit card required • Free preview on every video