Create an Animated GIF Background in Minutes
Learn how to make a stunning animated GIF background for your website. This guide shows you how to transform videos into fast-loading, transparent GIFs.
An animated GIF background can completely change the vibe of a webpage, swapping out a static, boring look for something with a bit of life and movement. Unlike a clunky video file that can slow everything down, a properly optimized animated GIF background is a slick, lightweight way to grab a visitor's attention, point them where you want them to go, and just make your site feel more professional.
Why Moving Backgrounds Are So Effective
In a sea of static websites, adding a little motion makes you stand out immediately. It's just human nature—our eyes are hardwired to notice movement. This makes an animated background a fantastic tool for creating a strong first impression that sticks with people. But it’s not just about adding visual flair; it's a smart design choice.
A subtle animation can gently pull a user's gaze towards a "Buy Now" button or a key feature you want to highlight, all without being obnoxious or distracting. It adds a layer of polish that makes your entire site feel more thoughtfully designed and high-end.
The Resurgence of a Classic Format
The Graphics Interchange Format (GIF) has been around forever—since 1987, to be exact. It really took off when Netscape 2.0 came out in 1995, making looping animations a core part of early web design. For a while, GIFs were seen as a bit of a relic, but they’ve made a huge comeback. They've evolved from cheesy memes into a genuinely useful tool for modern designers.
This revival is happening for a few good reasons:
- Lightweight Performance: When optimized, GIFs are much smaller than video files. That’s a huge deal for keeping your page load times fast and your visitors happy.
- Universal Support: They just work. GIFs play automatically on every browser and device out there, no plugins or clicking "play" required.
- Creative Flexibility: You can do so much with them, from full-screen looping backgrounds to tiny, subtle animations on buttons when someone hovers over them.
The real power of an animated GIF background lies in its ability to tell a micro-story. It can instantly convey a mood, demonstrate a product's function, or create an atmosphere that static images simply cannot match.
Thankfully, you no longer need to be a design wizard to create them. Modern tools have made the process incredibly simple. If you're looking to dive deeper into the art of creating visuals for motion, this guide on how to make backgrounds for animation is a great resource. Getting comfortable with this format is a surefire way to make your work pop.
Alright, let's get into the nitty-gritty of picking the right video to turn into an awesome animated GIF.
Picking the Perfect Video for Your GIF
The secret to a great animated GIF background isn’t about fancy editing tricks. It all comes down to choosing the right video from the get-go. Some clips are just built for this, while others will leave you with a clunky, awkward result.
You're looking for footage that has a gentle, continuous motion. Something that can loop forever without looking like it’s restarting every few seconds. Think of steam slowly rising from a coffee cup, sunlight dappling through leaves, or even some abstract digital particles floating around. These clips don't have a distinct start or finish, which is the magic ingredient for a seamless loop that adds vibe without being distracting.
What Makes a Video "GIF-Worthy"?
As you hunt for the perfect clip, there are a few practical things to keep in mind. If the video is too short, the loop will be too obvious and jarring. Too long, and your final GIF file will be enormous. I’ve found the sweet spot is usually a clip with 5 to 15 seconds of solid, usable action.
Here are a few other pointers I've picked up along the way:
- Keep it Simple: Steer clear of super busy or chaotic scenes. A clean subject with a simple background not only looks better but also makes it much easier for background removal tools to do their job accurately.
- Start with High-Res: Always begin with the best quality you can find, preferably 1080p or even 4K. You can (and will) shrink it down later, but you can’t add quality that was never there in the first place.
- Steady Lighting is Key: Avoid clips with flickering lights or sudden changes in brightness. Consistent lighting is crucial for making the loop feel smooth and preventing that jarring "jump" when the GIF resets.
The best source video adds atmosphere without stealing the show. Its motion should be a subtle enhancement, not a distraction that pulls focus from your main content.
Ultimately, find a video that just feels right for your brand. A tech startup might go for a slick data visualization, while a spa's website would be better served by a calming shot of a waterfall. You get the idea.
Making a Transparent GIF from Your Video
Alright, let's get to the good stuff—turning your video into a sharp, transparent GIF. Not too long ago, this was a tedious, frame-by-frame nightmare. Thankfully, tools like VideoBGRemover have made it a matter of a few clicks, letting you cleanly lift a subject from its background.
The first move is simple: just upload your video file. The tool handles the usual suspects like MP4 and MOV without any fuss. Once it's uploaded, the AI kicks in and starts analyzing your video, figuring out what's foreground and what's background. It’s a world away from the old days of manual rotoscoping.
From Video Upload to Transparent Preview
After a few moments, you’ll get a preview of your video with the background totally gone. You'll see your subject against that classic checkered pattern, the universal sign for transparency. This is your chance to play quality control.
Play the clip back and watch it closely. Are the edges clean? Is any part of your subject getting cut off, or are there stray pixels from the background hanging around? The AI is surprisingly accurate, but tricky situations—like busy backgrounds, motion blur, or fine details like hair—can sometimes need a second look.
Thinking about what makes a video work well for this process from the start can save you a ton of headaches.
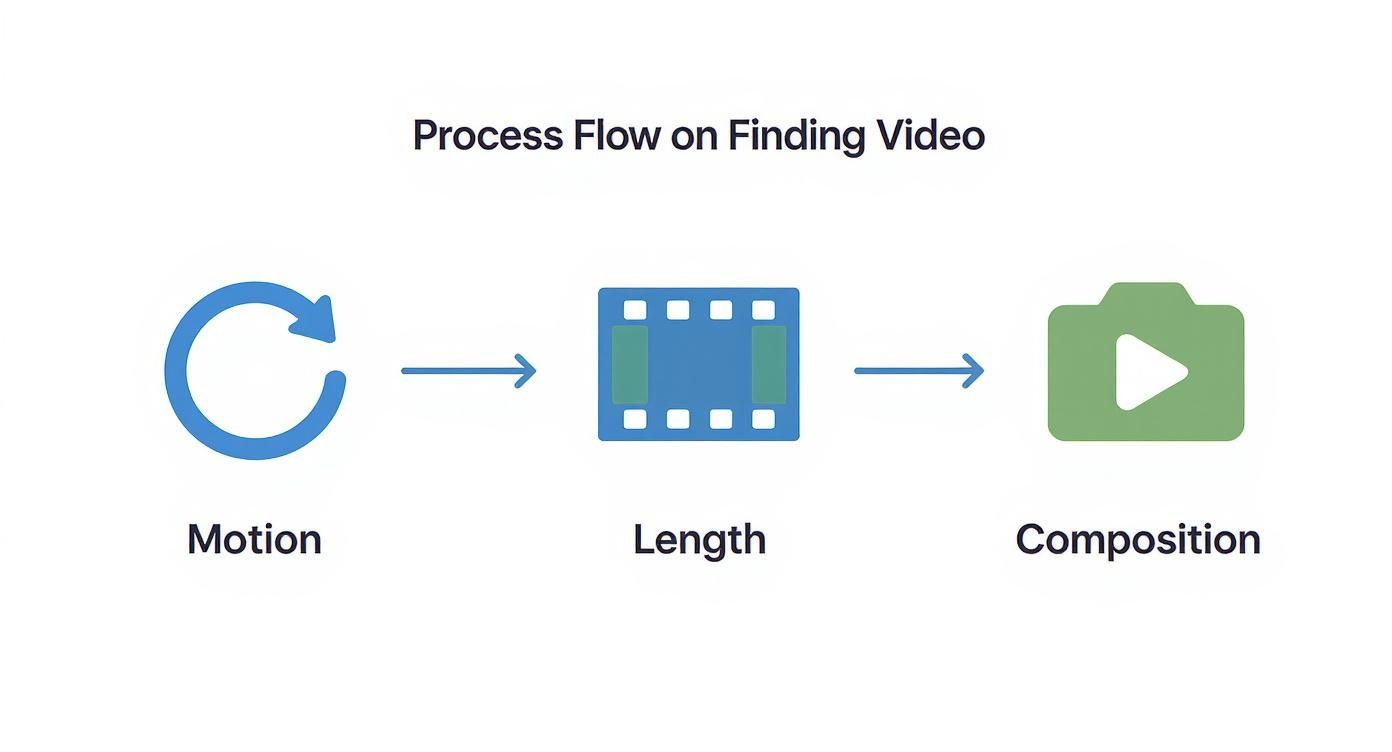
As you can see, focusing on clear motion, a reasonable length, and good composition will give the AI the best possible chance to deliver a flawless result.
Finalizing and Exporting Your Animated GIF
Happy with how the preview looks? Great. The last step is exporting it as an animated GIF background. In VideoBGRemover, this is as easy as choosing the GIF option from the export menu.
The best part is that the transparency is baked right into the GIF file. You don't have to mess with any extra steps or software. Your GIF is immediately ready to drop onto a website, into a presentation, or even in an email, and it will blend in seamlessly.
If you want to dive even deeper into the process, our guide on how to make a video with a transparent background has you covered.
The whole process starts with a clean, drag-and-drop interface that gets right to the point. No steep learning curve, no complicated settings—just your video and a clear path to a great-looking animated GIF. The tool does all the heavy lifting for you.
Optimizing Your GIF for Web Performance
https://www.youtube.com/embed/izLxd8DkWtk
So you've created a fantastic animated background—the hard part is over, right? Well, almost. A stunning GIF that grinds your website to a halt isn't helping anyone. Performance is everything online, and that means we need to optimize our creation so it's both eye-catching and lightweight.
The whole game is a balancing act between file size and visual quality. It's shockingly easy for a high-resolution animated GIF to bloat into several megabytes, which is a death sentence for page load times. Our job is to strategically shrink that file size without turning our smooth animation into a choppy, pixelated mess.
This isn't a new problem. The GIF format's history is actually tied to compression challenges. Fun fact: early patent issues with its LZW compression algorithm almost killed it off, pushing developers toward formats like PNG. But once the patent expired in 2004, the rise of social media brought the GIF back in a huge way, forcing us to get smarter about making them work on the modern web. You can actually read more about the fascinating history of the GIF format on Discover Magazine.
Key Optimization Techniques
When you're ready to start shrinking that file, you have three main levers to pull: the dimensions (width and height), the frame rate, and the color palette.
The easiest win is often just reducing the physical size of the GIF. If your background only needs to span a 1920-pixel-wide container, there's absolutely no reason to start with a massive 4K video file. Crop and resize it first.
Next up is the frame rate, measured in FPS (Frames Per Second). A standard video might run at 24 or 30 FPS to look silky smooth, but a background animation rarely needs that level of detail. I've found that dropping the frame rate to 15 FPS, or sometimes even 10 FPS, can cut the file size in half with very little noticeable difference, especially for subtle, looping movements.
The real secret weapon for GIF optimization? Slashing the color count. A GIF can display a maximum of 256 colors. By reducing that palette to 128 or even 64 colors, you can achieve massive file size reductions, particularly if your original video didn't have a ton of complex gradients to begin with.
GIF Optimization Settings Explained
To make sense of all the dials and sliders in optimization tools, it helps to know what each one actually does. Here’s a quick breakdown of the common settings you'll encounter and how they affect your final GIF.
| Setting | What It Does | Impact on File Size | Impact on Quality |
|---|---|---|---|
| Dimensions | Sets the width and height of the GIF in pixels. | High (Larger dimensions drastically increase file size) | High (Reduces sharpness and detail when scaled down) |
| Frame Rate (FPS) | The number of individual images displayed per second. | High (Fewer frames mean a much smaller file) | Medium (Too low and the animation will look choppy) |
| Color Palette | The total number of unique colors used in the animation. | High (Reducing from 256 to 64 can have a huge impact) | Medium (Can cause color banding or loss of detail) |
| Dithering | A technique to simulate more colors by mixing pixels. | Low (Slightly increases file size) | High (Improves perceived quality, reduces color banding) |
| Lossy Compression | An algorithm that discards "unnecessary" data. | Very High (Allows for significant size reduction) | High (Can introduce artifacts and pixelation if set too high) |
Ultimately, you'll need to experiment. There's no single "best" setting, as the ideal combination depends entirely on your specific source video and where the final GIF will be used.
Your Practical Optimization Checklist
Here’s a simple workflow I follow whenever I'm prepping an animated GIF background. It’s a great starting point.
- Start with Dimensions: Scale the GIF down to the absolute largest size it will ever be displayed on your site. Don't go bigger than you need.
- Adjust the Frame Rate: Try 15 FPS first. Preview it. If it still looks smooth, see if you can get away with 12 or 10 FPS.
- Reduce the Colors: This is a big one. Start by cutting the color palette in half to 128 and see how it looks. You might be surprised.
- Compress It: Once you've tweaked the settings above, run the final GIF through a dedicated compression tool to squeeze out the last few kilobytes. Many of the techniques discussed in our guide to the best video compressors apply here, too.
Putting Your Animated GIF on Your Website

Now for the fun part: getting your new animated GIF live on your site. You might be surprised at how simple this is. With just a few lines of CSS, you can turn your creation into a full-screen, immersive background that really grabs a visitor's attention.
The magic happens with the background-image property. You just point it to your GIF file, and then use a couple of other properties like background-size: cover; and background-position: center; to make sure it scales beautifully without looking stretched or pixelated.
Making It Work Everywhere
Of course, what looks great on a desktop monitor might be a bit much on a smartphone. A full-screen animation can sometimes feel distracting or slow things down on smaller screens. This is where media queries in your CSS become your best friend.
You can set up a simple rule to serve a static image background—or even no background at all—for mobile users. It’s a smart way to keep the experience clean and fast without sacrificing the cool animation for your desktop audience.
The whole point is to enhance the user experience, not get in the way of it. A responsive design ensures your animated background is a plus on every device, from a massive monitor to a tiny phone screen.
If you want to explore this concept further, the principles are very similar to what we cover in our guide on using a https://videobgremover.com/blog/background-video-for-website. And if you're working with a specific platform, you can often find dedicated tutorials. For example, WordPress users can find guides on how to create animated website backgrounds in Elementor.
And don't forget, these transparent GIFs aren't just for websites. They're fantastic for adding a subtle touch of motion to email newsletters or presentations, making your content that much more engaging.
Got Questions About GIF Backgrounds? We've Got Answers
Even with a tool like VideoBGRemover at your fingertips, you're bound to run into a few tricky questions when making your first animated GIF background. Let's walk through some of the common hurdles I see creators face, so you can get your project over the finish line.
One of the first things people ask is, "Can a GIF even be transparent?" Absolutely. It's one of the format's best features. The magic happens when the software isolates your subject from its original background before it ever becomes a GIF. The transparency is baked right in, allowing you to place your animation perfectly over any website color, gradient, or image.
Keeping Things Fast and Looking Good
Of course, the next big worry is usually performance. "Won't this massive moving thing grind my website to a halt?" It's a valid concern, and it absolutely can if you're not careful. A huge, unoptimized GIF will tank your load times.
This is where you have to be strategic. Think about shrinking the dimensions, trimming the color palette, and maybe even dropping the frame rate a little. It's always a balancing act between that buttery-smooth look and a snappy user experience.
So, what kind of video should you even start with to make this whole process easier? I've found that the best results come from clips that have a few specific qualities:
- Go for Subtle Motion: Look for gentle, looping actions. Think of things like slowly drifting smoke, soft light patterns, or rippling water. These loop beautifully without a jarring "jump" at the end.
- Keep the Scene Simple: The cleaner the original background, the better. A simple, uncluttered scene gives the AI a much easier time creating a clean, crisp cutout of your subject.
- No Jarring Cuts: Your source video needs to feel like one continuous, flowing shot. Any abrupt edits or camera shifts will immediately make your final loop feel awkward and amateurish.
A great source video is half the battle. If you pick the right clip from the start, you'll find that creating a high-quality, lightweight animated GIF background is a surprisingly smooth process.
Ready to turn your video clips into stunning transparent animations? VideoBGRemover handles all the complex work for you. Just upload your file and let our AI take care of the rest. Start creating for free at videobgremover.com.
Tagged with
Ready to Remove Your Video Background?
See a free preview before you buy.
No credit card required • Free preview on every video