Rotoscope in After Effects A Modern Workflow Guide
Master how to rotoscope in After Effects with this practical guide. Learn to use the Roto Brush, refine complex edges, and troubleshoot common issues.
Rotoscoping in After Effects boils down to one core task: isolating a moving subject from its background. We do this by tracing the subject, frame by frame, to create a matte. Thankfully, we're not stuck tracing by hand anymore. Tools like the AI-powered Roto Brush 2 handle the heavy lifting, making it much faster to get a clean cutout for visual effects, background swaps, or any other compositing work.
Setting the Stage for a Flawless Rotoscope
Before you even touch the Roto Brush tool, you need to think about your footage. A little prep work upfront can save you from hours of headaches and tedious cleanup later. Your source footage is, without a doubt, the single biggest factor in getting a successful rotoscope.
Think of it like you're giving directions to the After Effects AI. The clearer and more direct your instructions—in this case, your footage—the better the result will be. High-quality, well-lit video where the subject clearly stands out from the background is the ideal starting point.
Why Pre-Production Matters
If you have the chance to plan your shoot with rotoscoping in mind, do it. It’s a professional habit that pays off big time. Here’s what to aim for on set:
- Consistent Lighting: Flickering lights or shadows that move and change across your subject will confuse the tracking algorithm. Keep it stable.
- High Contrast: A person in a dark shirt against a bright, plain wall is a dream to rotoscope. Someone in a green shirt standing in front of a bunch of trees? That's a nightmare. The more separation, the better.
- Minimal Motion Blur: A faster shutter speed is your friend here. Sharp, defined edges are easy for the AI to grab onto, while blurry, smeared edges are nearly impossible to track accurately.
These are the same kinds of principles you'd follow for a green screen shoot. For a deeper dive into setting up your shots for easy keying, check out our guide on selecting video backgrounds for green screen.
Key Takeaway: The best rotoscoping starts long before you open After Effects. Clean, high-contrast footage with sharp edges is the foundation for an efficient and accurate matte.
The Evolution of Rotoscoping
Rotoscoping is nothing new; it’s a technique that’s been around for over 100 years. It started back in 1915 as a painstaking, manual process of tracing over live-action footage frame by frame for animation.
Fast forward to today, and After Effects is the industry standard. The game really changed when Adobe introduced the Roto Brush with CS5 back in 2010. The latest version, Roto Brush 2, uses machine learning to produce results that are often 70-80% more accurate than older methods. This incredible leap in technology, detailed further by the experts at Boris FX, is what allows modern artists to pull off complex shots that would have been completely impractical just a decade ago.
Your First Pass with the Roto Brush Tool
Alright, this is where we get our hands dirty. With your footage ready to go, it’s time to give Adobe After Effects a solid starting point for its rotoscoping magic. The goal here isn't to nail a perfect matte on the very first try; it's about making a clean, confident selection that the software can understand and work with.
Think of your first brush stroke as the most critical one you'll make. This is your "base frame," and it's what teaches the AI what to look for as it moves through the rest of the clip. A simple, decisive stroke inside your subject is way more effective than trying to meticulously trace the edges from the get-go.
Making the Initial Selection
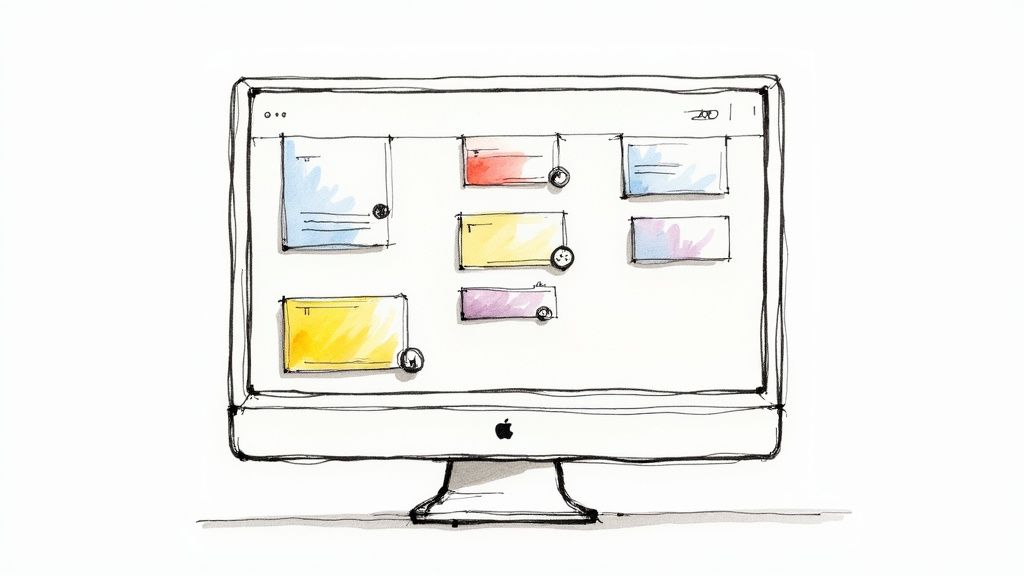
First things first, you need to be in the right workspace. Double-click your footage layer in the timeline. This pops it open in its own Layer Panel, which is the only place you can work with the Roto Brush. Now, grab the Roto Brush tool from the toolbar—it's the icon with a paintbrush next to a little person.
Your cursor will switch to a green circle with a plus sign, which is your foreground brush. I always recommend finding a frame where your subject is clear and well-defined, usually near the start of the action. Just click and drag a rough line inside the object you want to cut out.
Instantly, you'll see a vibrant magenta line—the segmentation boundary—snap around your subject. After Effects just analyzed the pixels you painted over and made its best guess at the object's full shape. Don't sweat it if it's not perfect; it almost never is on the first go.
Guiding the AI with Corrective Strokes
Now, it's time to refine that initial guess. To get rid of areas the tool accidentally included, just hold down the Alt (Windows) or Option (macOS) key. Your cursor will flip to a red circle with a minus sign. Simply paint over any bits of the background that got pulled into your selection, and you'll see the magenta line snap back.
It’s really like having a quick conversation with the software. A green stroke says, "Hey, this is what I want to keep." A red stroke clarifies, "Nope, get rid of this part." It usually only takes a few smart, corrective strokes to get the base frame looking solid.
This infographic gives you a simple visual of how this process works.
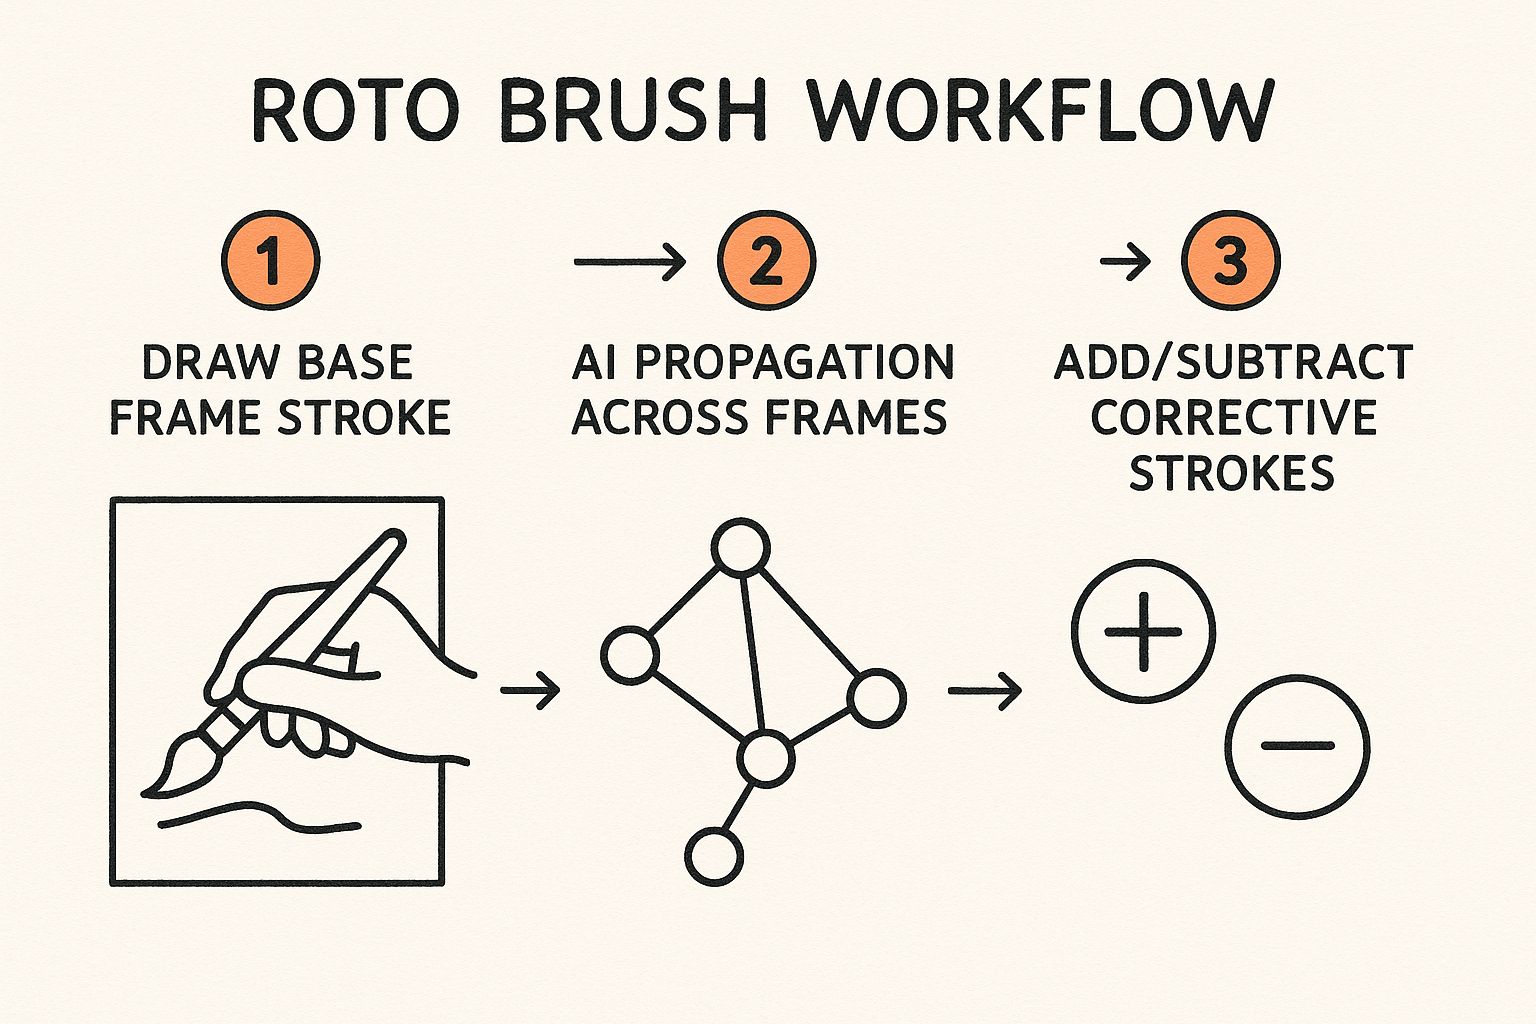
As you can see, a strong base frame acts as the foundation. The AI then uses that information to build the matte on the following frames, and you just jump in to make corrections when needed.
Pro Tip: Need to change your brush size on the fly? Hold Ctrl (Windows) or Command (macOS) and drag your mouse left or right. I use this constantly. A smaller brush is an absolute must for getting into tight corners or refining tricky edges like hair or fabric.
Once your base frame is locked in, hit the spacebar. After Effects will start propagating forward, analyzing the footage frame by frame and doing its best to follow your subject’s movement. You’ll see a green progress bar at the bottom of the Layer Panel showing how many frames have been analyzed.
It’s easy to forget that artists used to do this manually, drawing masks frame by agonizing frame. The Roto Brush automates so much of this, and the tech has slashed rotoscoping time by an average of 40-60%. That said, you should still expect about 20-30% of shots to need manual tweaks, especially with tricky elements like motion blur or fine details. If you're curious, it's worth checking out the evolution of rotoscoping tools to see just how far we've come.
Essential Roto Brush Shortcuts
Getting comfortable with keyboard shortcuts is the fastest way to level up your rotoscoping speed. Instead of clicking around menus, you can make adjustments instantly.
This table covers the shortcuts I use on every single Roto Brush project. Committing these to muscle memory will save you a massive amount of time.
| Action | Windows Shortcut | macOS Shortcut | Description |
|---|---|---|---|
| Select Roto Brush Tool | Alt + W |
Option + W |
Quickly activates the Roto Brush tool from the toolbar. |
| Toggle Foreground/Background | Alt / Option (hold) |
Option (hold) |
Switches between adding (green) and subtracting (red) from the selection. |
| Adjust Brush Size | Ctrl + Drag Left/Right |
Command + Drag Left/Right |
Interactively changes the brush diameter for precise selections. |
| View Alpha Channel | Alt + 4 |
Option + 4 |
Toggles the view to a black-and-white matte for easy refinement. |
| Toggle Overlay Alpha | \ (backslash) |
\ (backslash) |
Overlays a semi-transparent color (usually red) on the matted area. |
| Freeze/Unfreeze Roto | Click the Freeze button | Click the Freeze button | Caches the Roto Brush data to improve playback performance. |
Once you start using these shortcuts naturally, your entire workflow feels more fluid. You'll spend less time thinking about the tool and more time focused on the creative result.
Refining Edges for Seamless Composites
Nailing that initial Roto Brush selection is a great start, but it's really just the first step. The true magic behind a professional-looking composite in After Effects happens when you perfect the edges of your matte. A hard, chiseled edge screams "cutout," but an overly soft, blurry one looks just as fake. Your goal is to create an edge that feels like it naturally belongs in the new scene.
This is where the Roto Brush & Refine Edge effect panel becomes your secret weapon. Once you've propagated your selection, you'll find this panel in your Effect Controls, and it's loaded with the precision tools you need to sell the shot. It’s all about moving from a rough selection to a truly nuanced edge.
Mastering the Core Refinement Properties
Think of the main sliders in this panel as your first line of defense against bad edges. They work in tandem to clean up your initial matte, letting you fix the big problems before diving into the tiny details. Each one has a very specific job.
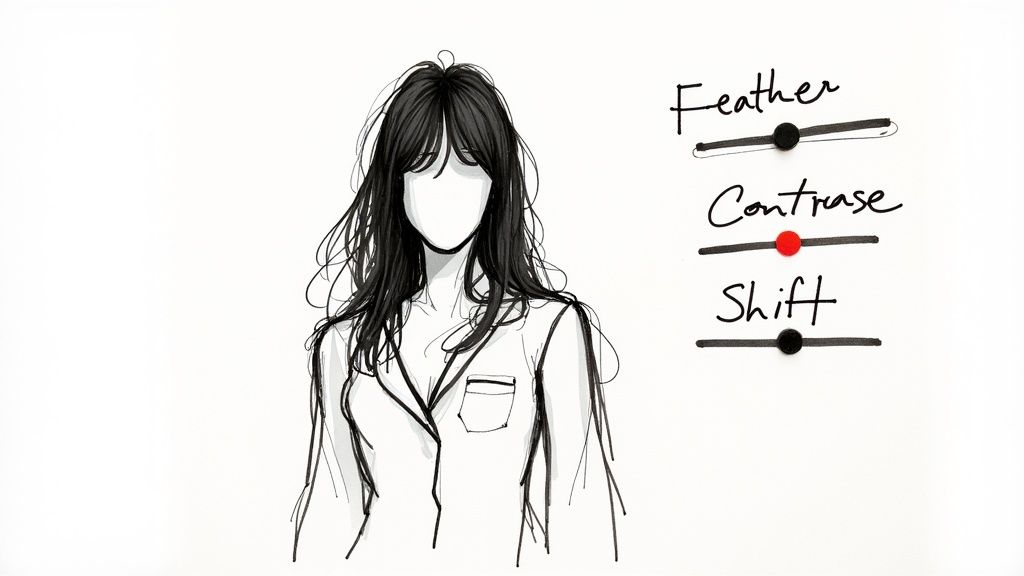
- Feather: This one is pretty straightforward. Bumping up the Feather value softens the edge of your matte, which helps create a smoother transition. Even a small amount, like 2-5 pixels, can do wonders to reduce jaggedness without turning the edge into a blurry mess.
- Contrast: This slider is the yin to Feather's yang—it sharpens the edge. If you find that feathering has made your edges too soft and indistinct, a little Contrast will tighten them right back up for a more defined separation.
- Shift Edge: This is an incredibly powerful control for either shrinking or expanding your entire matte. If you’re seeing a slight halo of the old background around your subject, a negative Shift Edge value (say, -15%) will pull the matte inward, effectively choking it to get rid of that nasty fringe.
High-quality rotoscoping is more in demand than ever, thanks to a booming visual effects (VFX) industry valued at USD 19.8 billion in 2024. In After Effects, the Roto Brush tool gives you a massive head start, often providing 50-70% time savings over old-school manual masking. That kind of speed is a lifesaver when a single clip at 60 frames per second can contain thousands of individual frames. You can find more great insights into the rotoscoping process over on GarageFarm.net.
The Power of the Refine Edge Tool
When you’re up against the really tricky stuff—flyaway hair, fur, or semi-transparent fabrics—the standard Roto Brush is going to struggle. For those challenges, you need to bring in the specialist: the Refine Edge Tool. It’s located right next to the Roto Brush in the toolbar, and its entire purpose is to analyze and preserve those intricate edge details.
To use it, you just paint over the problem areas, like the wispy edges of someone’s hair. The tool intelligently analyzes the pixels and generates a much more detailed and believable matte for that specific spot. While After Effects is the gold standard for this level of detail, the core concepts of masking are universal. For simpler edits, our guide on how to mask in Premiere Pro covers foundational techniques that are useful everywhere.
Key Takeaway: Stop trying to perfect hair with the main Roto Brush. Use the standard brush to get the solid parts of your subject locked in, then switch to the Refine Edge Tool to specifically paint over and capture all those fine, complex details. This two-step approach will give you much better results, much faster.
Solving Common Rotoscoping Problems
Even with the impressive AI behind Roto Brush 2, you're going to hit clips that just don't want to cooperate. Real-world footage is never perfect, and learning how to wrestle with the common issues is what separates a frustrating afternoon from a clean composite. This is your field guide for those inevitable rotoscoping headaches in After Effects.
One of the first things you'll probably run into is matte chatter. It’s that awful, flickering jitter along the edge of your subject. This happens because the AI is making slightly different guesses about the edge from one frame to the next, and the result is an unstable line that screams "VFX shot!"
Luckily, there's a built-in fix. In the Roto Brush & Refine Edge effect panel, look for Reduce Chatter. Cranking this up tells After Effects to average the matte’s position over a few frames, which smooths out those distracting jitters. I find a good starting point is around 25-30%. Nudge it up from there until the edge looks stable.
Wrestling with Low Contrast and Tricky Shots
What about when your subject practically blends into the background? If the colors and brightness are too similar, the Roto Brush will get lost. You'll see the magenta selection either spill out way too far or shrink in on itself because the AI just can't find a clear edge to follow.
When the algorithm starts to fail you, there are a couple of ways to get it back on track:
- Go Manual: If it’s just a few problem frames, don't be afraid to step in. Pause the propagation, jump to the frame that's giving you trouble, and use the foreground (green) and background (red) brushes to make your corrections. This works great for quick, isolated fixes.
- Set a New Base Frame: If the tool is consistently messing up for an entire section of your clip, stop fighting it. It’s way faster to find a cleaner frame a little further down the timeline and create a new base frame. This basically gives the AI a fresh start with a better reference, which often solves the problem for the rest of the shot.
Key Takeaway: Don't get stuck painting corrections for dozens of frames. If a matte is consistently breaking, it's almost always more efficient to stop, set a new base frame, and let the tool do the heavy lifting from there.
Dealing with Motion Blur and Things Getting in the Way
Fast-moving subjects are another classic rotoscoping challenge, mainly because of motion blur. The Roto Brush is looking for hard edges, but motion blur is the exact opposite of that. My approach is to focus on rotoscoping the solid, sharp parts of the subject. Then, I lean heavily on the feathering controls in the Refine Edge panel to soften the matte and blend it naturally into the blurred areas. It's more about finessing than perfection.
And finally, you have occlusions—when something passes in front of your subject. The Roto Brush is obviously going to get confused. The best strategy here is often to just let it fail for those few frames. Once the object has passed by, create a new base frame for your subject and keep going. You can then circle back and manually fix the handful of frames where the two objects overlapped. It can feel a bit tedious, but those manual touch-ups are a non-negotiable part of professional rotoscoping.
Locking In Your Work: Freezing and Exporting
You’ve spent hours, maybe even days, perfecting your rotoscope. The last thing you want is for an accidental click or a background process to undo all that effort. This is where you need to lock it all down.
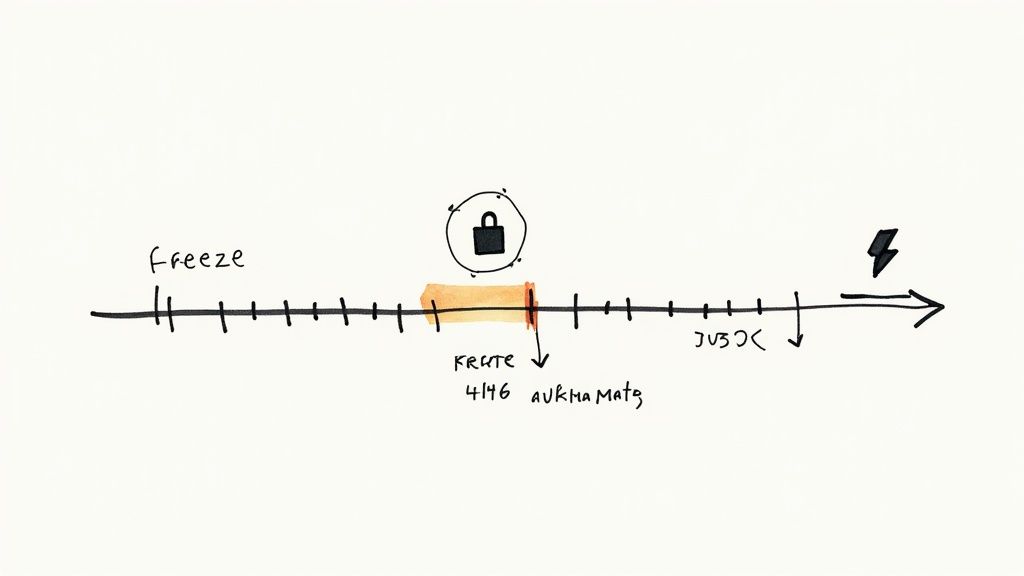
Look for the Freeze button at the bottom right of the Layer panel—it’s about to become your best friend. Clicking this button tells After Effects to stop thinking so hard. It caches all the Roto Brush data, which means it no longer has to re-analyze the matte every single time you move the playhead.
The immediate result? Much smoother playback and a far more responsive timeline. It also acts as a safeguard, preventing you from making any more accidental brush strokes and messing up your perfect edges.
When Should You Freeze?
Don't wait until the very end of a long clip to hit Freeze. I’ve learned this the hard way. My workflow involves freezing in sections. Once I nail a particularly tricky 5 or 10-second segment, I freeze it. This approach breaks the project into manageable wins and keeps After Effects from getting bogged down.
Pro Tip: Freezing isn't a final, irreversible decision. If you find a mistake later, just click the Freeze button again to unlock it. All your original Roto Brush data is still there, so you can jump in, make your fix, and re-freeze. No sweat.
Getting Your Rotoscope Out Into the World
With everything frozen and looking great, it's time to export. Your settings here depend entirely on where this footage is going next.
If you're taking this rotoscoped element into another program (like Premiere Pro or DaVinci Resolve) or even just a different After Effects project, you absolutely need a format that supports an alpha channel. That's what preserves the transparency.
- Apple ProRes 4444: This is my go-to. It’s an industry-standard codec that balances fantastic quality with reasonable file sizes, and it handles transparency perfectly.
- PNG Sequence: For shorter clips or when you need frame-by-frame control, exporting as a sequence of PNG files with transparency is a rock-solid option.
But what if you're just compositing right here in the same project? You can often skip the export process altogether. Just use your rotoscoped layer as a track matte for other layers below it, or pre-compose it to keep your main composition tidy. If you're new to this concept, understanding how to make a video with a transparent background is a game-changer for your workflow.
Finally, before you send your work off to a client or upload it, you'll want to make sure the file size is manageable without destroying the quality. This ultimate guide to compress video without losing quality has some fantastic tips for getting that balance just right.
Common Questions About Rotoscoping in After Effects
When you first start getting your hands dirty with rotoscoping in After Effects, a few questions always come up. It's totally normal. Getting a handle on these common issues will not only help you fix problems but also give you a much better feel for the entire workflow.
Let's dig into some of the most frequent hurdles artists run into.
Roto Brush 2 vs. Roto Brush 3: What’s the Real Difference?
This is probably the first question everyone has. While Roto Brush 2 was a huge step up thanks to Adobe Sensei, the newer Roto Brush 3 (sometimes called the Next-Gen Roto Brush) takes that AI algorithm and makes it even smarter.
The biggest wins with version 3 are its incredible ability to track subjects that get partially blocked and its more precise initial selections on tricky stuff like hair or see-through fabric. Honestly, for any new project, just use the latest version. It's built to be better and faster.
Why Is My Roto Brush So Slow?
If you find yourself waiting forever for frames to process, you're not alone. Rotoscoping is one of the most demanding things you can do in After Effects. You're asking the software to analyze a mountain of pixel data on a frame-by-frame basis, and that takes some serious horsepower.
A few things can be bogging you down:
- Footage Resolution: Working with 4K footage is a whole different beast than 1080p. The more pixels the AI has to churn through, the longer it takes.
- Clip Complexity: A clean, high-contrast shot is easy. A subject with fuzzy edges, motion blur, and low contrast against the background? That's going to take some time.
- Available RAM: After Effects is hungry for memory. Make sure you've allocated as much RAM as possible to the application in your preferences.
The best way to speed things up is to drop your preview resolution to Half or Quarter while you work. But the most critical step is hitting that Freeze button once you've got a section looking good. This locks in your work, caches the analysis, and stops After Effects from having to recalculate the matte over and over again. It’s a massive performance saver.
How Do I Rotoscope Fine Details Like Hair?
For the really tough stuff—hair, fur, smoke—the standard Roto Brush will only get you so far. The secret weapon here is the Refine Edge Tool.
Once you have your basic matte, grab this specialized tool from the toolbar. You literally just paint over the complicated edges, and the tool does the heavy lifting, analyzing those tricky areas to create a much more detailed and believable matte. To really dial it in, you’ll want to play with the Feather and Shift Edge controls in the effect panel.
Key Takeaway: Don't sleep on the different view modes. The Refine Edge X-ray view, in particular, is a lifesaver. It isolates what the tool is doing, so you can make those tiny adjustments that truly sell the final shot.
Mastering these kinds of detailed techniques is a huge part of what professionals do. If you're looking to take your skills to the next level, it helps to understand how to choose an animation and visual effects studio and what they look for.
Tagged with
Ready to Remove Your Video Background?
See a free preview before you buy.
No credit card required • Free preview on every video